Hi Guys,
Well, it’s April 21, 2020. In New York, this is around the time when spring hits us with full force.

Time to open up the windows to air out the house, spring clean and–
Confession. I suck at painting.
And, I don’t mean painting something small. I mean painting a wall.
Why?
It’s for the same reason that I suck at sewing.
Add to that, the fact that painting is quite strenuous; well, at least it is for me.
However, where I do excel is getting everything covered with the paint.
That is anything within six feet of my brush or roller. That includes my hair.

Kind of like this.

Although, by August 2020, my hair is going to look like this.
Please, please, please open up the hair salons! That is an essential business!!!
 me, August 2019
Anyway, I know that a lot of you are far handier with DIY projects. And, others might want to give it a try for obvious reasons.
So, I thought that this time would be good to go over what you need to do to learn how to paint a room.
But, Laurel, I thought you said that you don’t paint.
I don’t. However, just because I don’t doesn’t mean I don’t know what you’re supposed to do. Over the years, I’ve specified dozens of paint colors for as many clients. At that time, I learned what it takes to get the job done right. And, on occasion, what can go wrong if the job isn’t done right.
Painting is one of those Do-it-yourself projects that many can do, providing your walls are in reasonably good condition, to begin with.
If your walls are in crappy condition, i.e:
- Badly cracked walls.
- Paint that’s flaking off in chunks.
- Orange peel walls from too many coats applied with a roller.
- Mold issues.
- Water damaged walls.
- Huge gaping holes.
For all of those situations and possibly some others, it requires a lot more skill and materials to fix.
Therefore, if you feel it’s beyond your scope, I very much recommend finding a professional to at least do the necessary prep work.
Okay, it’s time to dive in and go over approximately 20 steps for how to paint a room.
20 STEPS!!! Laurel? Really???
Please, calm down. It’s not nearly as bad as it sounds. In fact, I can pretty much guarantee that some of the steps are going to be quite enjoyable. The less enjoyable ones, I’m going to spell out.
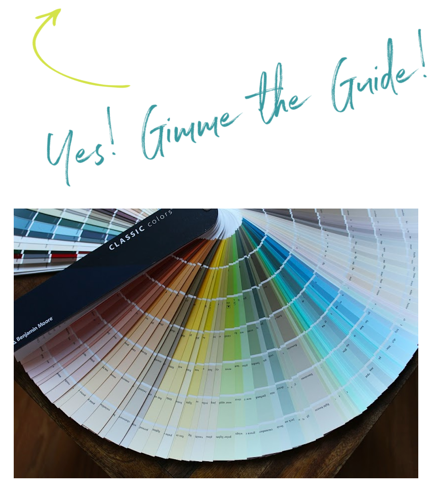
1. Choose a paint color. Okay, this might be the most challenging step of them all. So, I’ll be spending extra time on this one. For those of you who are subscribers, you received a guide that tells you how to do it. You received it twice if you subscribed in the last four years.
Now, please, wonderful subscribers, I need you to listen to read this part carefully.
I am not going to email the freaking out about your paint colors guide to you again, so please don’t ask.
But, I’m also not going to be a heartless b*tch.
***So, here is the guide you received when you subscribed.***
If you are not a subscriber, please consider subscribing by forking over your email address, fill out the form in the sidebar, if you are on a desktop computer or tablet. Otherwise, there is a “freaking out” form at the top of every blog post, and you will get the guide two more times. haha
For a LOT of additional help:
For more help on not how to paint a room, but what colors to select, please also consider purchasing my nearly 500-page two-part paint and palette collection. That link takes you to the page for all of my rockin’ digital interior design products. Please scroll down, and you’ll find two more links to both the paint and palette info pages. Why are they separate?
They came out separately because if I had tried to do it all at once, I would’ve expired. So, the paint collection came out in May 2016 and the palette collection (which uses the paint collection colors) in November 2016.

Above is one of the bonus boards from the paint collection. You can find the rest of the bonus boards (there are 12) here. Once in a while, I share them. There are 40 more in the palette collection, but those you have to pay for. And, there are 144 paint colors in the paint collection. You won’t get all of the 144 paint colors with the bonus boards, however
However, for free, there are dozens of posts on this website that go over paint colors. (not how to paint a room; just the colors and palettes)
Actually, make that 100s of posts. If you’re bored, that’s enough reading to keep you occupied for a while. These are all of the pages that mention Benjamin Moore.
And, these are all of the pages where that mention Farrow & Ball.
Of course, there is some overlap.
How much paint will you need in order to paint a room?
Look on the back of the can or ask the guy at the paint store. This amount can also vary with the color, type of paint, and current wall-color. But, it is better to get too much paint than too little. The reason is, you can’t depend on the next batch of paint matching.
But know, if it’s an adjacent wall, you can always paint it a different dye-lot. The reason for that is that the colors usually look different anyway. I’ve seen situations so dramatically different on two adjacent walls, the same color looked like two completely different colors in some lighting situations.
2. Purchase your materials. However, for a comprehensive list of what you will need and more info on how to paint a room. Please look here.
3. Have a snack.
4. Put on some beautiful music. (whatever that is for you)
5. If there’s furniture, put it all in the center and cover it and cover the floor. Home depot sells drop cloths.

6. Prepare the walls for paint. First, dust the walls with a Swiffer duster that comes on a long handle.
7. Clean the walls. The paint is going to adhere so much better to a clean wall. The easiest way to clean is to make a solution of 1 cup vinegar to two gallons of warm water in a big bucket.
Get some old absorbent towel rags and dunk clean ones into the solution and ring out.
Then, put one over your sponge mop and work from top to bottom. When it begins to look a bit dirty, take it off and use a fresh one. If the water starts to look dirty, make a fresh batch. You can also use a solution of detergent and water, but if you do, you’ll have to rinse. Let that dry thoroughly.
8. Next, fix small holes and imperfections with a good spackle. Let it dry and sand. (this page will link to spackle, putty knife, blue tape, and more.)
9. Use a primer. Primer prepares the walls to accept the paint and provides an excellent surface, as well. However, Benjamin Moore makes a fantastic low VOC paint that has the primer in it already, and it covers beautifully. It’s their Regal Select. I have used it many times, including my own home, and love it!
10. Sand lightly. I know… it’s a pain, but well worth it.
11. Dust walls again and follow with a damp cloth, just to make sure you’ve removed all of the dust.
12. Use painter’s blue tape to mask off areas not being painted.

Photo I took a couple of weeks ago here in Bronxville. If you’d like to see the inside of this home, go here. (note: The home does have new owners now.)
13. Choose a dry day. Water-based latex paints will dry so much faster on a day with low humidity.
14. Start with the ceiling (unless it doesn’t need painting)
15. Use “cut-in” techniques. There are zillions of tutorials on youtube. So, try googling them. I do recommend a 2″ angled brush, however, for cutting in. For the ceiling and walls, you will want to use a roller. Again, there are painting tutorials available on youtube.
16. After painting the ceiling, let it dry thoroughly. I would wait several hours. Then if there is no crown moulding and/or the ceiling is a different color than the walls, tape the ceiling line. Then, paint the walls
17. Finally, paint the trim with your two-inch brush.
18. For ceilings, I recommend flat paint. You might enjoy this post about terrific colors to paint your ceiling.
For walls, I recommend matte, which is a flat finish, but washable. And for trims, I recommend semi-gloss. Benjamin Moore Advance is very good. If the trim is gloppy from layers and layers of paint, that is another issue entirely. If it’s awful, it is better to just replace the trim.
Speaking of which. If there is ANY chance that your old paint is lead or there’s asbestos anywhere, you will need a professional to take care of that. Do not attempt to remediate that on your own.
Depending on the type of paint, you may only need one coat or as many as five if it’s a dark color, for instance. If you want a guarantee of no more than two coats. I would try Benjamin Moore’s Aura formula. They say only one coat, but it’s still usually two coats.
19. Clean your brushes and stuff. For more information on how to do that, please look here. (lots of great tips here from a prof painter!)

please pin to Pinterest for reference
Well, I hope you enjoyed this guide on how to paint a room—one more important step.
20. Finally, take a shower. I very much recommend some of this Elemis ginger lime salt scrub.
(the link above takes you to the mother’s day gift guide. There’s still time to order gifts but hurry because shipping is going to take longer than usual.)
The salt scrub smells incredible and will leave your skin in great shape. Put on some clean clothes and order a take out dinner. You deserve it!
And, please check out the newly updated HOT SALES PAGES.
xo,

PS: I promised you a mother’s day flower guide today, but it will have to wait until Friday.
Related Posts
 Gorgeous Bathroom Vanities + Sinks, Faucets, Mirrors, Lights
 22 Living Room Lighting Rules You Need To Know
 The ONE White Trim Color That Works Every Time
 Here Is The Reason Why You Need To Test Paint Colors Before Painting
 15 Hideous Decorating Mistakes With Fabric
 The Dreamiest Bedrooms + Where I Go For My Bed Linens
 Flush Mount Ceiling Lights – No Boobs Allowed!


