Hi Everyone,
This is a two-part post that goes into detail about the upstairs architectural mouldings. There will also be a video going over some of the points, not in the text. And also sometimes, watching it in a moving image makes things easier to see where they are.
Before we break apart, the thing that a lot of people don’t realize about architectural mouldings is that a lot of them can be used for multiple purposes. We’re going to see a lot of examples of this as we look at how each was applied.
Okay, if you’ve already read part 1, please feel free to click the link below to skip to part 2. If you’d like to review or are landing here for the first time, please begin from the top of the page.
Part 2 Begins Here
Hi Everyone,
It’s March! Hooray! As if on cue, the proverbial “roared in like a lion” must’ve begun somewhere in these parts. True to form, what began as a fairly pleasant day was abruptly interrupted by a massive cold front, with driving rain, wind, and plummeting temps back down to the teens tonight.
I see it as winter, noticing the longer daylight hours and trying to hang on with all its might.
As part of the review of everything I purchased and used for the renovation, we will examine all of the architectural mouldings in more detail.
Does anyone wish to guess how many architectural mouldings were used?
While you’re pondering that, some of the mouldings were used extensively, but several were used in tiny amounts for a specific purpose.
Okay, one more question. Can anyone guess which moulding was used most frequently?
The answers are as follows: 23 mouldings were used, counting the custom doors, because there was a choice. In the case of the embrasure doors, it was a substantial selection.
As for the moulding used most frequently.
Did you guess it right? Yes, it’s the panel moulding that was used in the entry, kitchen, living room, den, and as a picture rail in the primary bedroom.
Alright, it’s time to go through each of the architectural mouldings.
While it might be intuitive to begin in the entry, some of the mouldings in the entry were used because they were used in the living room. Therefore, we need to begin there.
Many of you will recall that I wasn’t originally going to do a big number in the living room.
I always planned to add wall panels, but seven months into the reno, I knew I had to change the wainscoting. For further reading, please review this post about the living room wainscoting.
Below, is how everything looked just before the surgery commenced. Oh man, I can’t tell you how bummed I was to be doing a fairly major demo project at this late date. However, I’m so glad we did it.
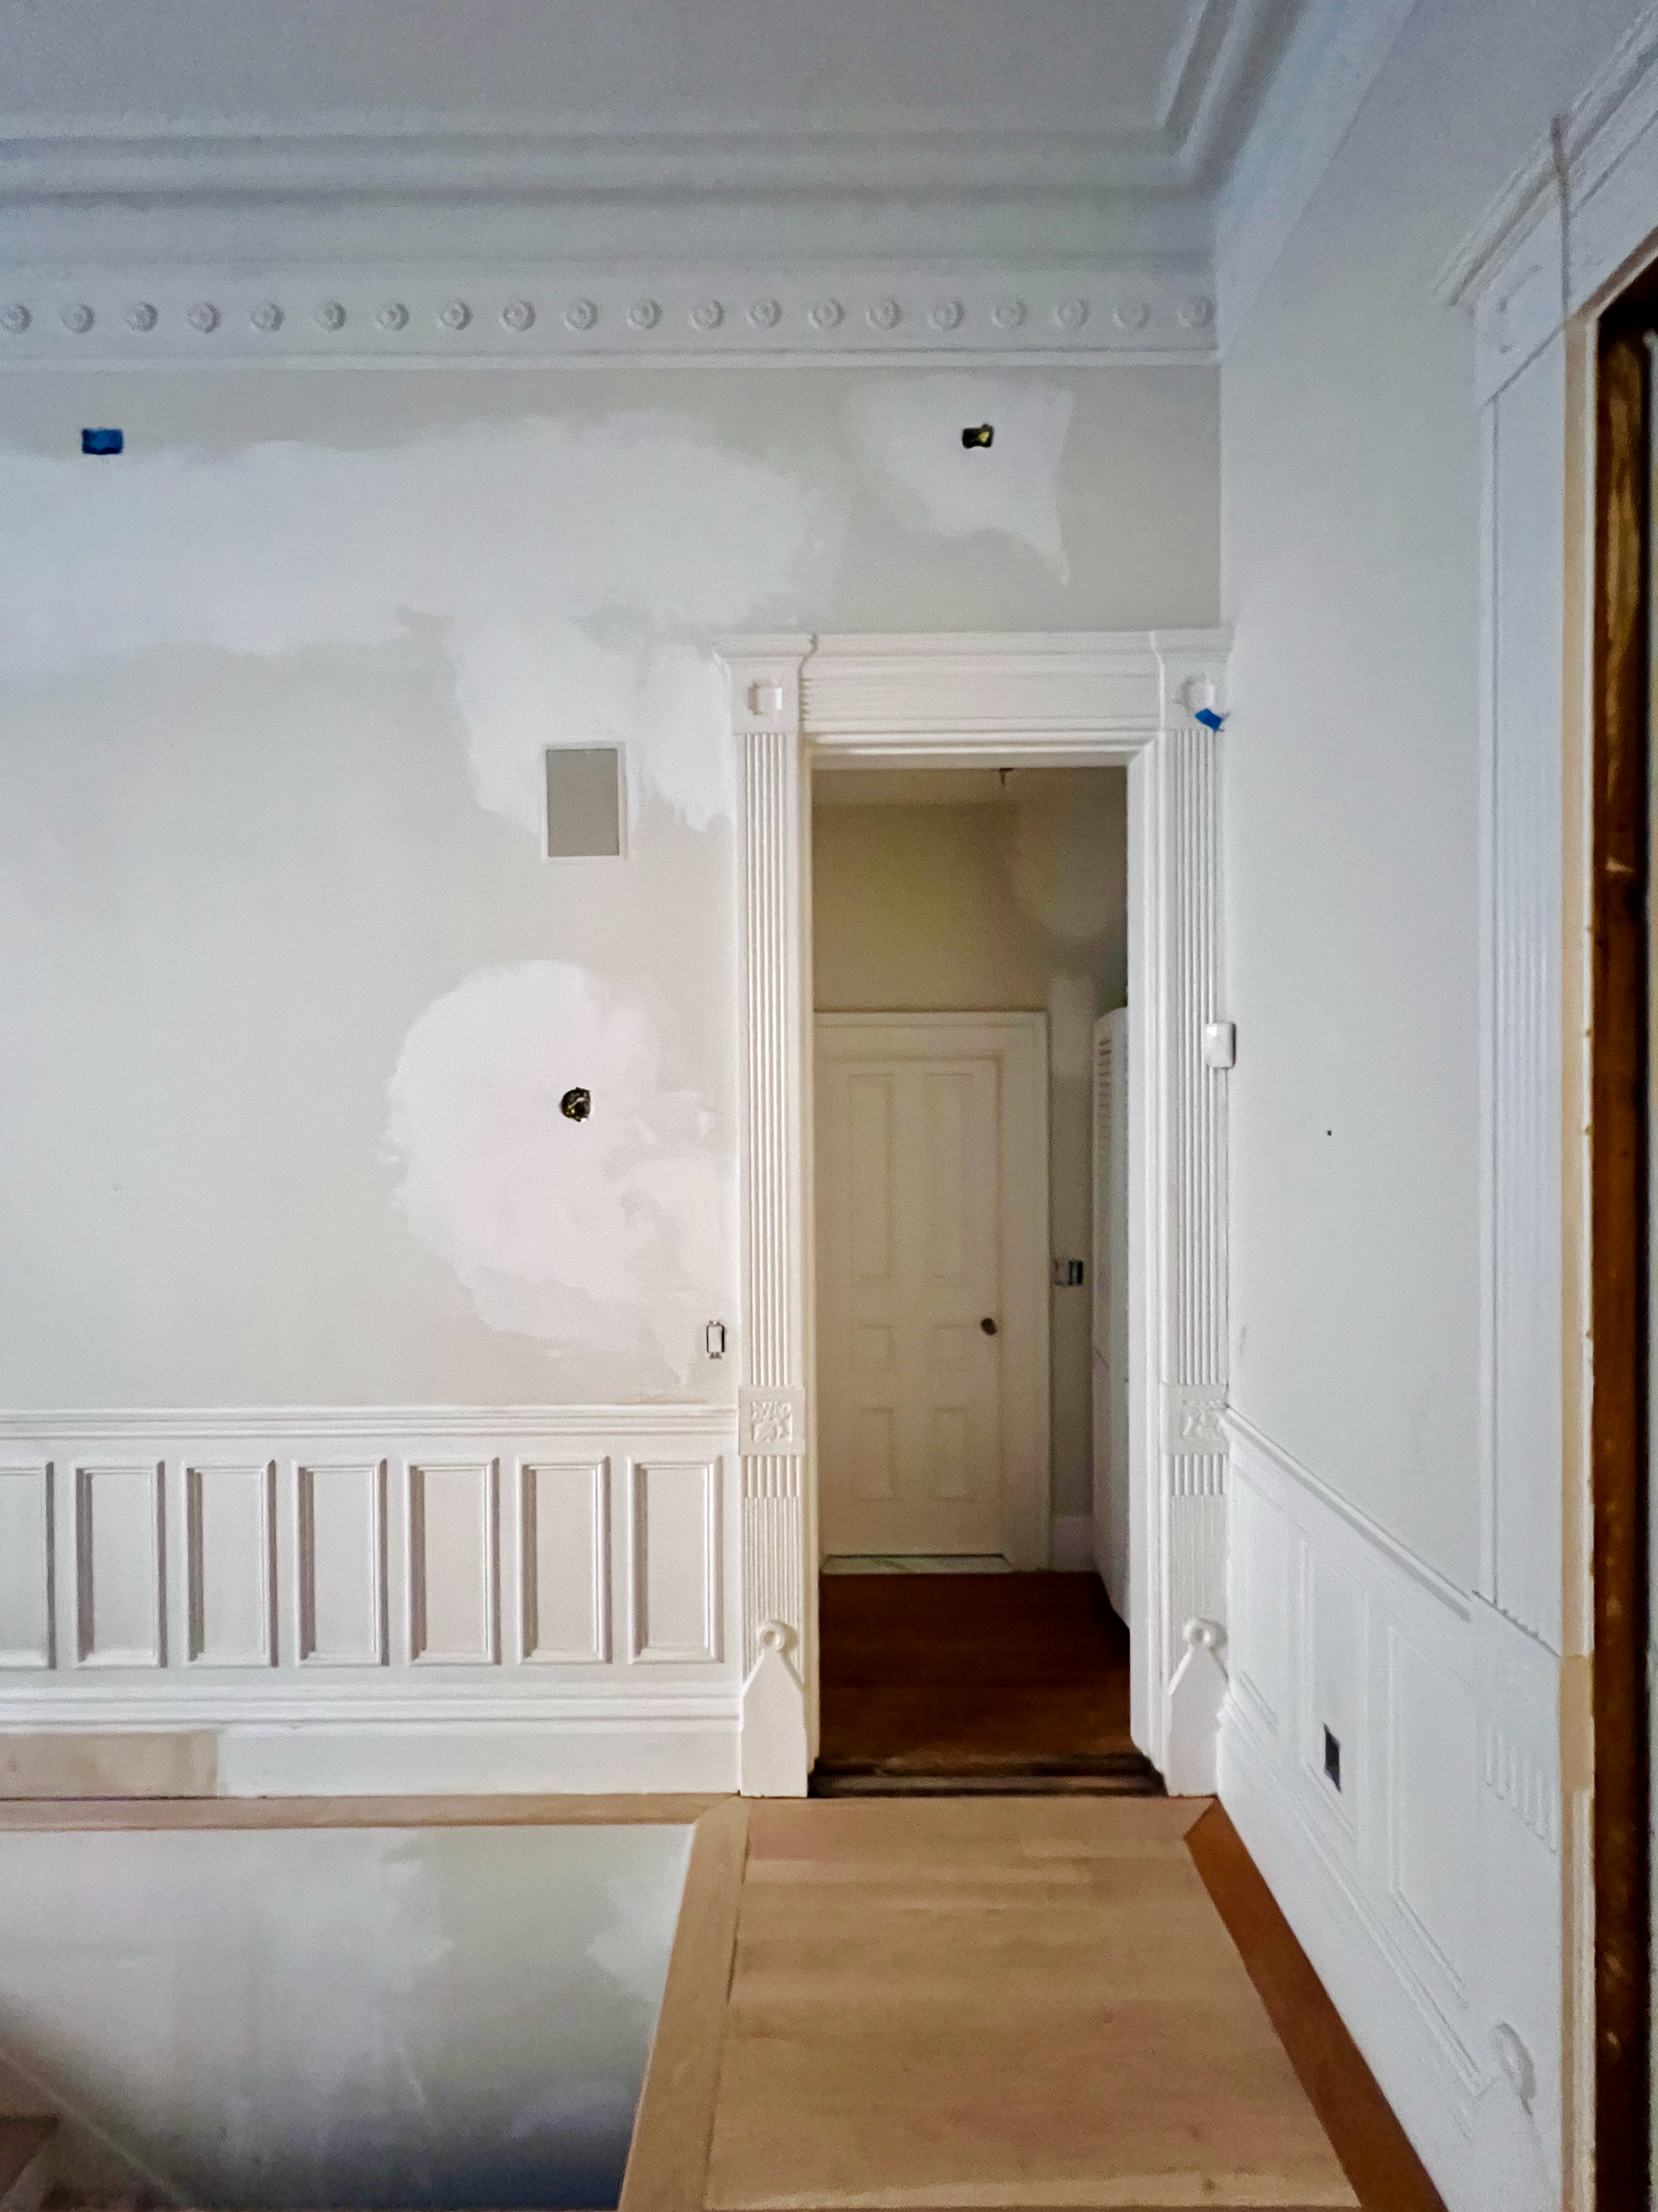
At 41 inches high, the wainscoting not only dwarfed the furniture but was also the same height as the new antique fireplace mantel I had just imported from the Netherlands. Like the rest of the architectural mouldings, the wainscoting was eccentric in its proportions. The baseboard was too tall, and the panels were too close together and mostly too narrow.
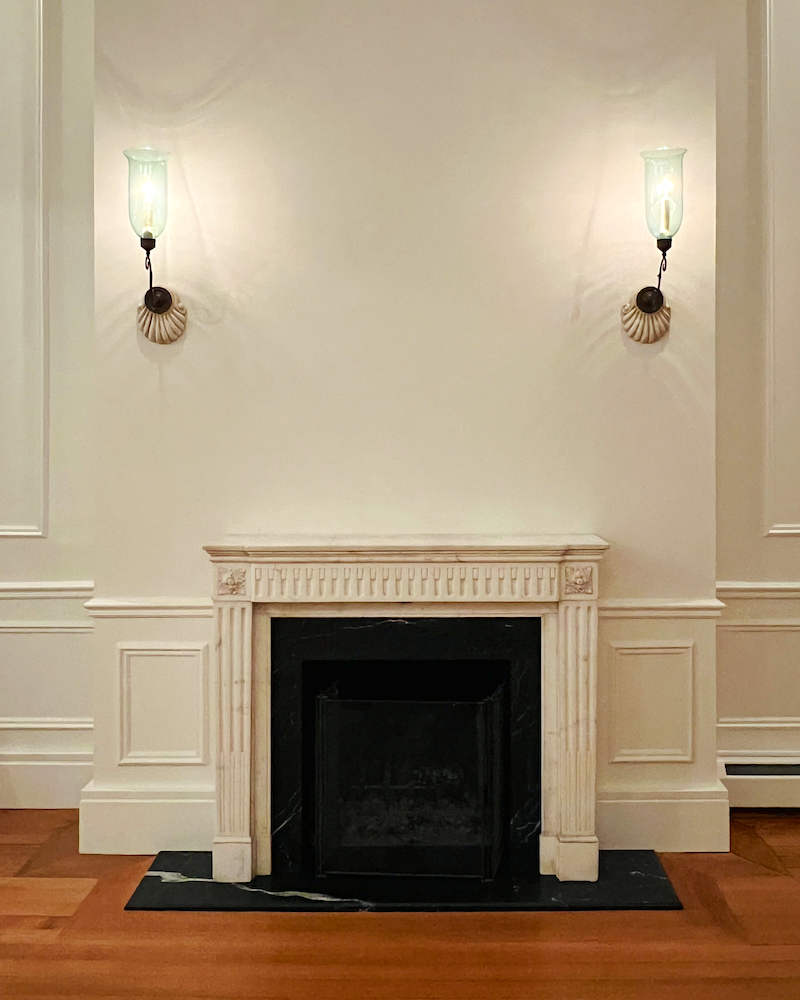
The new wainscoting is 33 inches high and in much better proportion with the rest of the room and architectural mouldings. Today, I was sitting in a chair near the mantel when I was suddenly overcome by its beauty. It was worth the expense and effort it took to get it in place.
Laurel, please tell us about that squared-off base cap.
Sure. I have seen this baseboard style somewhere but don’t remember when or where. What happened is that the guys took off the huge base cap, and what remained was the 8″ flat bottom of the base that you see, with a small nose and cove moulding. That part of the baseboard was in excellent condition, but we couldn’t figure out how to do a regular base cap because of that little moulding in the way.
You can read about how this came to be in this post, but there was an L-shaped moulding lying around for something else. I asked the guys to hold it up, and it looked perfect, creating a small reveal that looked natural. “Let’s do it,” I said.
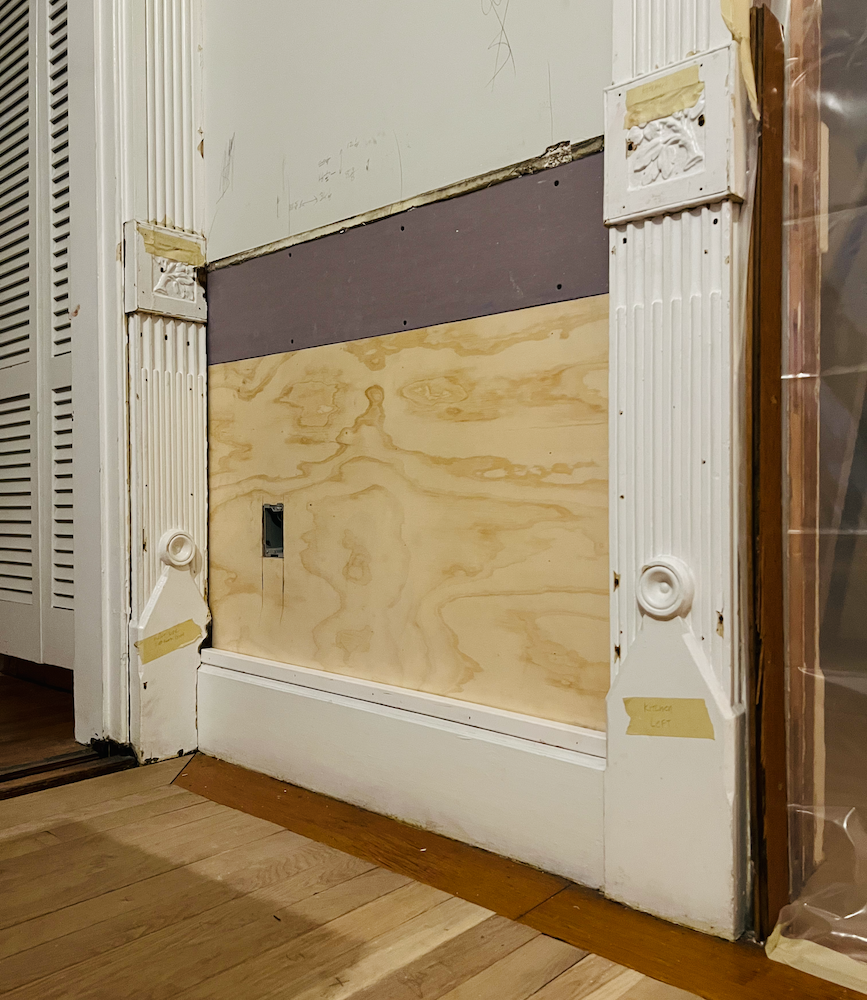
Late January 2024.
Good grief!
And below is how it looks today.
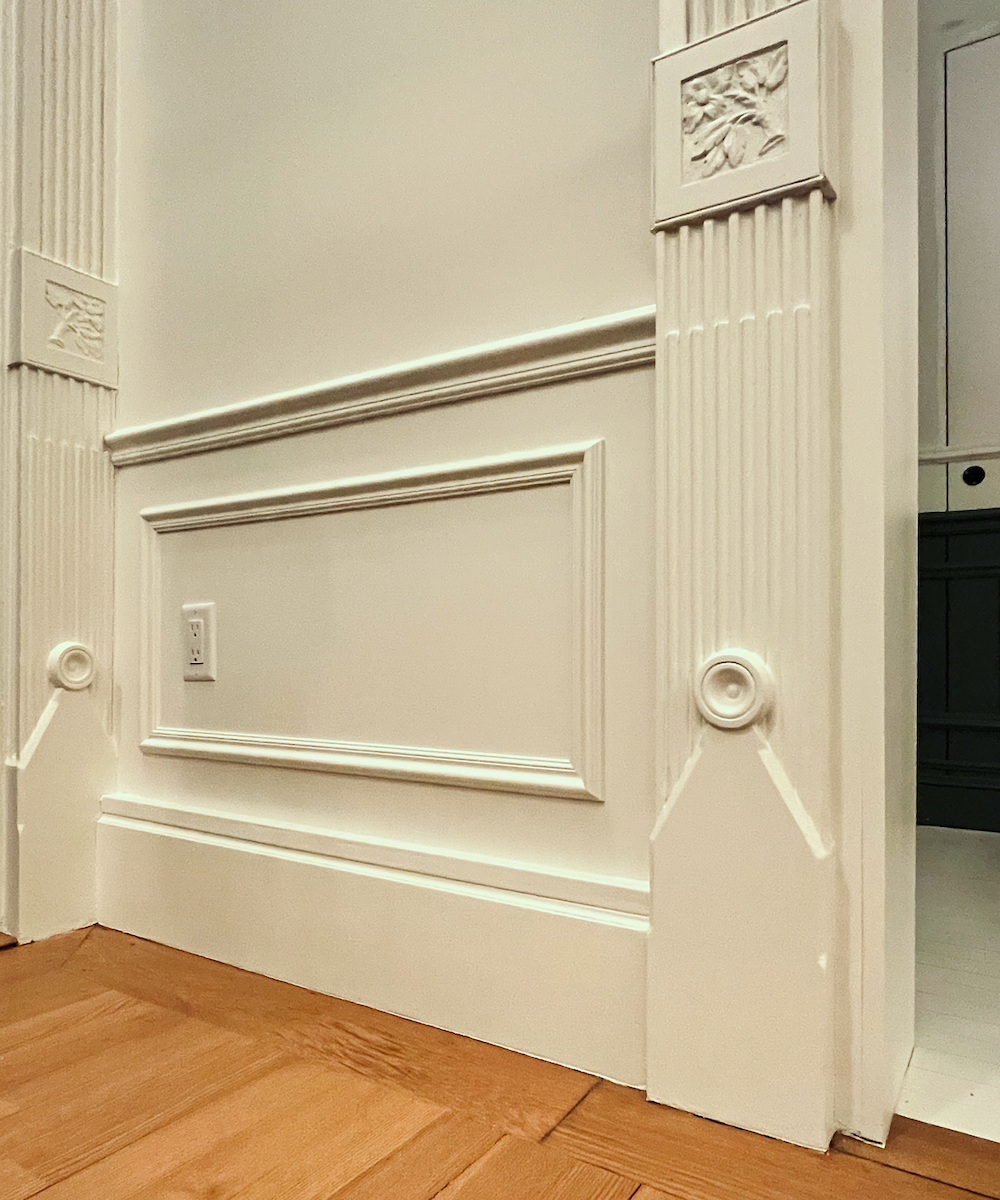
I think the new baseboard is much better suited to the paddles masquerading as plinth blocks.
This post will most likely be in three parts. I don’t know. It might even be four parts. There’s a lot to cover, and you know, the mouldings are very important. It’s not just what was selected but also the sizes, placement, and proportion. I think the new wainscoting looks completely at home with the existing door and window casings.
Let’s go to one of my favorite parts of the renovation: the front door entry.
Below is before.
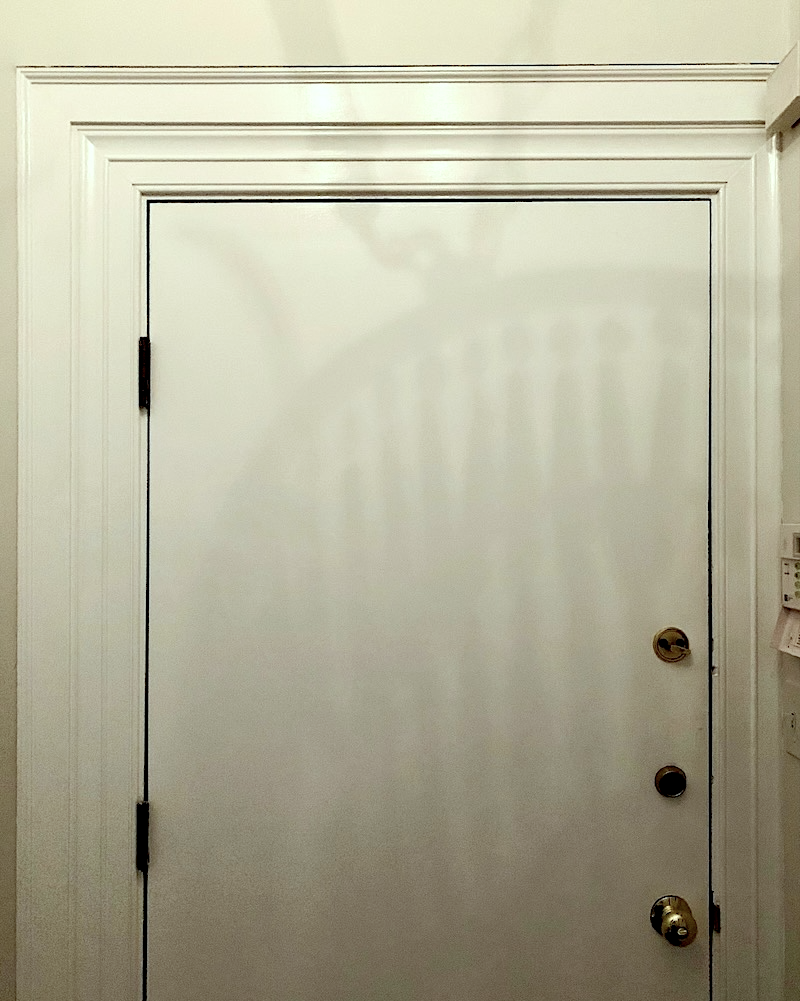
The old massively bizarre front door and laughable surround that’s being devoured by the drywall; shockingly poor construction. The only solution was to rip it all out. Below is when that happened–February 26th, a year ago!
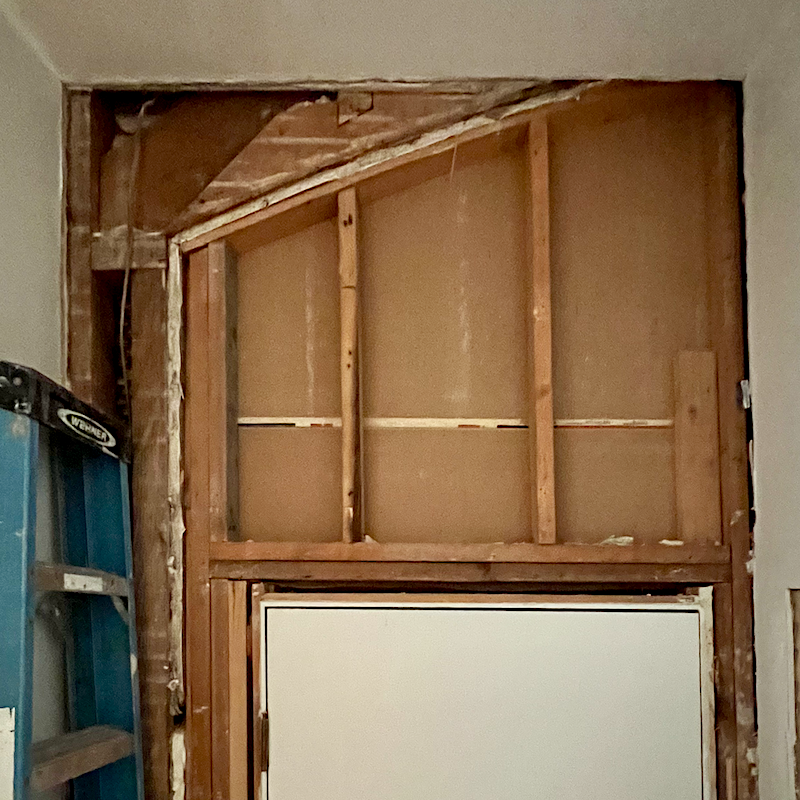
This post may have gone into the 2024 renovation news and deets. At the time, doing those shorter posts diary style certainly made my life easier. However, it’s sometimes difficult to find information without endless scrolling. One thing that may help is the tag cloud in the sidebar. But still, you might have to scroll. Please accept my apologies. (I just scrolled, and this entry is about halfway down the page. There’s some good reading here!)
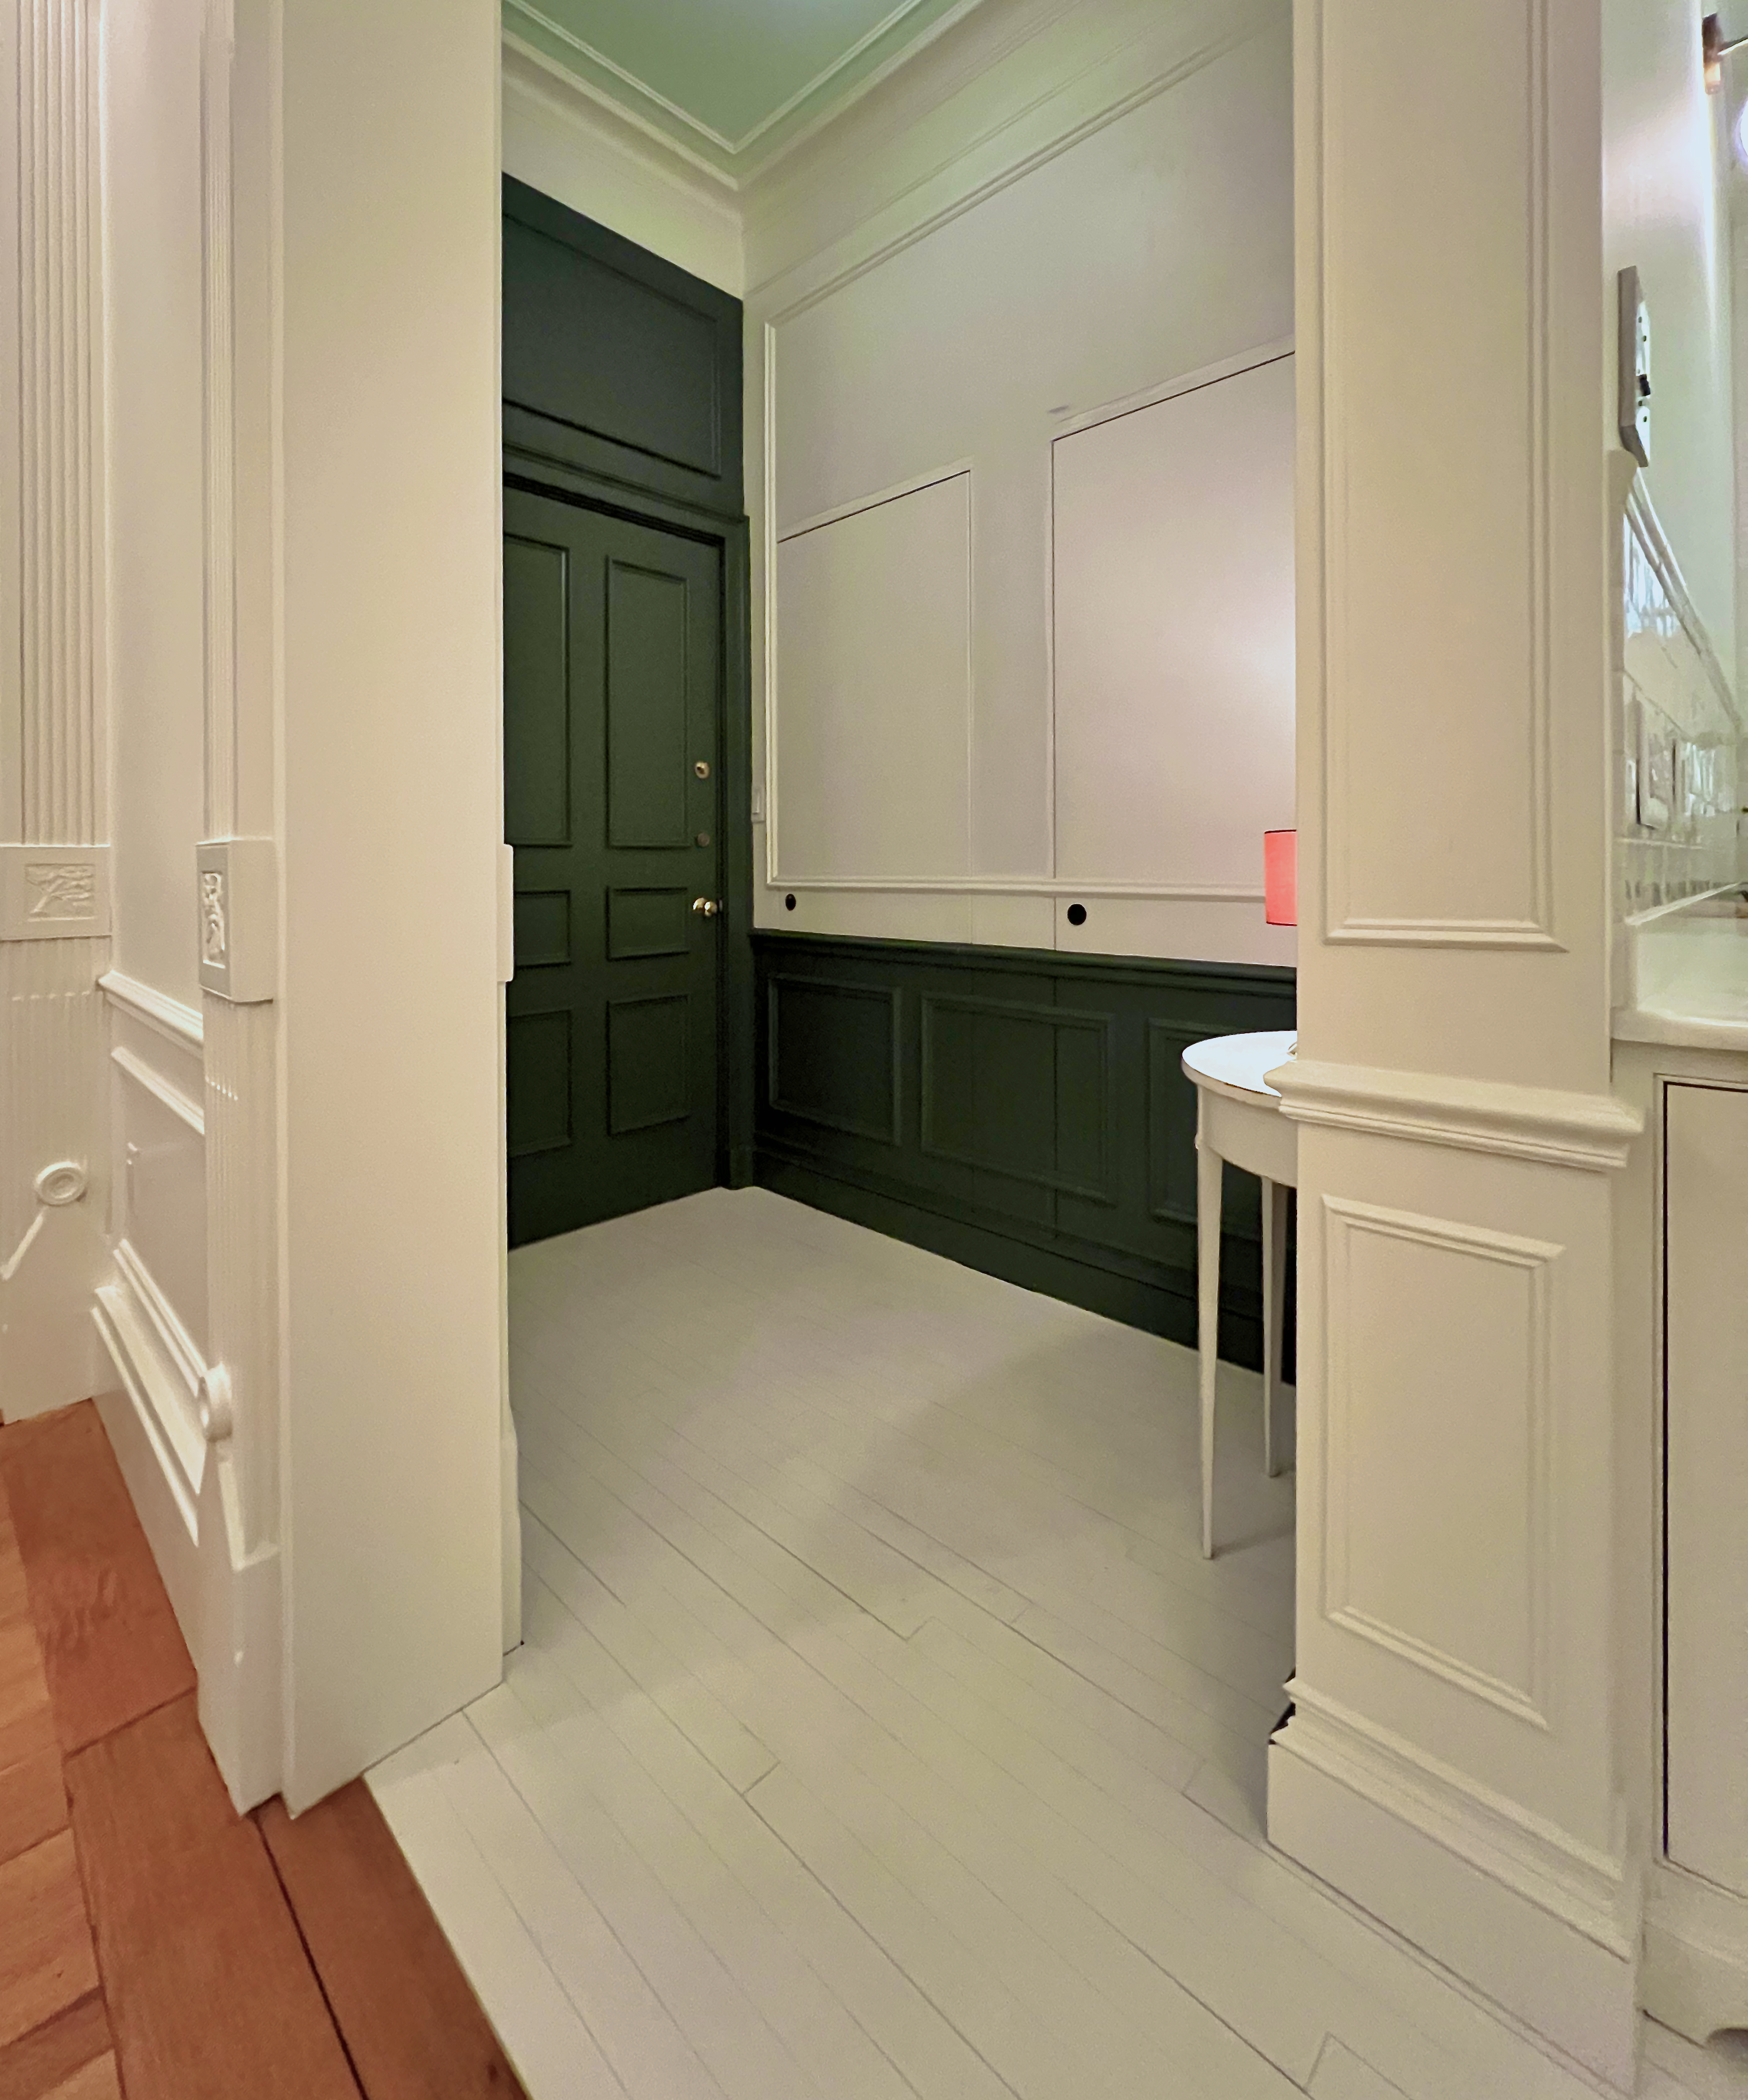
Of course, it looks a bit strange without the art inside the panels, but I’m incredibly pleased with how the front door area looks now.
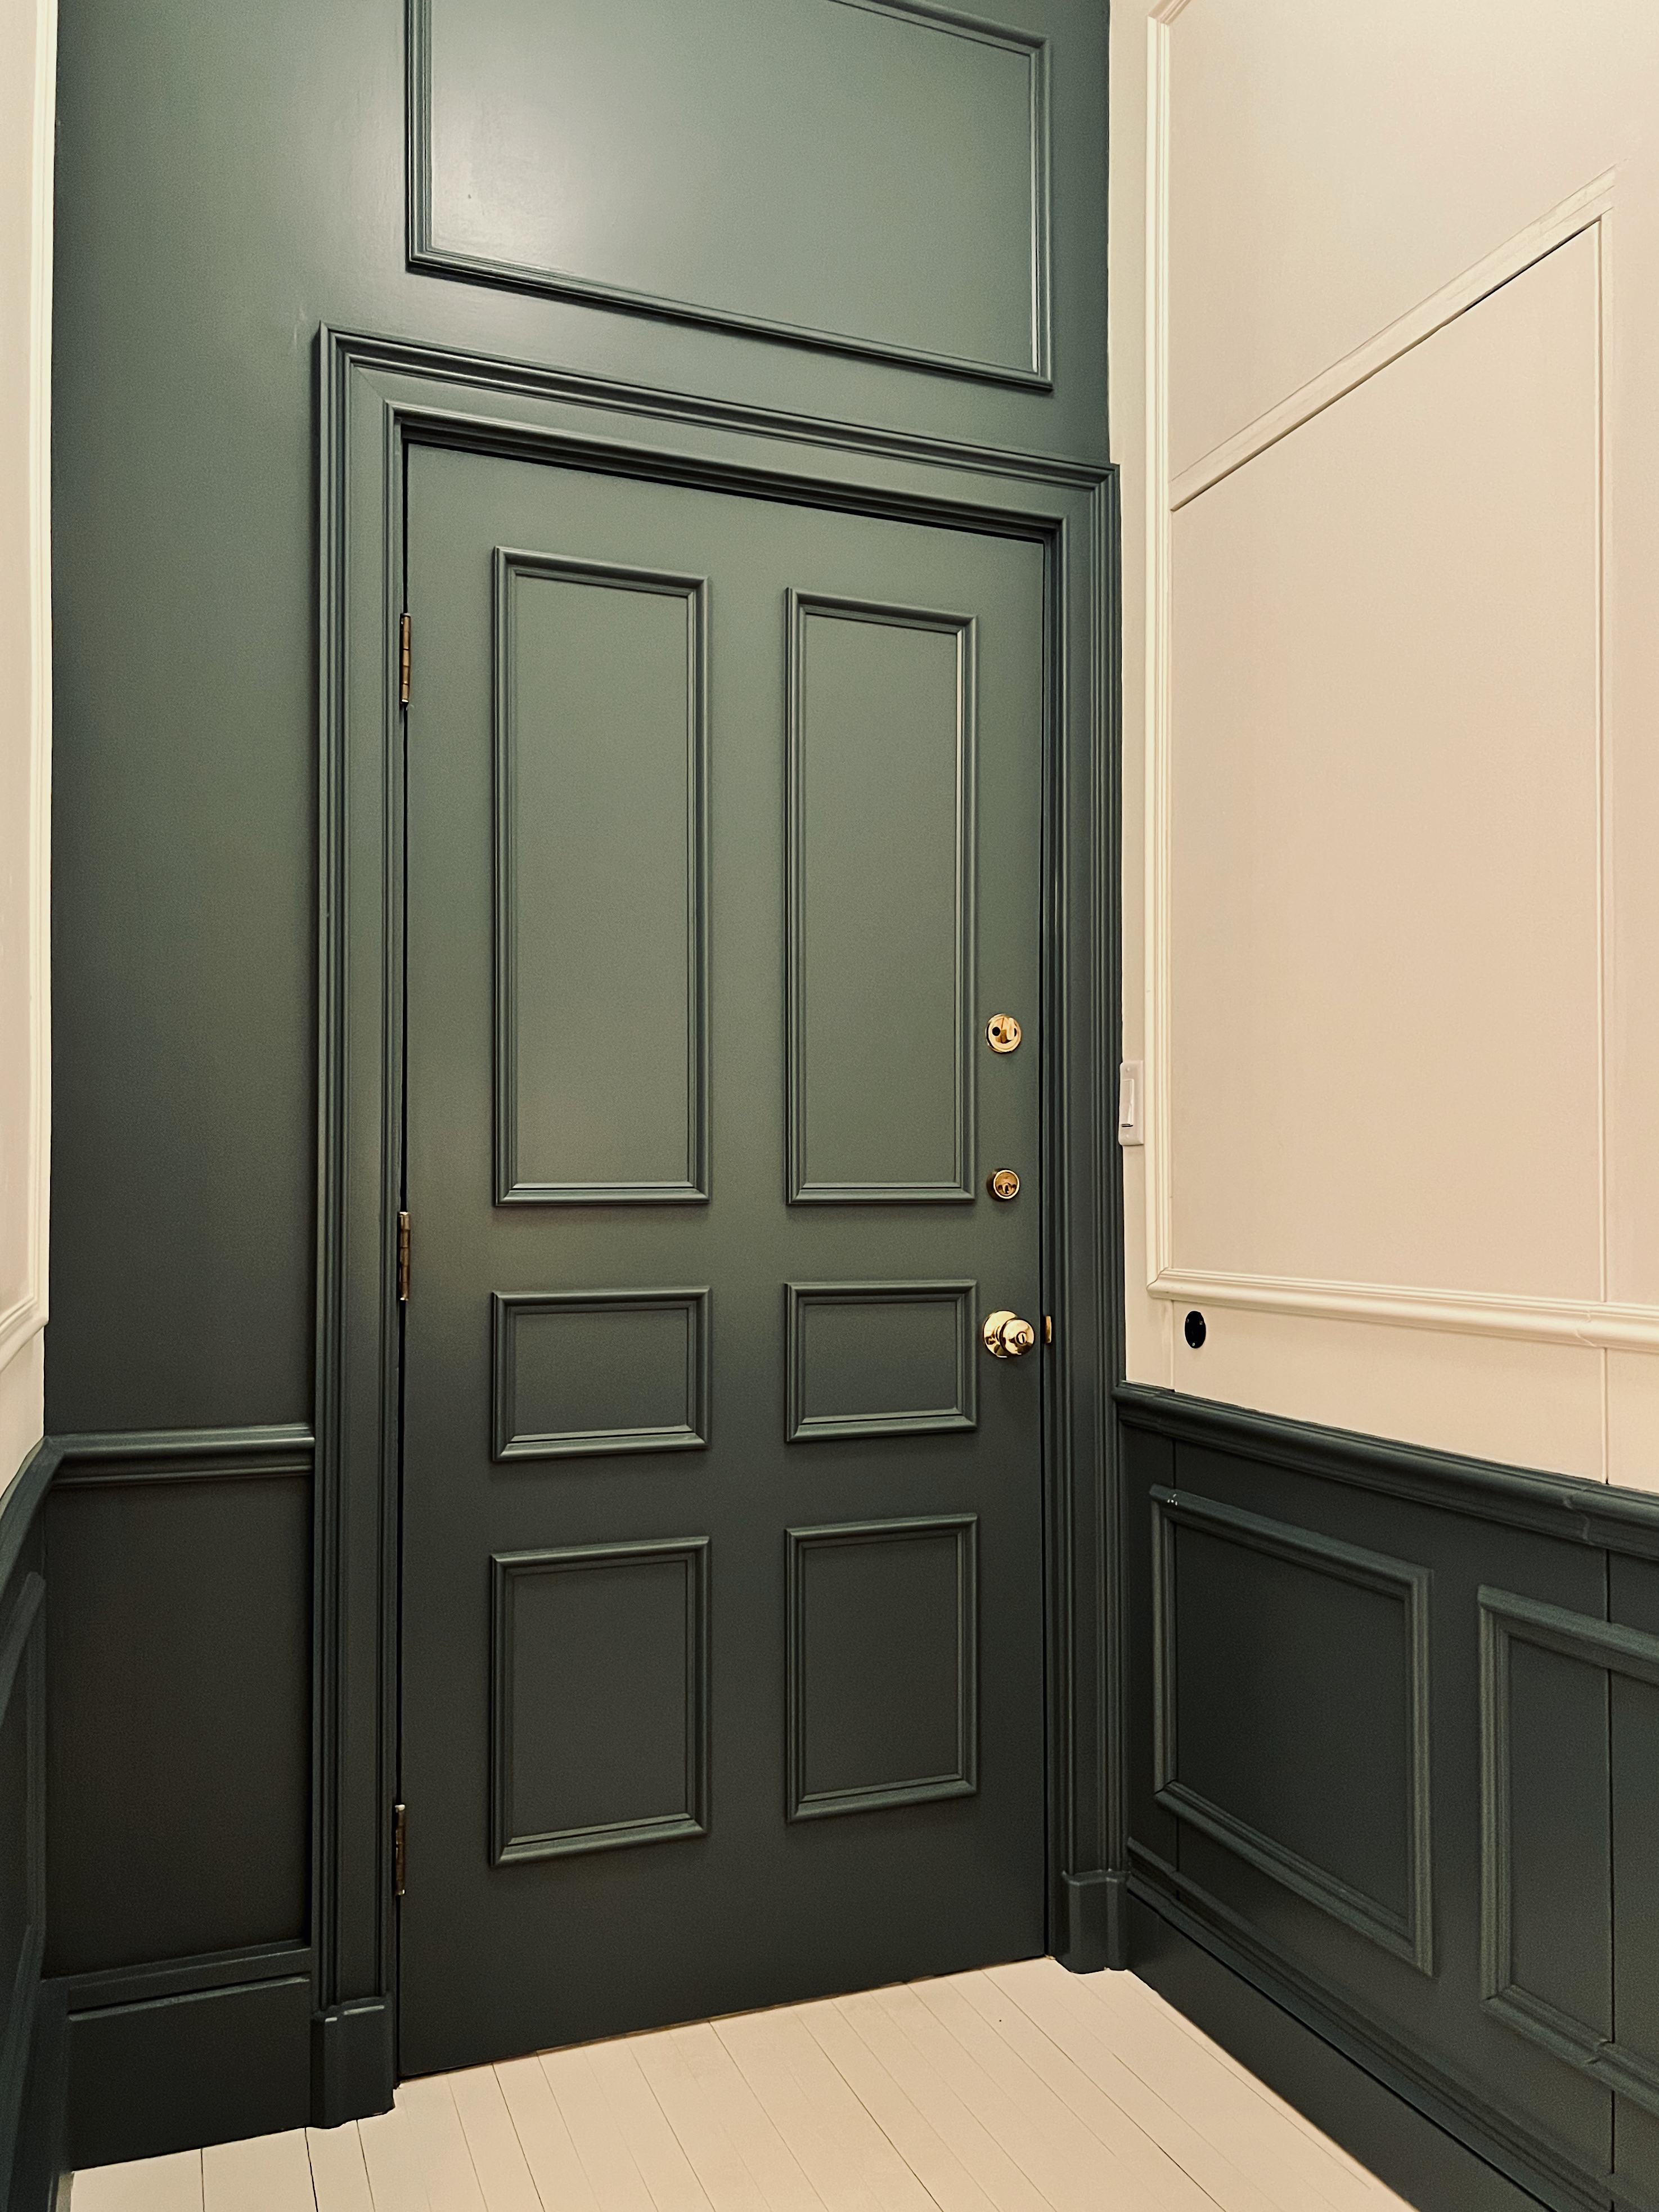
In case you missed it, this is the same old 1970s dormitory door. All we did was add the panel moulding. It’s a very simple base cap moulding.
Please observe in this image that there are two styles of baseboard. The reason is that the one on the left was already there, so we kept it. And no, in case you’re wondering, moving the door over was impossible. The door barely fits as it is. And no, the closets could not have been made shallower. It would be so much better to have a few inches between the door and the closets, but alas, it’s not possible.
Incidentally, there will be a widget coming up with most of the mouldings in it.
Some people have asked why I decided to do a plinth block at the base of the door casing.
The reason is that this particular moulding only came in 96″ lengths. However, downstairs, most of the doors are 96″. We needed another four inches so that the moulding would work. This was the first plinth block to go on. The others are all downstairs and put on a little better.
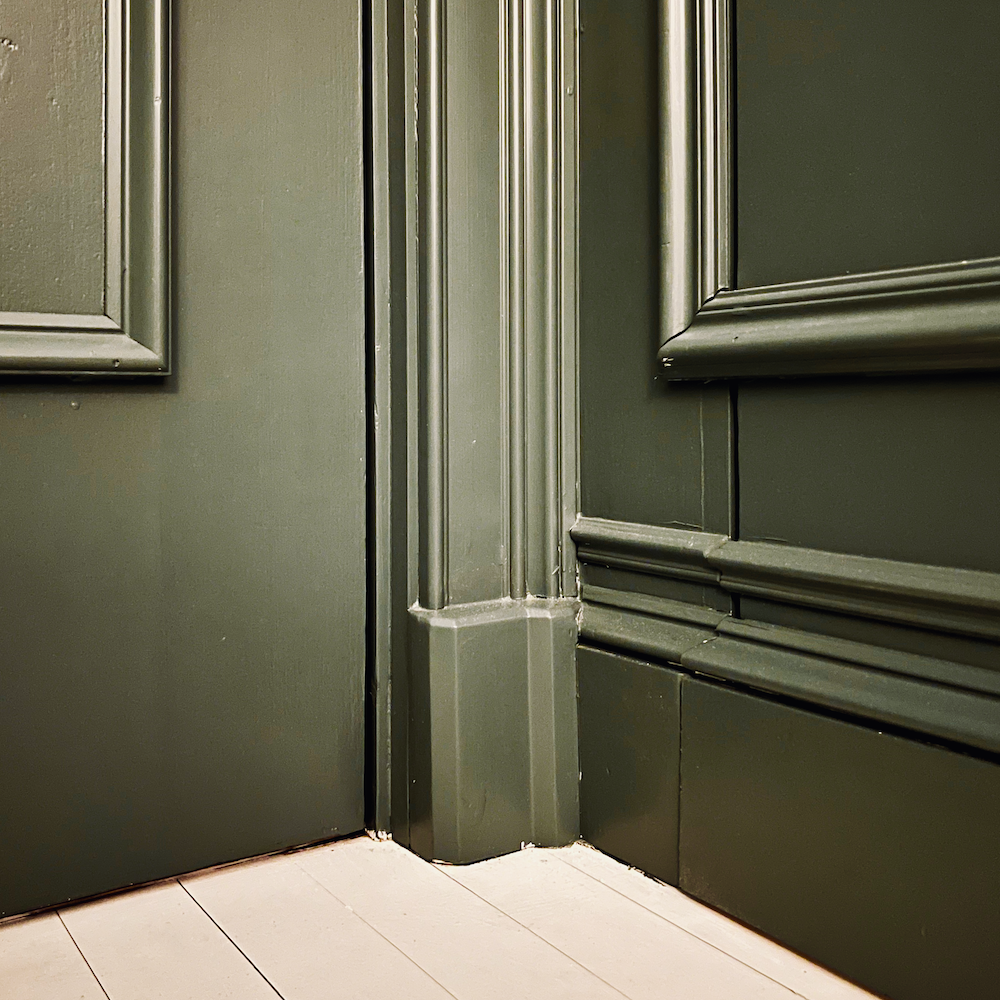
The above is a close-up. Downstairs, the plinth block stops just before the base cap. Originally, we had only the baseboard moulding, but as we did in the bedroom, I thought the small 1″ panel moulding would look nice above the baseboard.
The only thing is, the guys put it on upside down!
Yes, they did.
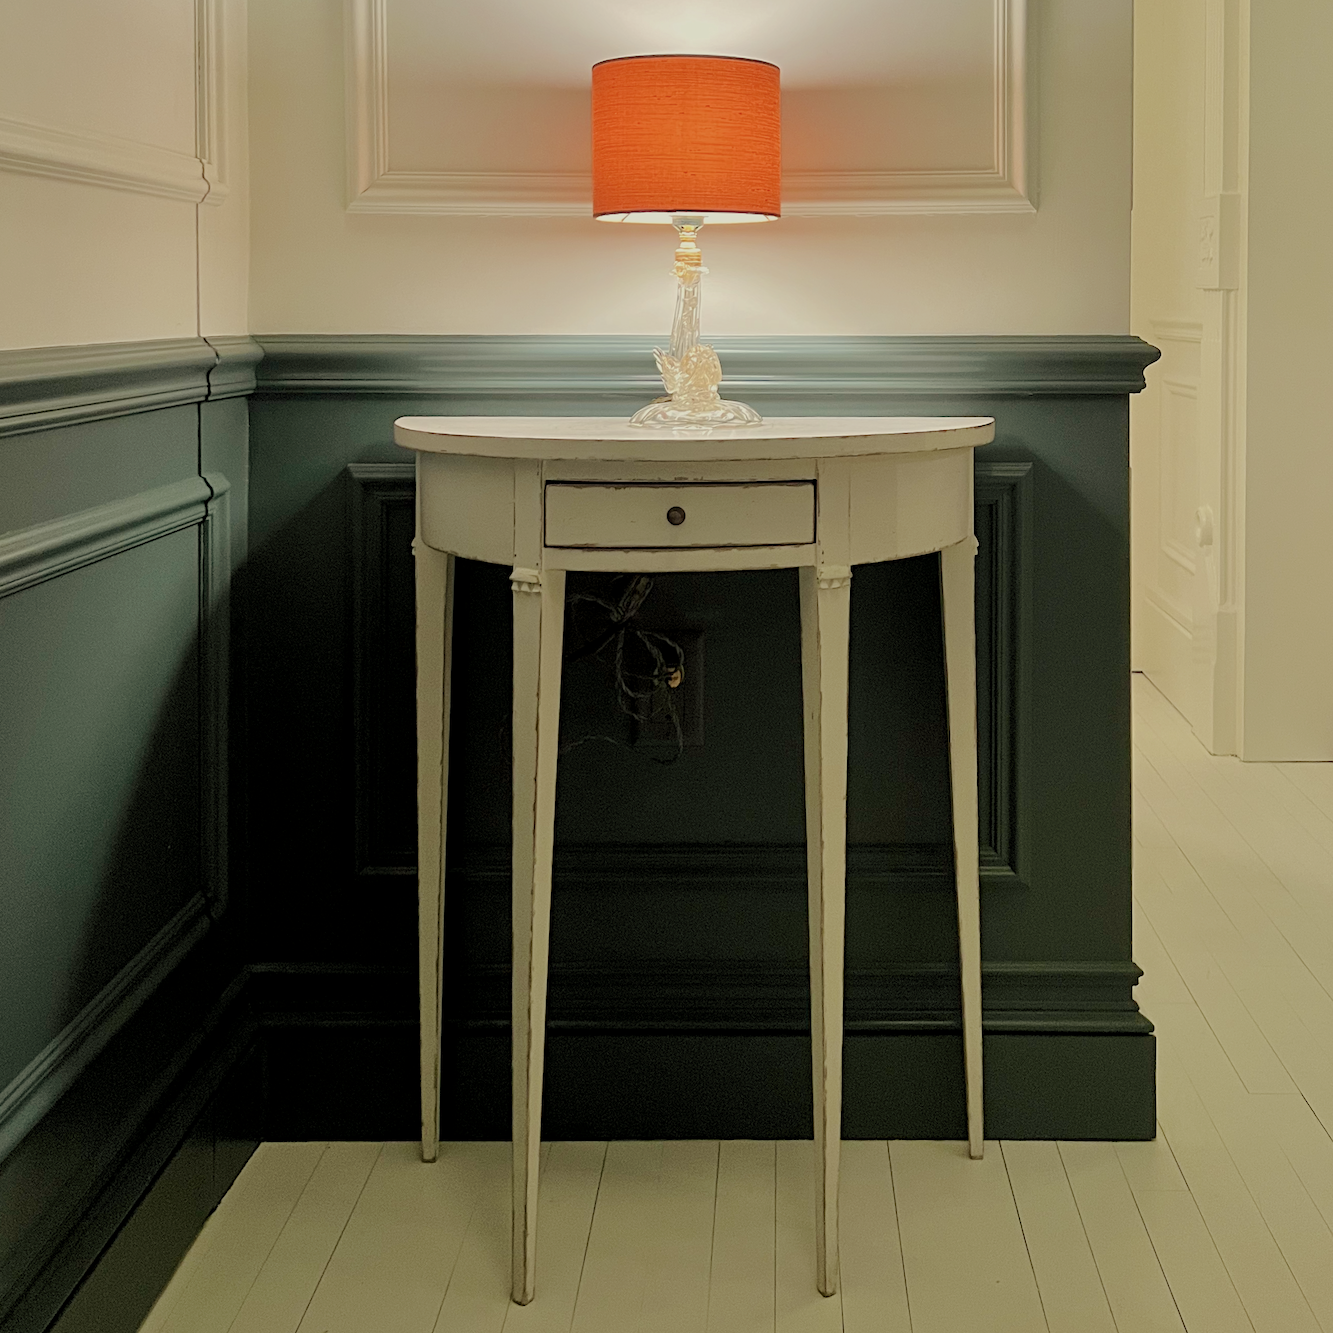
From the recent post where I shared my new little Murano glass lamp. The light it gives off helps the entry immensely!
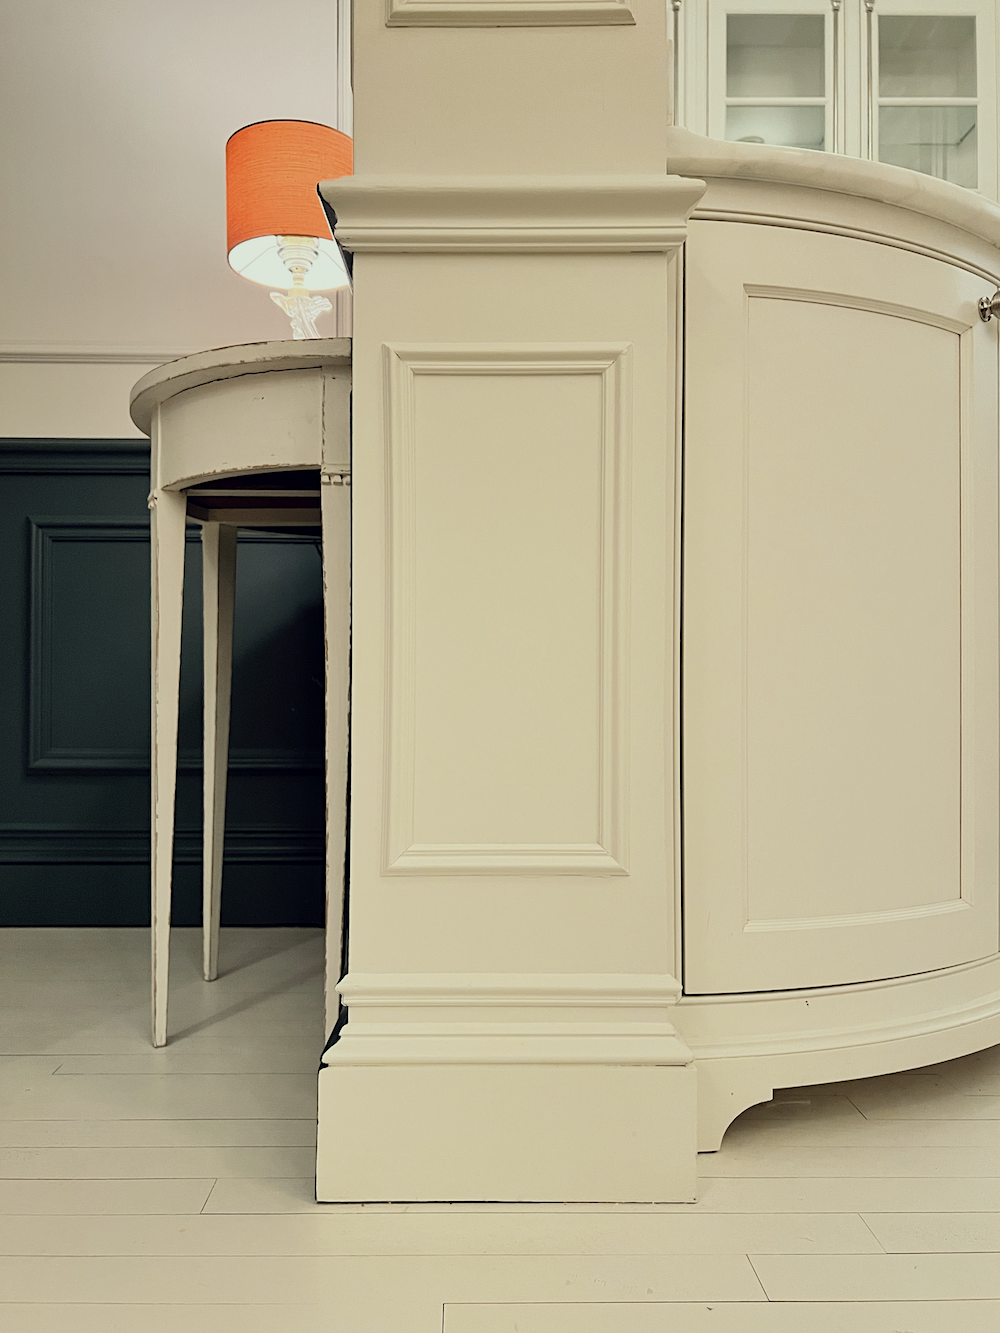
At first, I was a bit upset about it, But then I realized it was silly. No one will ever notice; even if they did, it wouldn’t look bad.
We used the same small panel moulding for the pilaster panel trim.
We also used it on the ceiling.
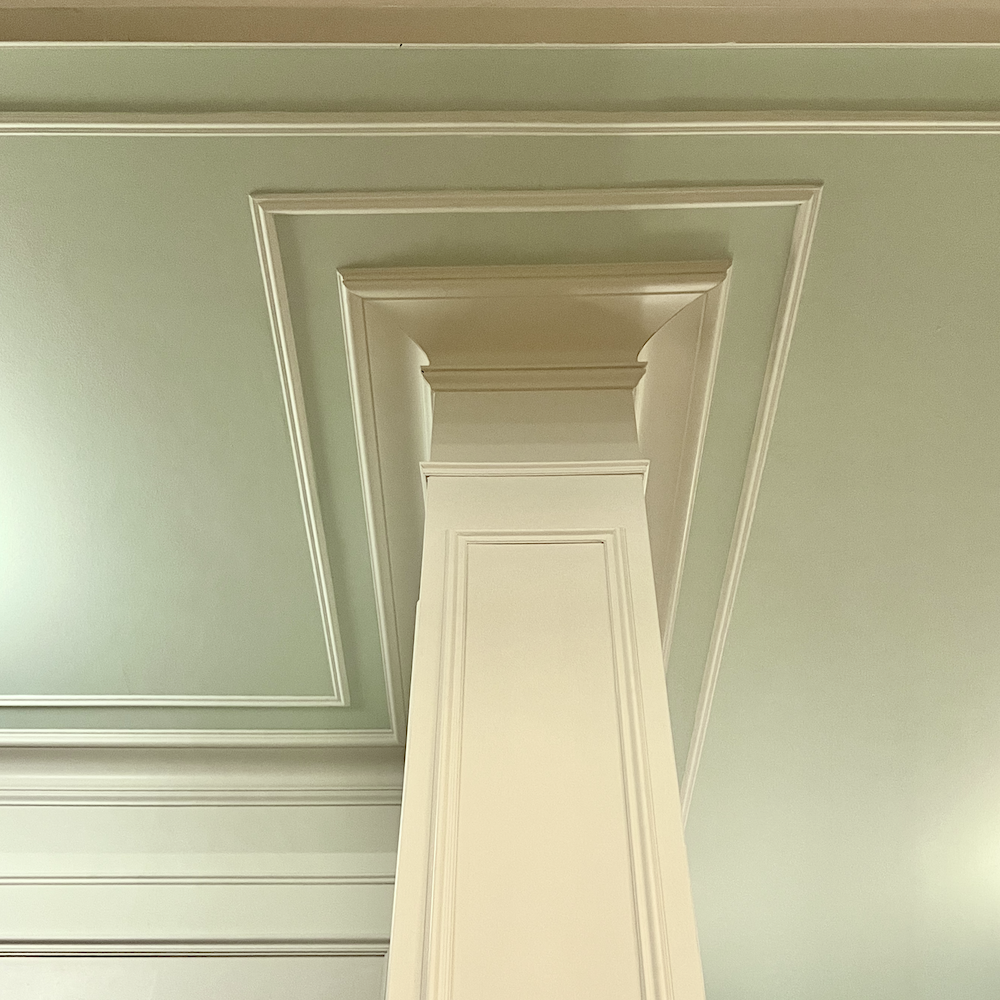
Okay, excluding the panel moulding in the lower right of this image, how many separate mouldings do you think were used to create this?
The answer is two. Yes, it’s only two.
The Victorian coving that looks like plaster but isn’t, and the one-inch panel moulding.
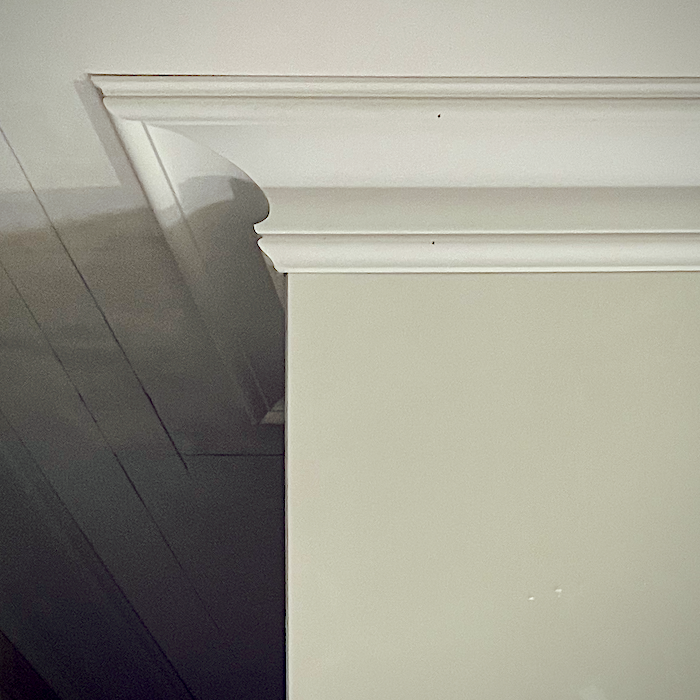
This is the Victorian coving in an image from February 2024.
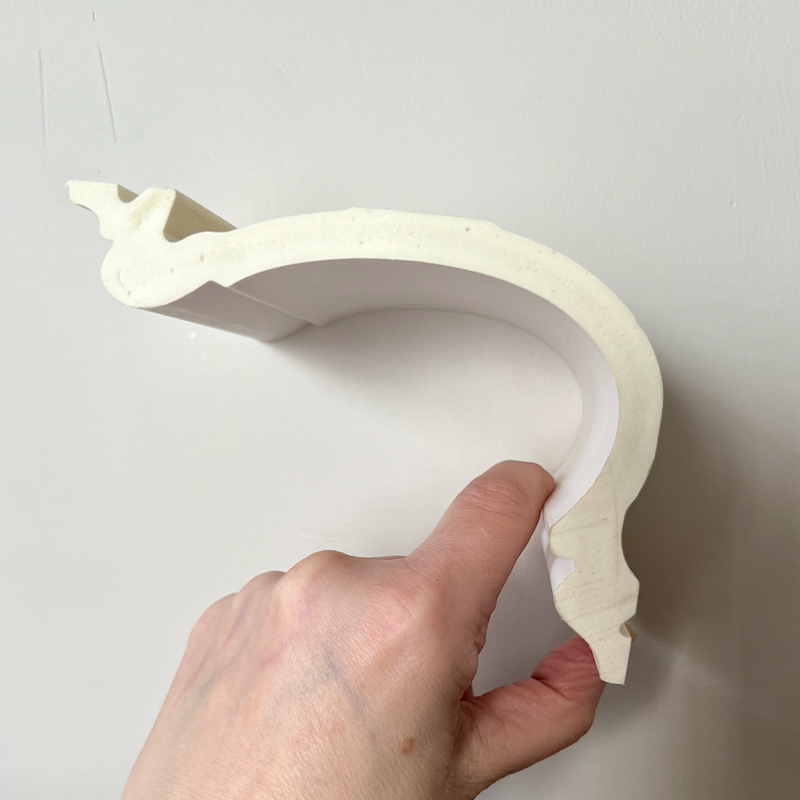
Orac Decor c341.
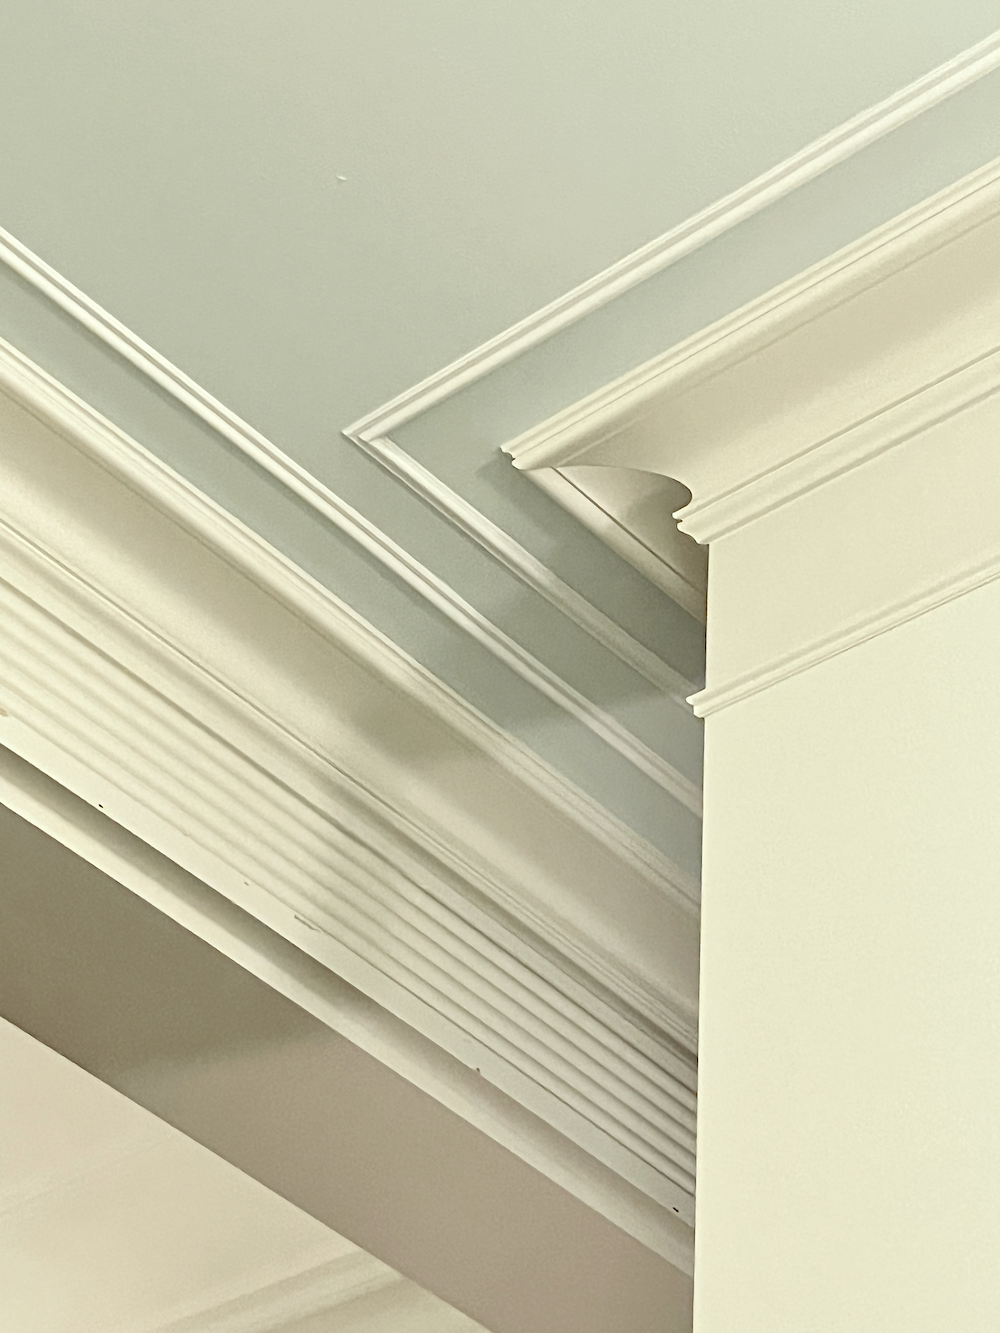
And here it is 13 months later. There are some areas where the paint came off when the guys ripped the plastic down. There’s still some painting that needs to be done, so it will get fixed then.
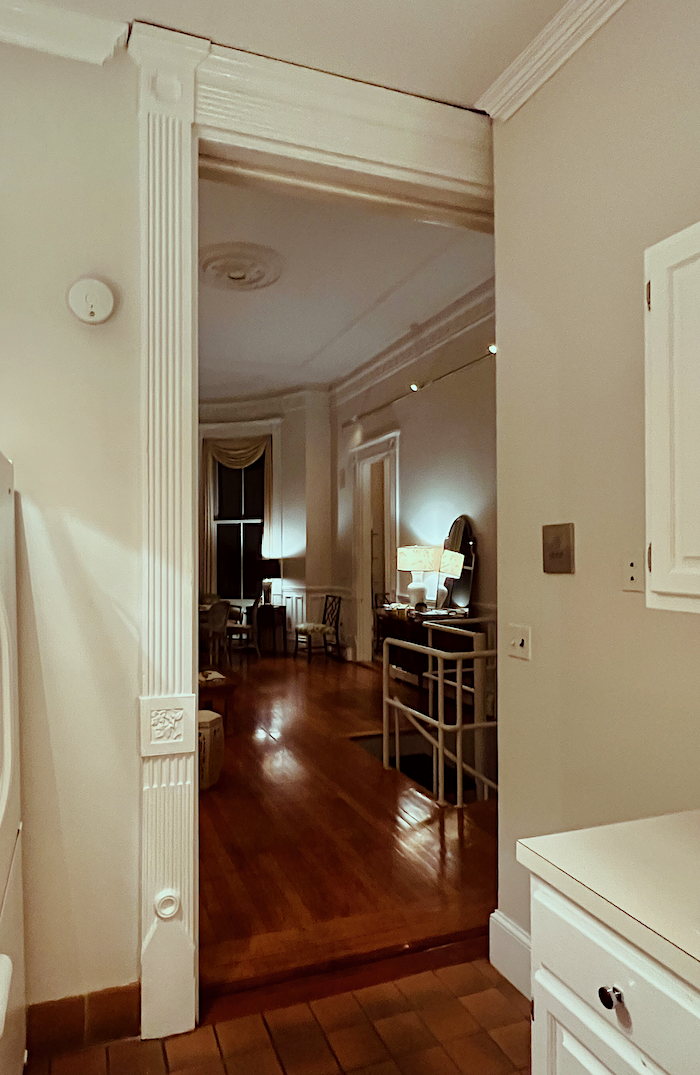
The old kitchen moulding. Yuck.
That floor!
I have to stop here, but we’ll hopefully pick up on Monday and finish up the architectural mouldings in the kitchen, living room, and den.
In the meantime, below is the widget mentioned above, with everything we’ve looked at and a few items we haven’t gotten to yet.

Thanks for all of your kind comments recently. I haven’t been able to answer most of them, but I read them all and appreciate them so much!
xo,

***Please check out the recently updated HOT SALES
And for a terrific vintage sale, please check out that page as that sale is ending tomorrow.
There is now an Amazon link on my home page and below.
Please note that I have decided not to create a membership site. However, this website is very expensive to run. To provide this content, I rely on you, the kind readers of my blog, to use my affiliate links whenever possible for items you need and want. There is no extra charge to you. The vendor you’re purchasing from pays me a small commission.
To facilitate this, some readers have asked me to put
A link to Amazon.com is on my home page.
Please click the link before items go into your shopping cart. Some people save their purchases in their “save for later folder.” Then, if you remember, please come back and click my Amazon link, and then you’re free to place your orders. While most vendor links have a cookie that lasts a while, Amazon’s cookies only last up to 24 hours.
Thank you so much!
I very much appreciate your help and support!
*********************************************************
Part 2 Begins Here
March 5, 2025
Hi Everyone,
Today, we will finish up the overview of the upstairs mouldings, and a video will go over what I’ve written in greater detail.
So far, we’ve discussed most of the mouldings upstairs, but I need to mention a few more and make some other points.
One we haven’t looked at is the trim around the range hood.
But first, let’s take a quick look at how much better the small kitchen wall to the left of the big opening looks compared to how it looked three years ago. (if you scroll up a bit.)
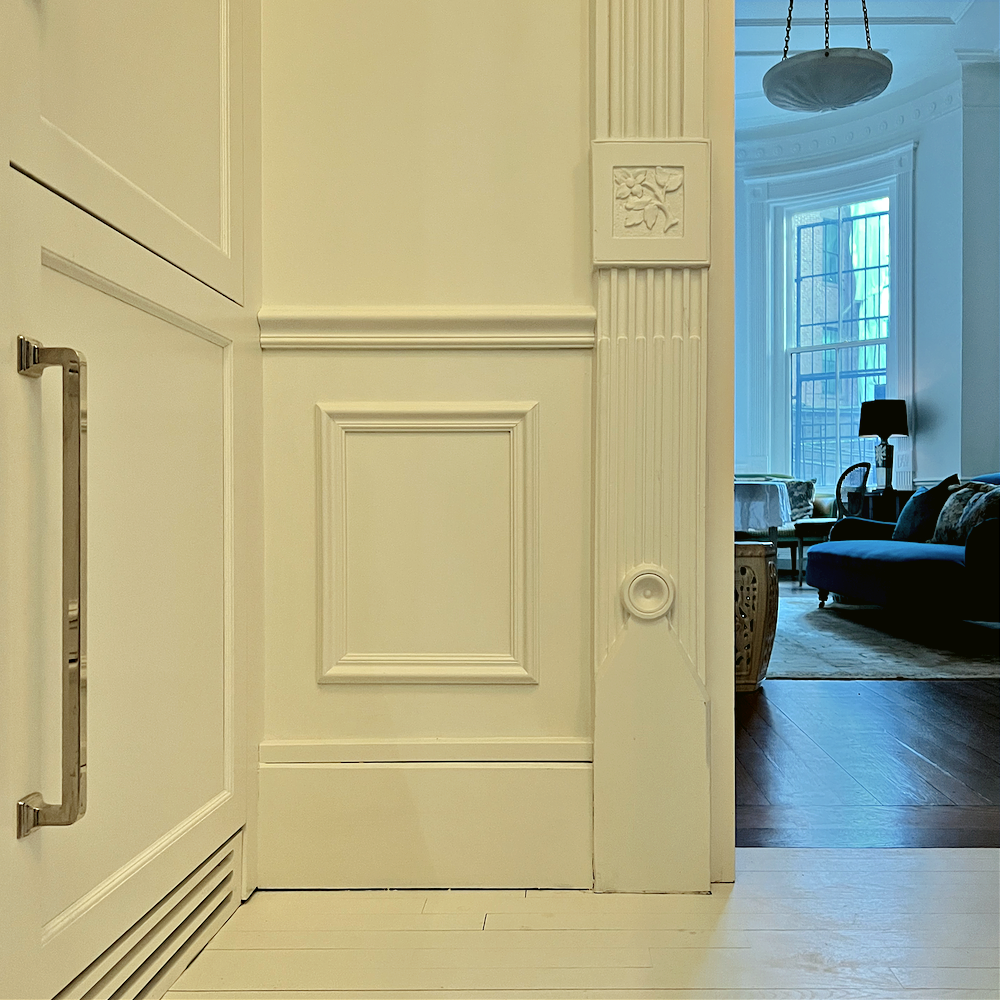
Aside from the wall moulding, we gained a few inches by doing a counter-depth refrigerator.
Let’s walk over to the entry to look at the short wall opposite the jib doors.
First of all, I want to point out that behind the 13″ wall next to the door is the vestibule niche where the ugly cabinet used to be. We will look at the niche in a bit.
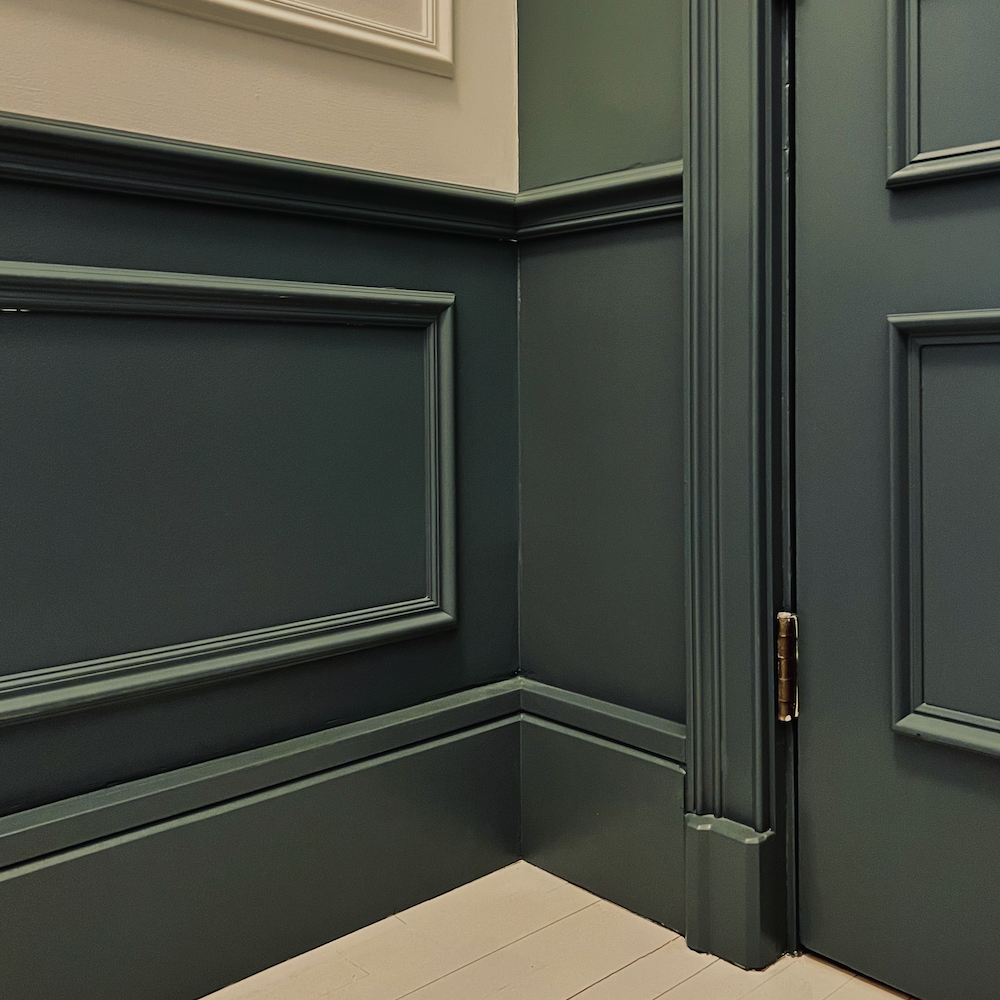
This baseboard moulding is different from the rest of the moulding because there was a big hole in the floor from the old moulding that needed to be covered. That is why it’s the same on the fridge side of the wide opening. This is the same baseboard that’s in the living room.
However, this hunky architectural moulding wouldn’t have looked good next to the round cabinet or the pilaster.
And, it wouldn’t have worked at all with the jib doors.
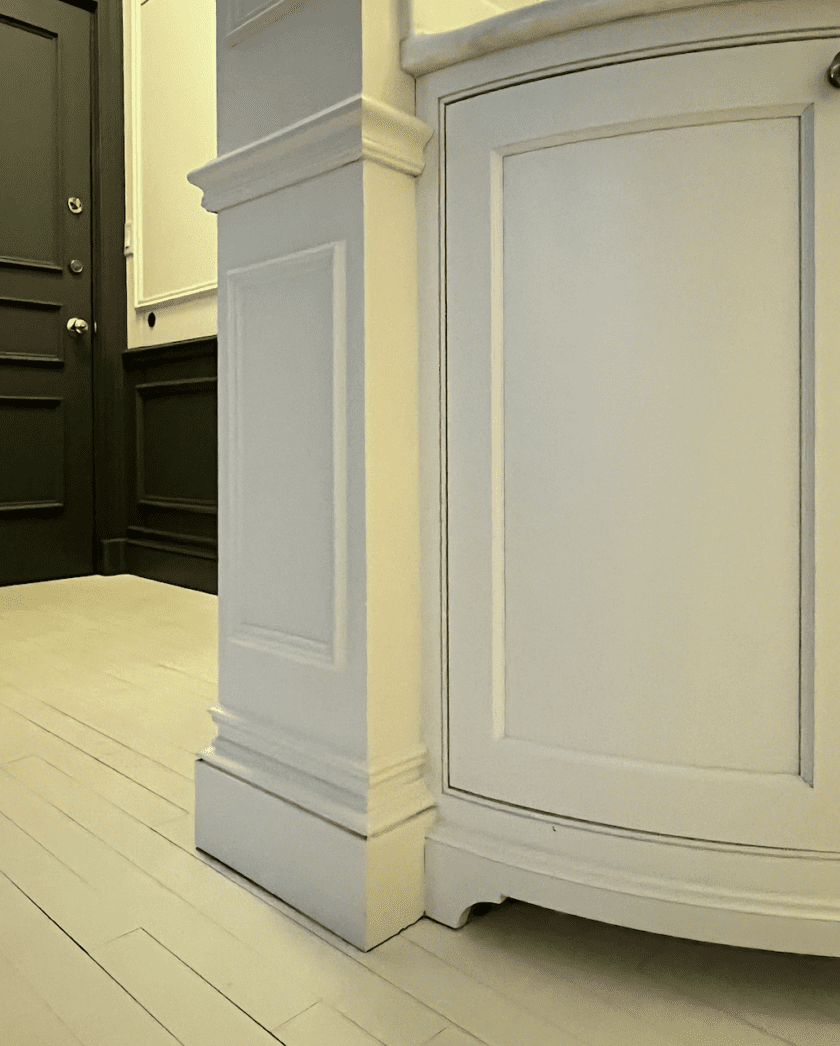
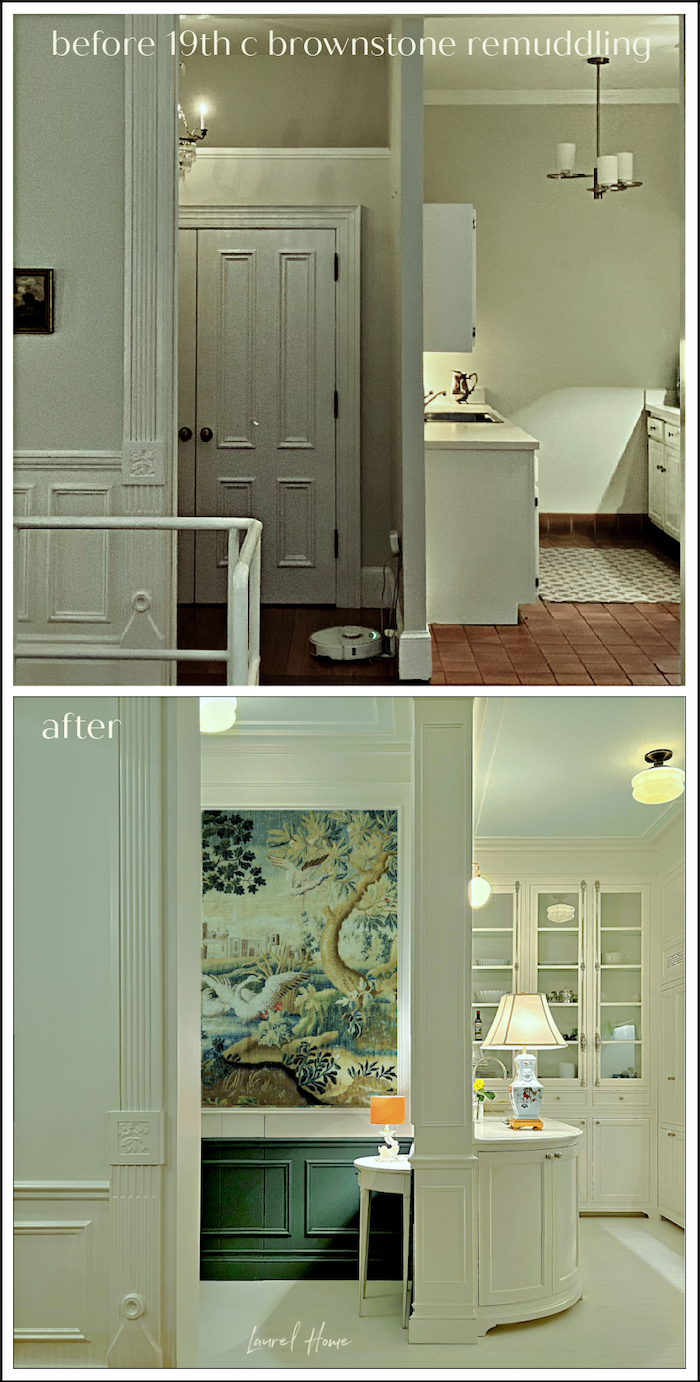
Above is my favorite angle for this architectural moulding detail. If you recall, this is the wall that was originally only 4″ wide and butted up to the opening. It totally cheapened the place and closed things off too much. We pushed the wall back about two feet, and now it looks like it belongs in this home.
Please pin the graphic below to your Pinterest boards!
Doesn’t it bother you that the baseboard is different on the other side?
Maybe the question should be, “Do you notice the difference?”
No, I don’t. First of all, it’s not easy to see both simultaneously. It might bother me if the baseboard was the same style, but one was two inches taller. But because they are so different, I’m okay with it.
Incidentally, while gathering stuff for this post, I came across an image I saved from Etsy of a similar Victorian baseboard architectural moulding.
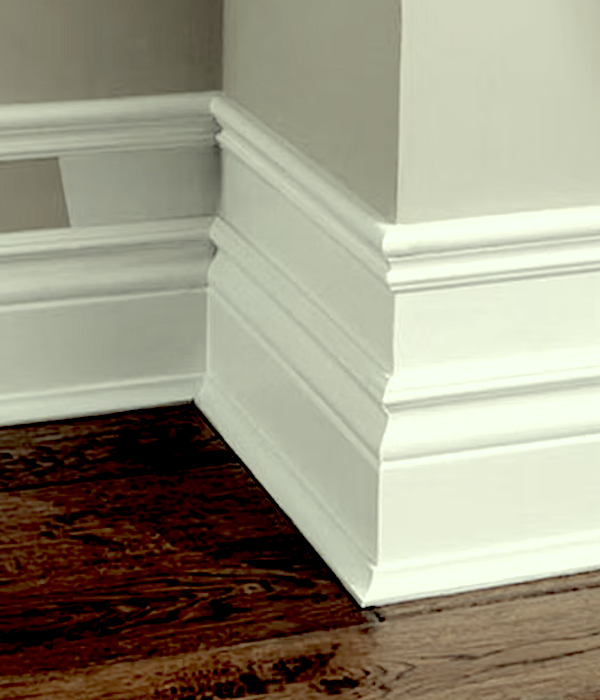
I don’t have a source for this. However, this trim is also upside down. I suppose either is okay, but the narrow end is usually on top. As you can see, the wall becomes part of the baseboard with this trim style.
Okay, let’s go back in the kitchen for a sec to look at the range hood moulding.
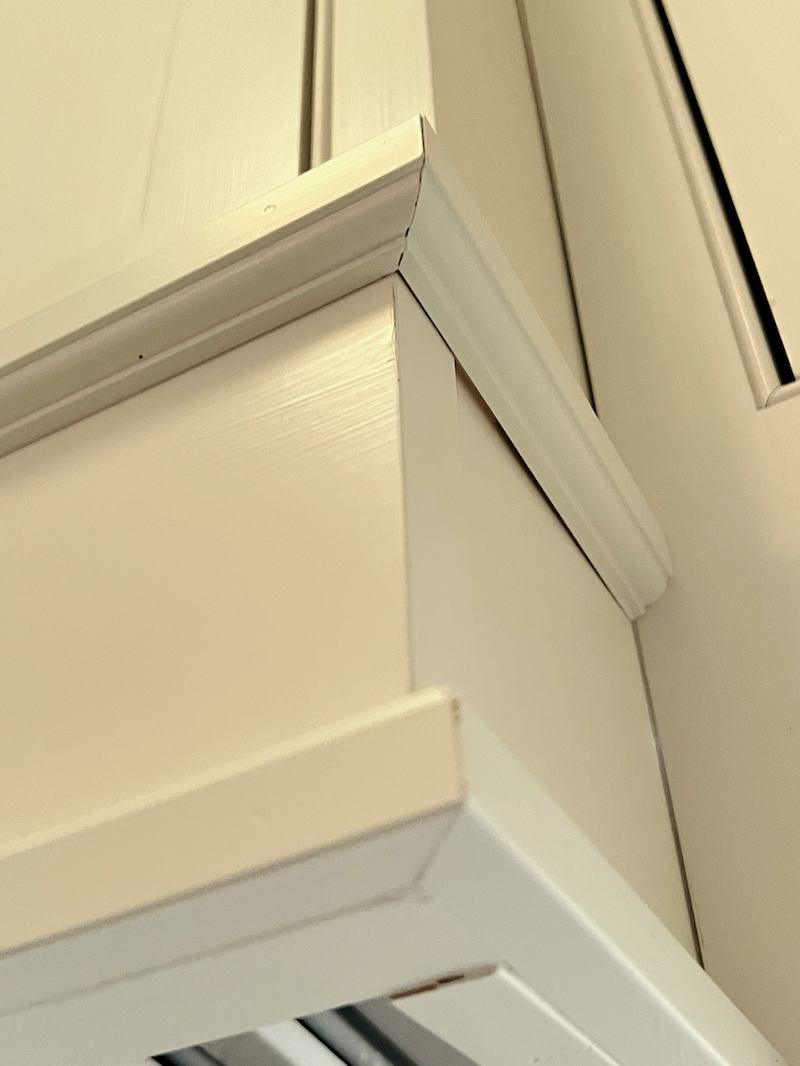
Crown Point Cabinetry did a magnificent job of the cabinets, but it would’ve been better if they hadn’t made that little bump out. As you can see, the trim doesn’t lay flush. And, the painters didn’t fill it in with caulk, either. They should have, but they didn’t.
For all the bloody time the painters took—four men—some areas are surprisingly poorly finished.
One good example is the crown in the back corner of the kitchen.
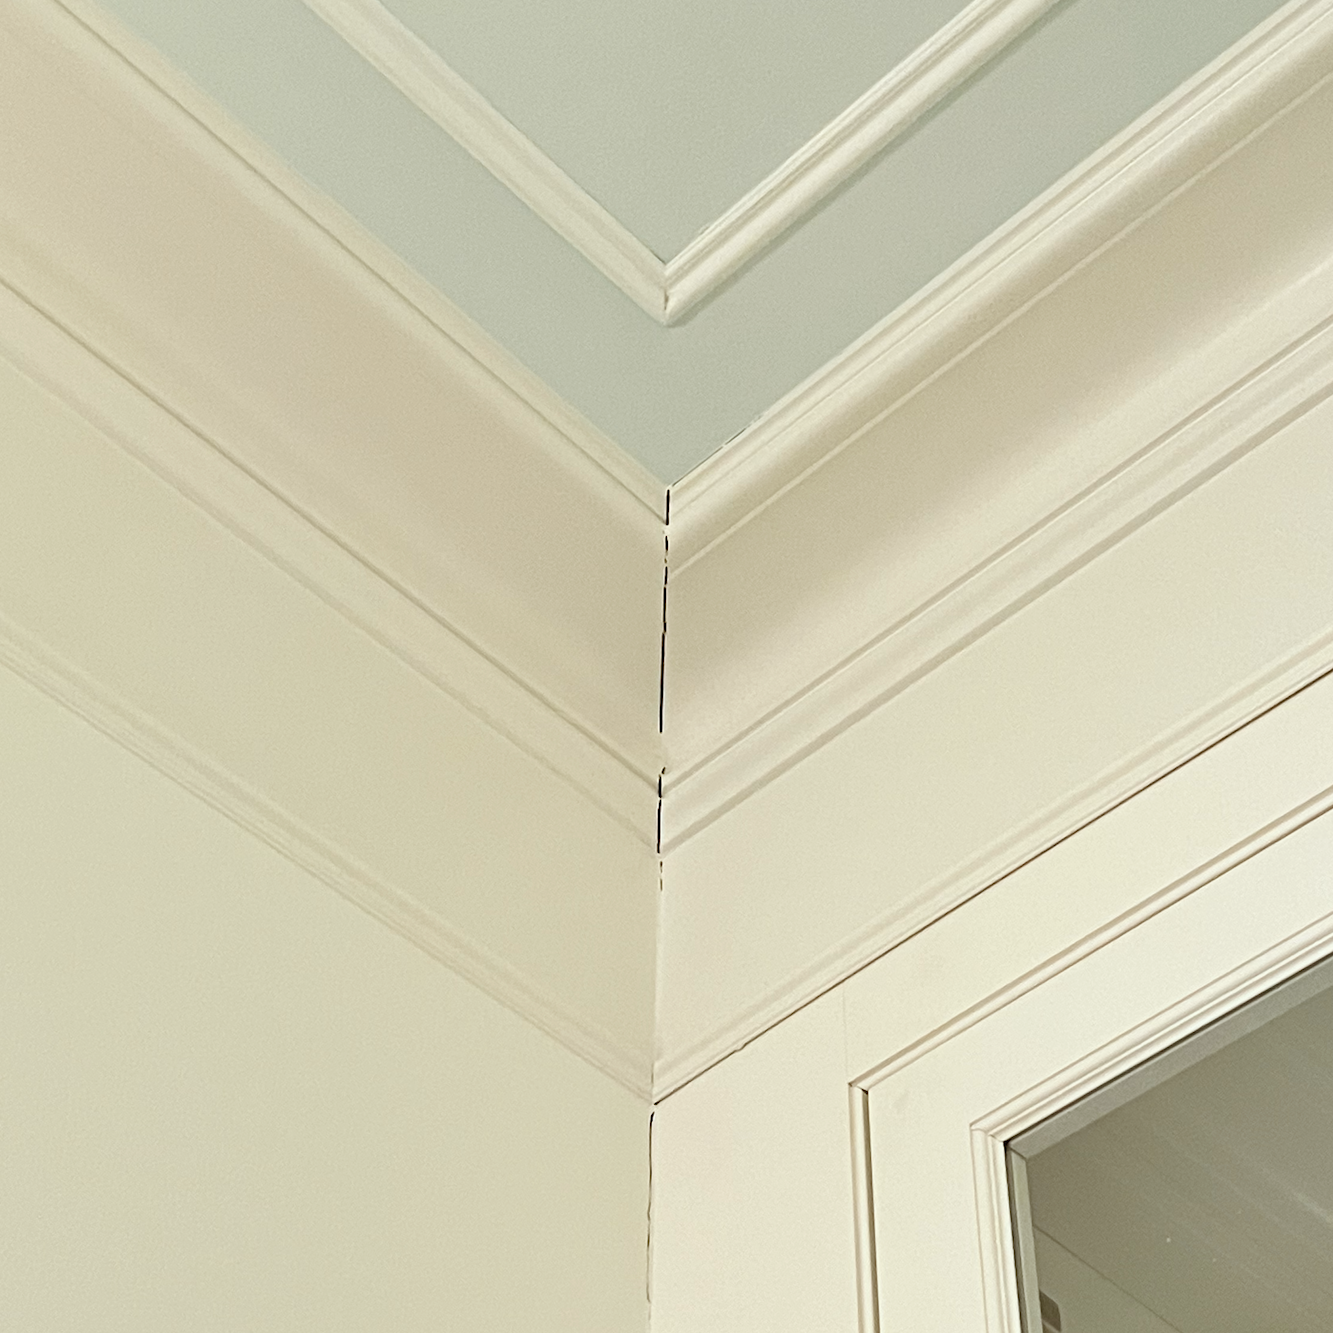
Guys, to be clear, this moulding is not wood. It is polyurethane; once it’s caulked, it will not spread apart like wood might. Wood has an inherent nature to expand and contract. This one bugs me.
Throughout their work, I had to request for them to caulk repeatedly.
The carpenters don’t do that. It’s the painter’s job.
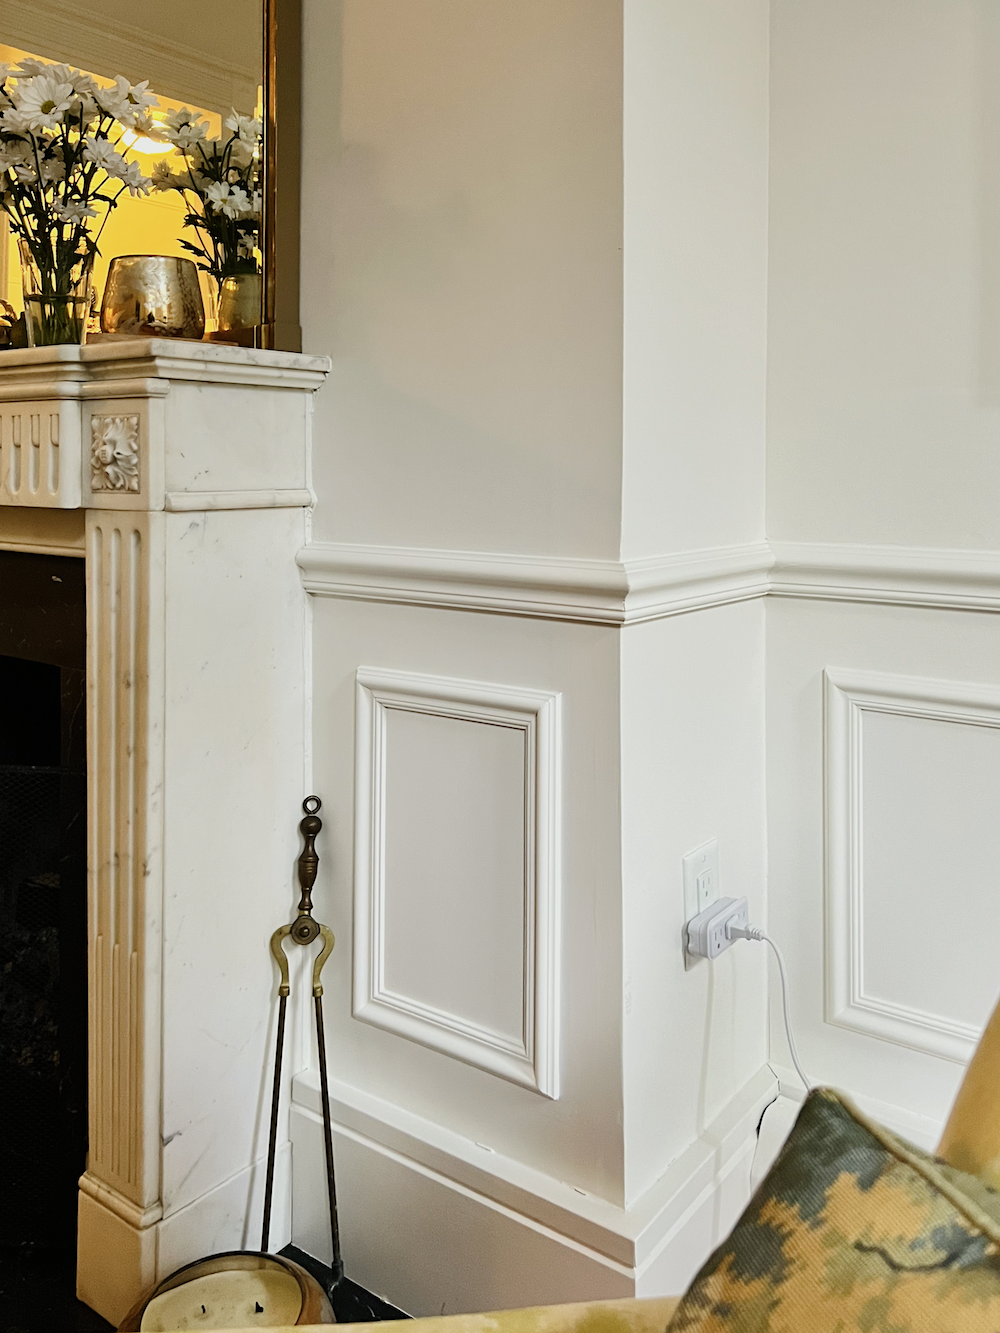
One area was the fireplace mantel. Finally, they did it, and it looks fantastic. While I’m kvetching. I paid 4k for this custom mirror. It was much more than I wanted to spend, but I figured this guy would do a terrific job. He did, except the sides of the mirror are spray-painted gold. Only the front of the frame was done in gold leaf. I didn’t realize until the day the mirror was installed. I didn’t have the strength.
Is it noticeable? Well, not from a distance. However, for the price, it should’ve been gold leaf all the way around. Up close, it’s very noticeable. Should I have said? “Oh, be sure to use gold leaf on the sides of the frame, too.” :/
Even so, the fireplace mantel and surrounding area make the room. And now I’m wondering why I even debated it for one second.
Before we get to the video, I want to show you the niche behind that little wall next to the front door.

The niche in the vestibule by the bathroom is what’s behind the wall perpendicular to the front door. (Remember the hideous cabinet we took down?)
We would’ve had to eliminate the niche to center the front door. I’d rather have this space inside than have the front door centered. So be it.
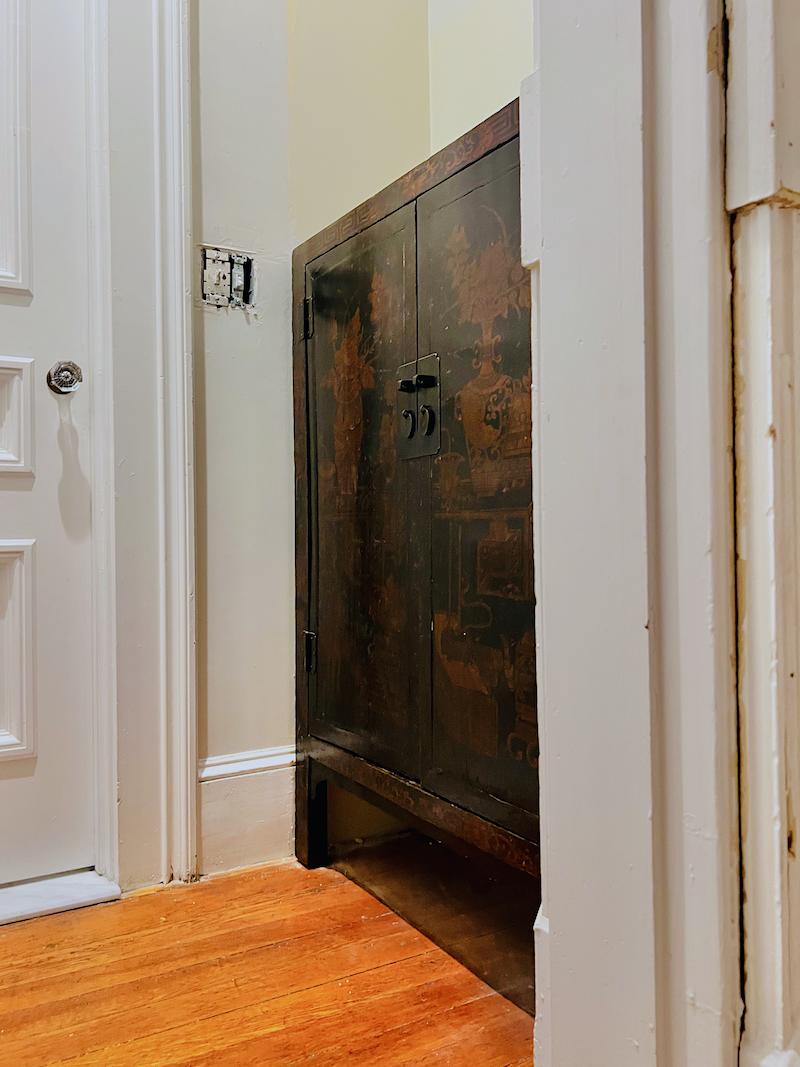
For several months, the Chinoiserie cabinet (Please scroll down about a quarter of the way down the page to see the post) I purchased about a year ago was here.
When it went downstairs last July, I fell in love with it in my bedroom and decided it needed to live there.
Eventually, I would like to do something in this niche, but for now, I’m enjoying not having anything in this spot except for an extra dining chair. I bought these chairs in Newport, RI, circa 1999. They looked like this, except they had no seat, just a frame. So, I had my upholsterer attach a cushion to fit the frame, and he added this beautiful little box pleated seat.
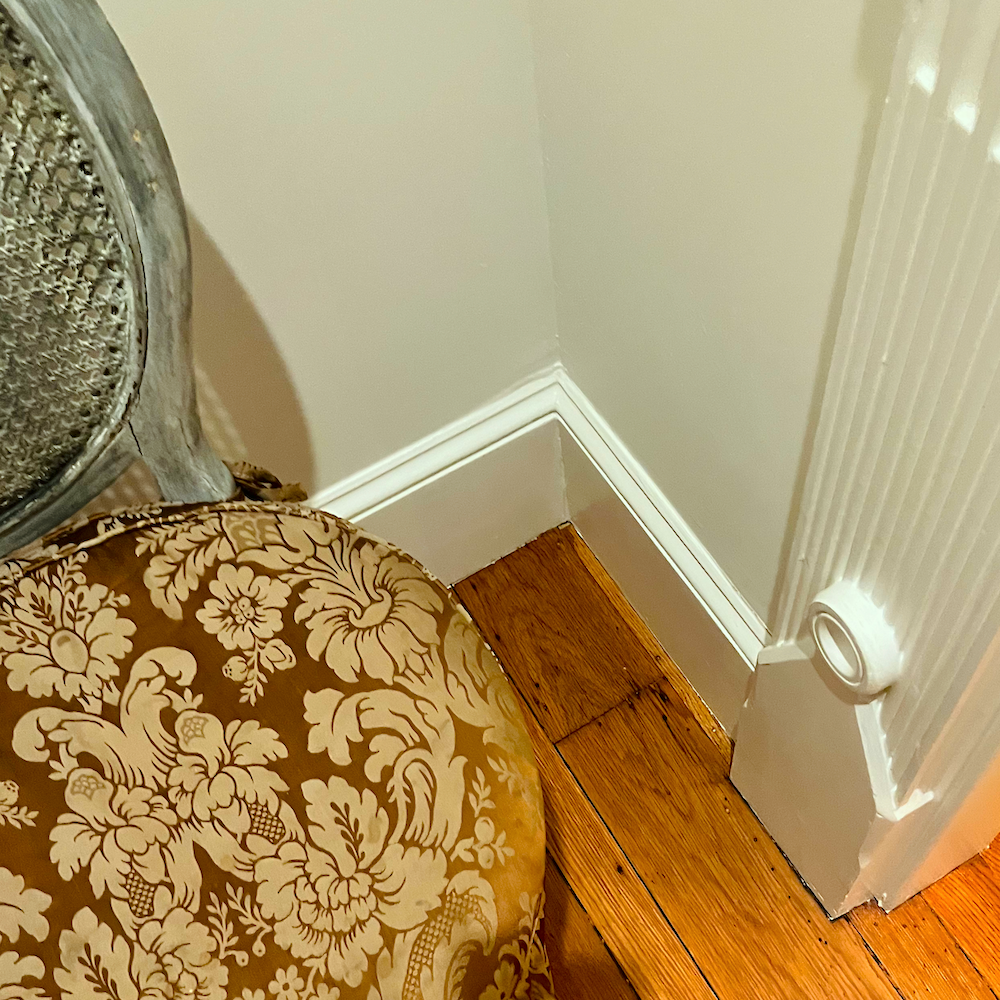
Here’s a close-up of the beautiful damask. It’s held up remarkably well, considering how much crap has spilled on them over the years; plus, it’s 100% silk, and I didn’t even have it knit-backed for stability. If you’ve never seen this post about some of my nightmares regarding fabric, please check it out here.
I took this detailed shot not for the fabric but to show that there are 14″ between the wall and door casing.
I almost forgot to mention the den window casing. This is the original moulding on the window. However, we needed a new casing for the big doorway and new closet doors.
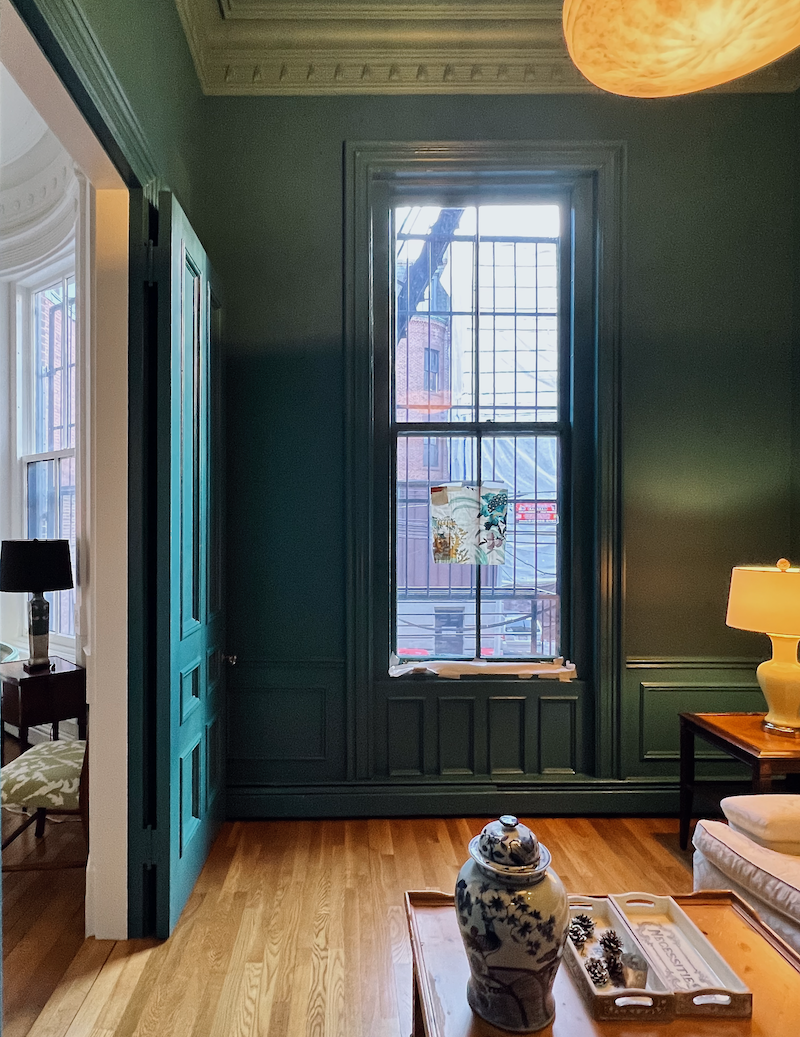
Below is a close-up of the window casing.
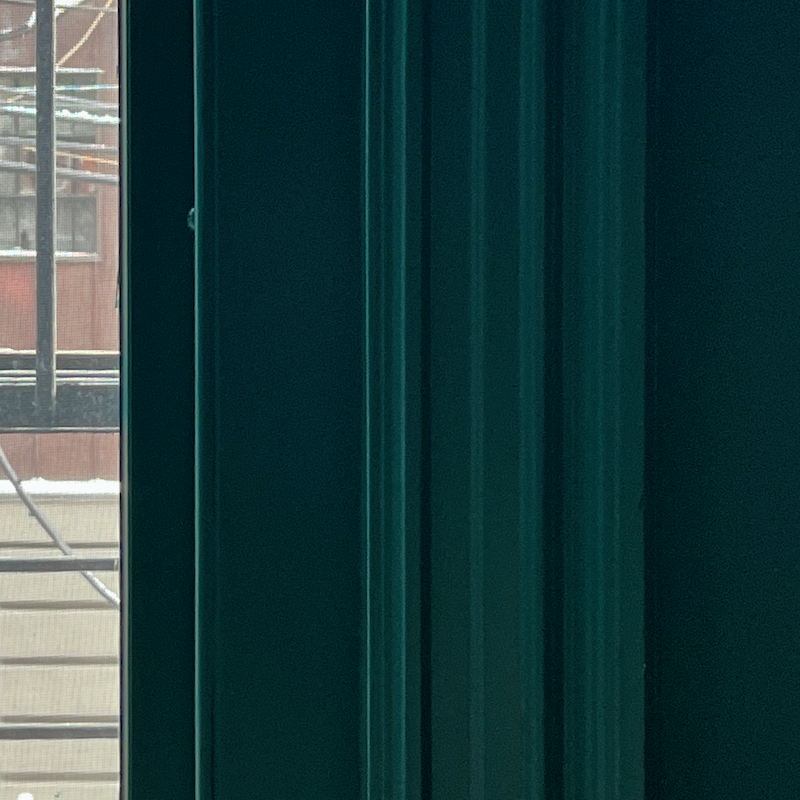
Below are the new closet doors. This one gets high marks for one of the most improved areas.
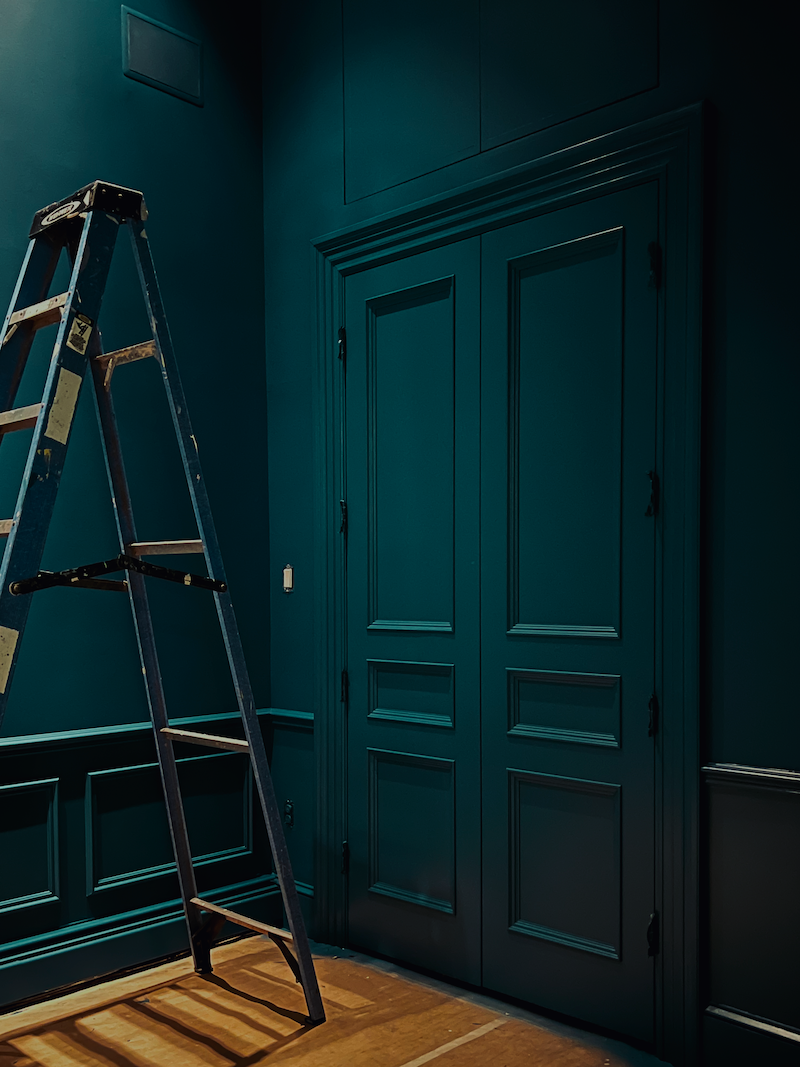
This link explains in greater detail about the casing in the den.
And, here is what the closet doors used to look like.
Below are the three mouldings used to make the casing.
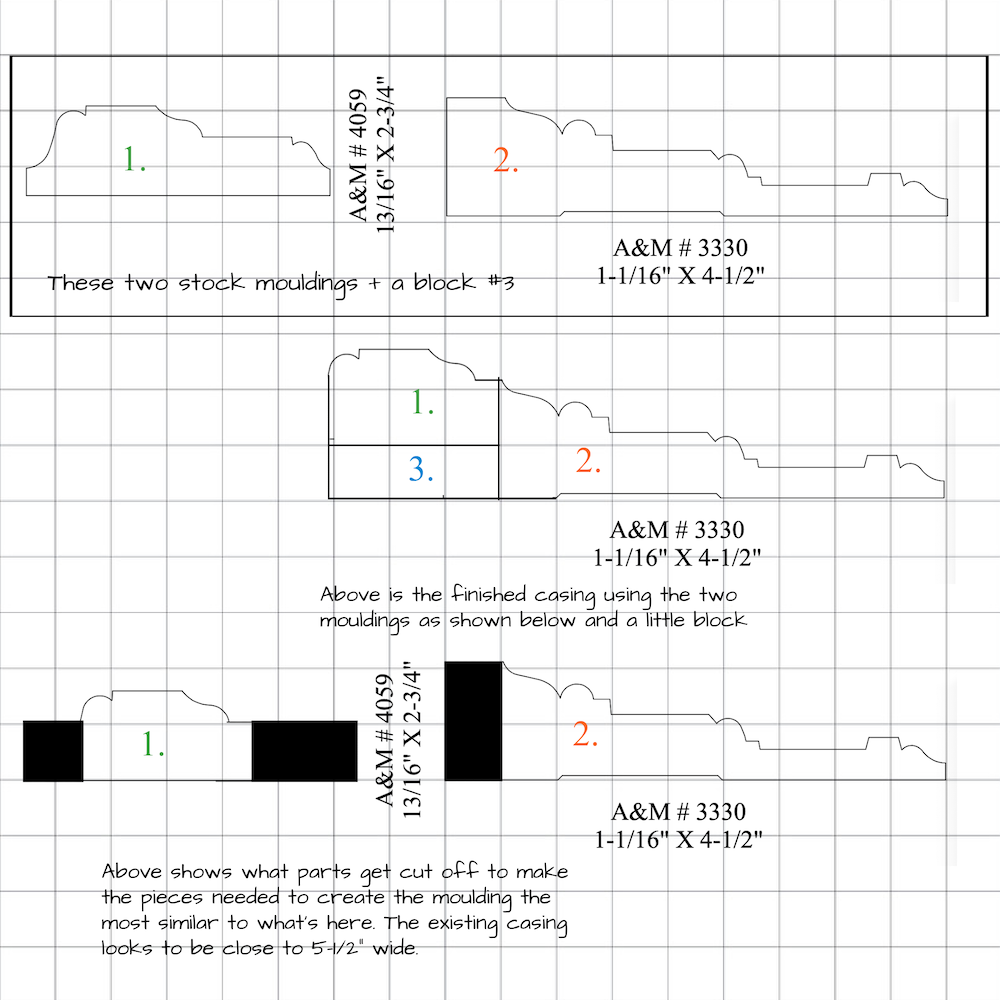
It’s not an exact match, but it’s pretty close. Numbers 1 and 2 are stock mouldings from Anderson & McQuaid, a local lumber company with the most extensive line of architectural mouldings I’ve ever seen. In addition, they can make anything. Number 3 is cut from 1/2″ plywood, 4′ x 8′.
Okay, here’s the video.
And below is the widget with all of the mouldings discussed so far.

We’ll visit the downstairs architectural mouldings soon. However, I might take a break from mouldings for a bit.
xo,

***Please check out the recently updated HOT SALES
And for a terrific vintage sale, please check out that page as that sale is ending tomorrow.
There is now an Amazon link on my home page and below.
Please note that I have decided not to create a membership site. However, this website is very expensive to run. To provide this content, I rely on you, the kind readers of my blog, to use my affiliate links whenever possible for items you need and want. There is no extra charge to you. The vendor you’re purchasing from pays me a small commission.
To facilitate this, some readers have asked me to put
A link to Amazon.com is on my home page.
Please click the link before items go into your shopping cart. Some people save their purchases in their “save for later folder.” Then, if you remember, please come back and click my Amazon link, and then you’re free to place your orders. While most vendor links have a cookie that lasts a while, Amazon’s cookies only last up to 24 hours.
Thank you so much!
I very much appreciate your help and support!
Related Posts
 Inherited Furniture That Must Stay – How To Work With It
 Bookshelf Styling-The Ultimate Guide with Templates!
 10 Decorating Questions With Difficult to Find Answers
 Decorating on a Budget Without It Looking Cheap
 9 Little-Known Paint Colors Decorators Are Obsessed With
 12 of the Best Paint Colors To Go With Red Brick
 Rooms With Light Walls Look Larger, Yes Or No?


