

Hi Everyone,
I am finishing up the discussion on the remaining architectural details and mouldings downstairs, as well as the bathroom floor tiles. Since this is a two-part post, I’ve included a link below for those who would like to skip Part 1. If you’re here for the first time, please begin at the top of the page.
Part 2 Begins Here
Hi Everyone,
Sorry, I left y’all hanging, first after discussing the architectural details upstairs, and then much more recently after discussing the paint colors and lighting downstairs. So, this post is really a continuation of what we started at the end of last month.
This post is primarily about my favorite architectural detail: the beautiful mouldings downstairs. Plus, I’m including the bathroom tiles.
While the upstairs ended up being a bigger deal than I thought it would, the lower level, except for the shower, was a total gut.
It takes a lot of courage to rip everything out, hoping that one day it will be put back together as one has envisioned it.
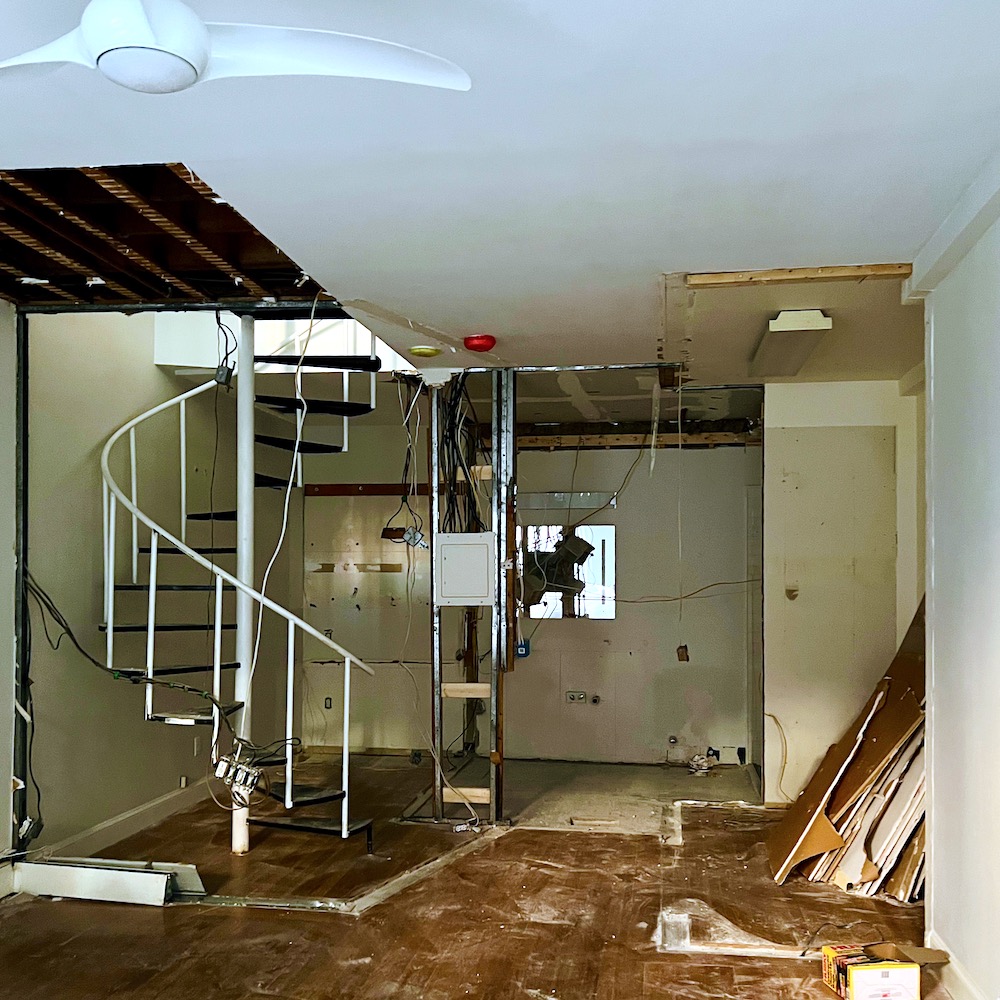
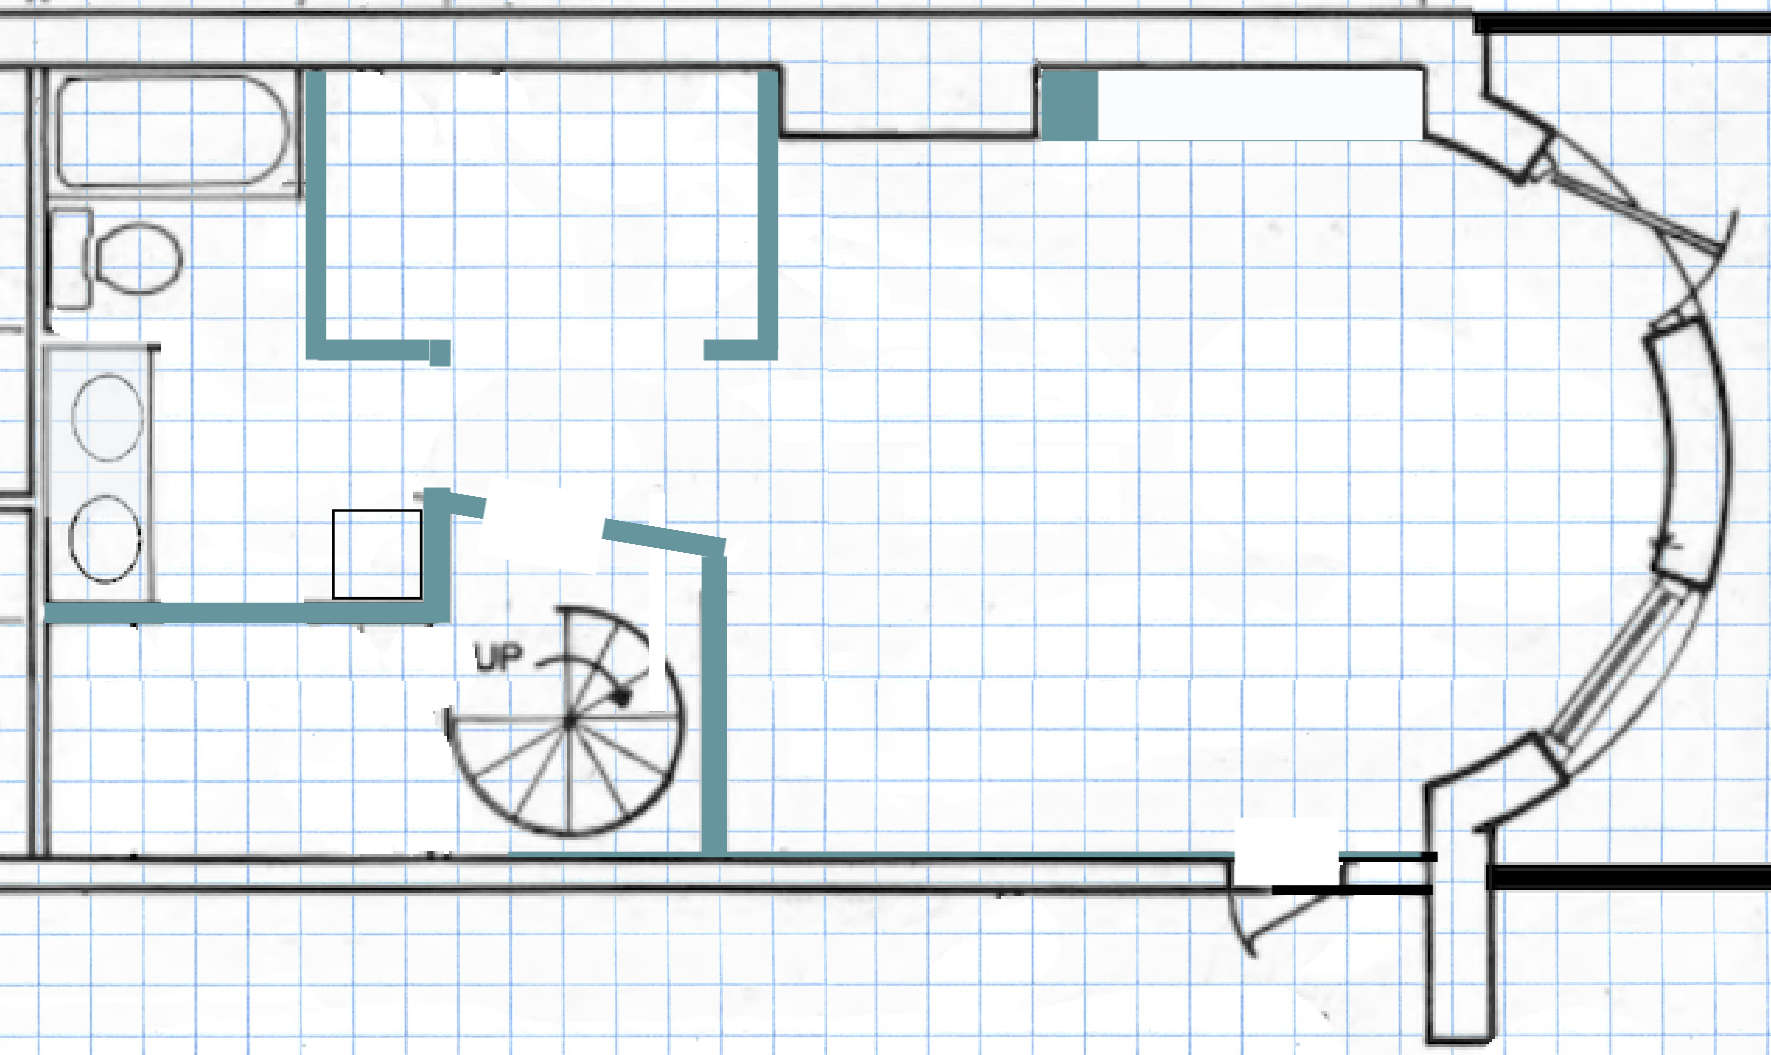
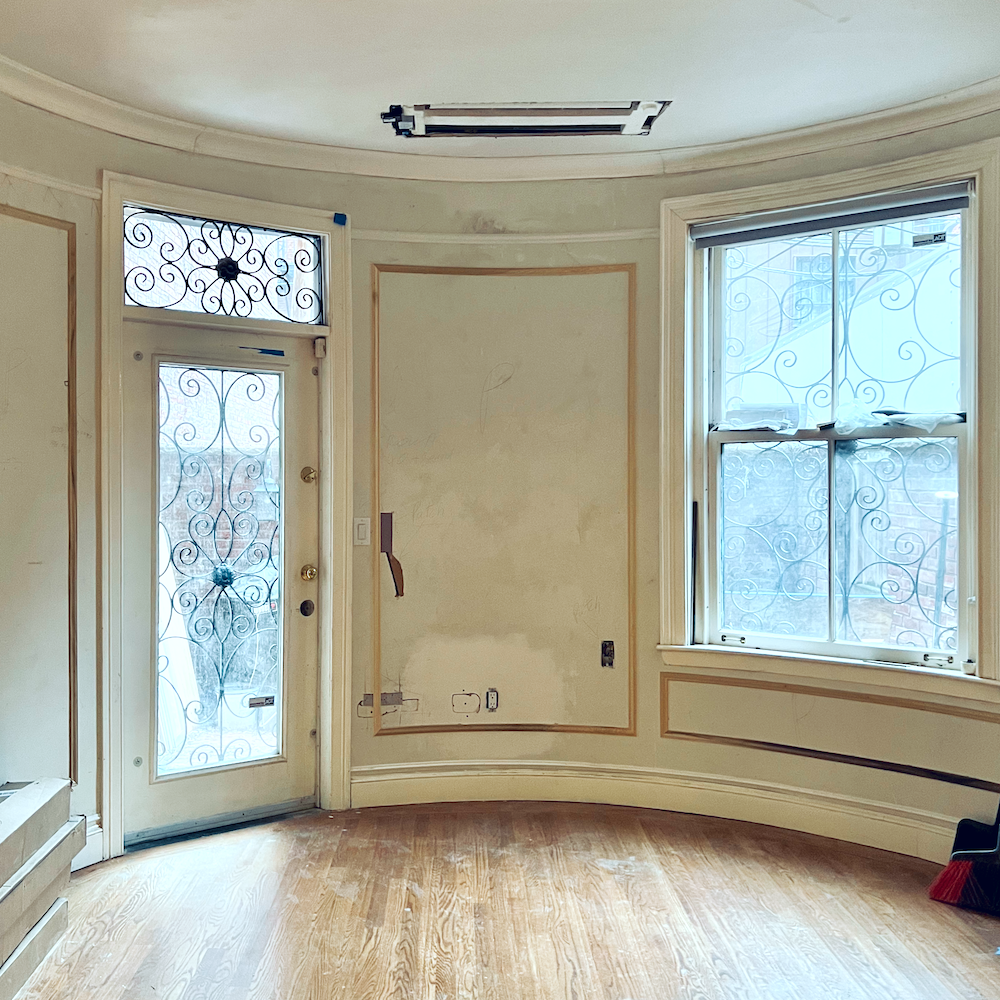
Below is how everything looked before the renovation began.
The only thing the lower level had going for it was that the ceilings were nine feet high. This is rare in a Boston brownstone. They are usually no more than 8 feet, if that.
However, the dinky doors and total lack of architectural details reminded me of a college dorm room.
I mean, is there anything about this space that suggests it was built in the 19th century?
No, there is not.
Above is before I purchased the unit.
Below is an accurate floor plan of how the entire garden level looked.
Below is pretty much the latest floor plan. However, tweaks were made during the building phase, using detailed drawings and sometimes verbal explanations. However, as far as general layout, this is as it is, except for the bedroom wall where the staircase breaks through the ceiling.
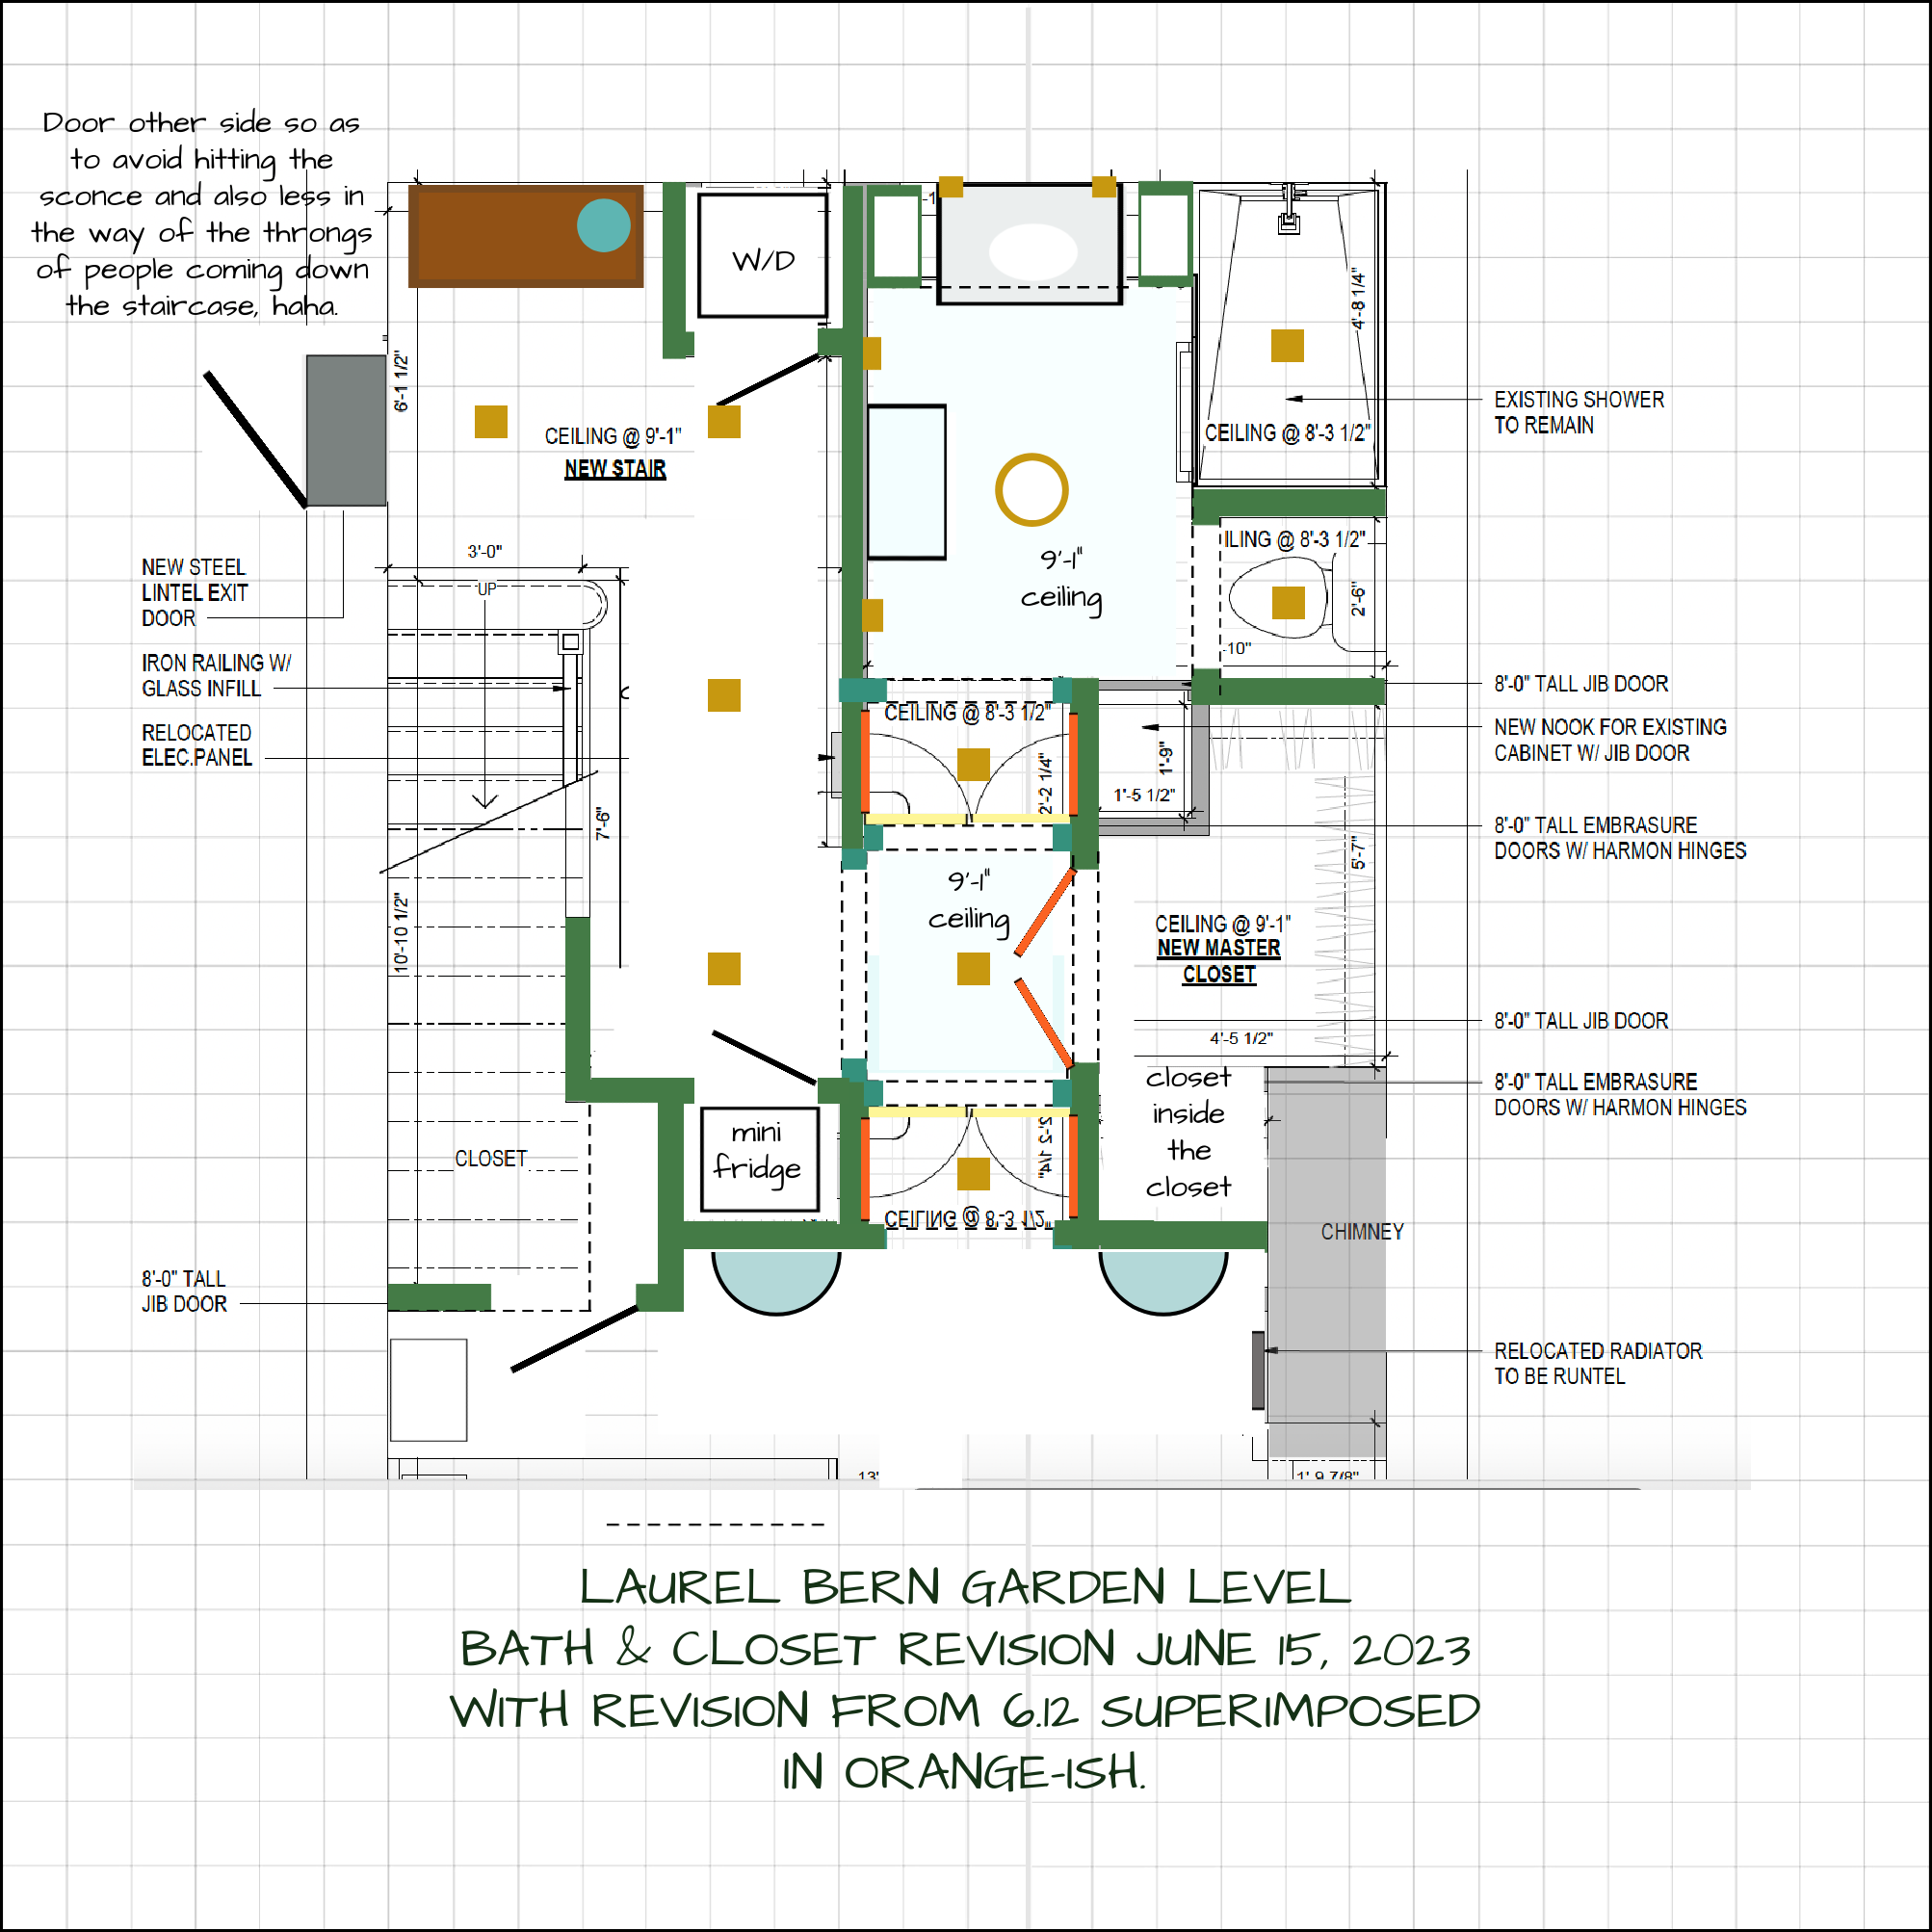
I was hoping that the wall could come forward far enough to fully enclose the staircase that breaks through the ceiling behind the closet. However, to do so, it would’ve left just a bit over eight feet for the bed and nightstands. Additionally, there needs to be sufficient space to open the door that goes under the staircase.
Since the door is 22″, there has to be at least that much space between the bed and the door. A queen-sized bed is 60″, and that leaves 28″ on each side of the bed.
If you’re interested in seeing earlier iterations of the floor plan and architectural details, please check out this post entitled “Little Known Secrets on the Design Process.
The final design was reached only a few weeks before the demo began.
I was looking at the exquisite architectural details done by Furlow Gatewood when a light bulb went off.
Photos above and below by Rod Collins
While Furlow’s paneled entrances are not doors, I had seen embrasure doors that fit into a pocket in an extra-deep door jam.
And that’s when the final design came to me.
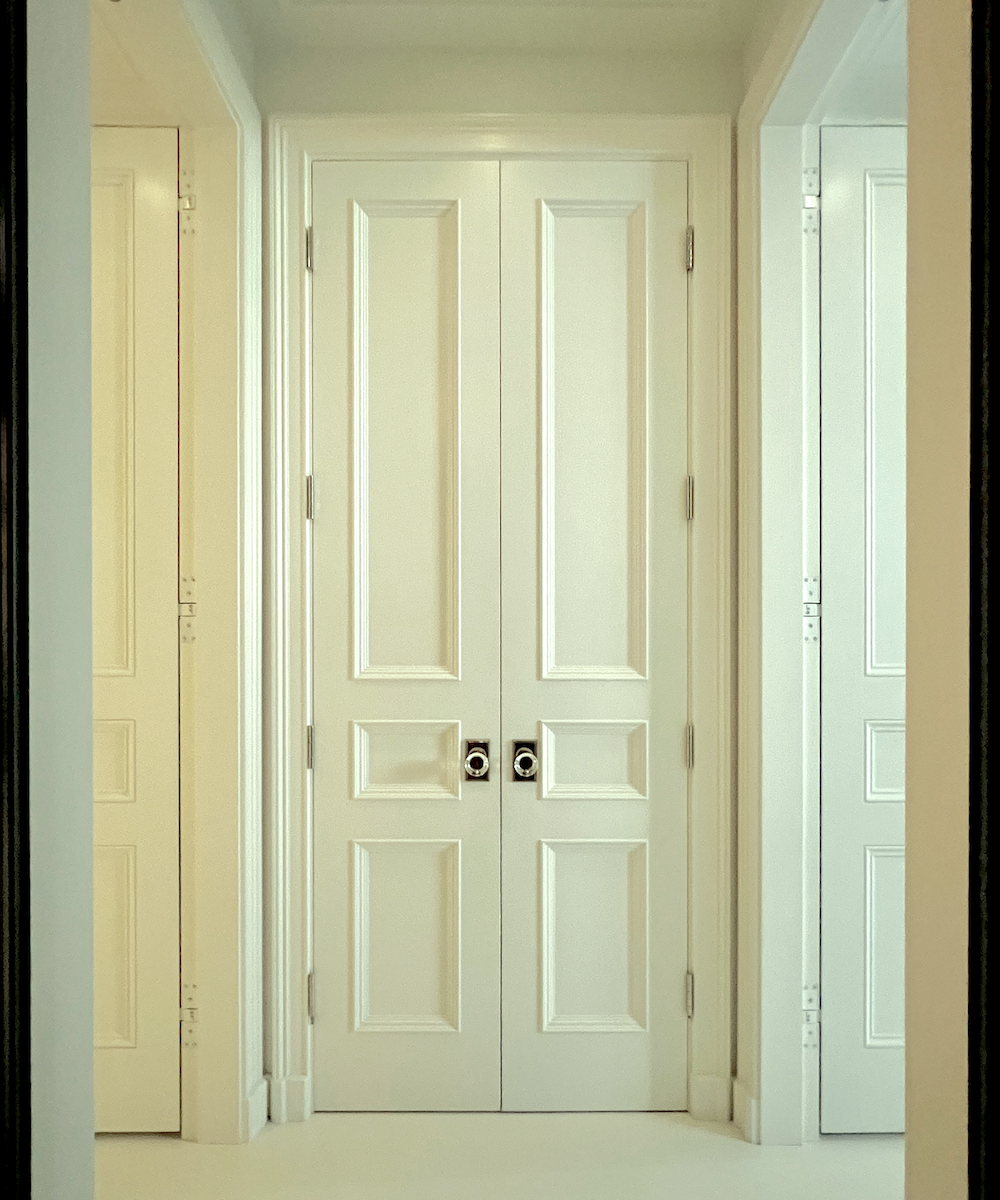
There would be two sets of these beauties. One pair of doors would close off the bathroom, and the other pair would close off the bedroom. The beauty was that it made the entrances into the private rooms all the more private. Plus, the doors never get in the way of anything.
In between would be the double doors for the primary closet.
Nothing was going to stop this from happening. However, it was an exercise in extreme patience and a lesson learned.
If you’re knowledgeable about certain details, ask your contractor upfront if it’s okay to source some of the items and which ones. Some contractors want you to do this. It depends on what it is. I could have saved a lot of time, because I had found a wonderful source at the time I was planning the doors, which was more than a year before they were installed.
Speaking of installations. I will forever remember the embrasure door installation coinciding with a hideous cold. However, I still managed to take some photos after the guys had left for the day. (This is a fantastic post with many renovation pics that are fun to look at now.
There will be another post that discusses the doors used throughout the apartment.
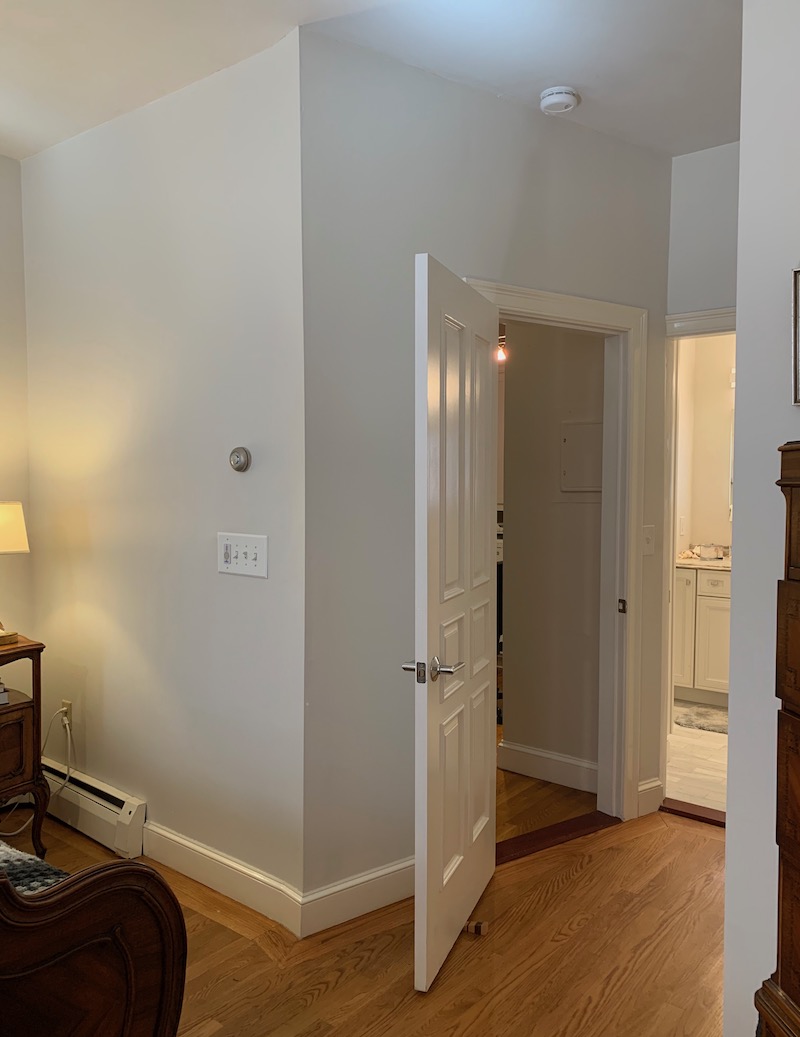
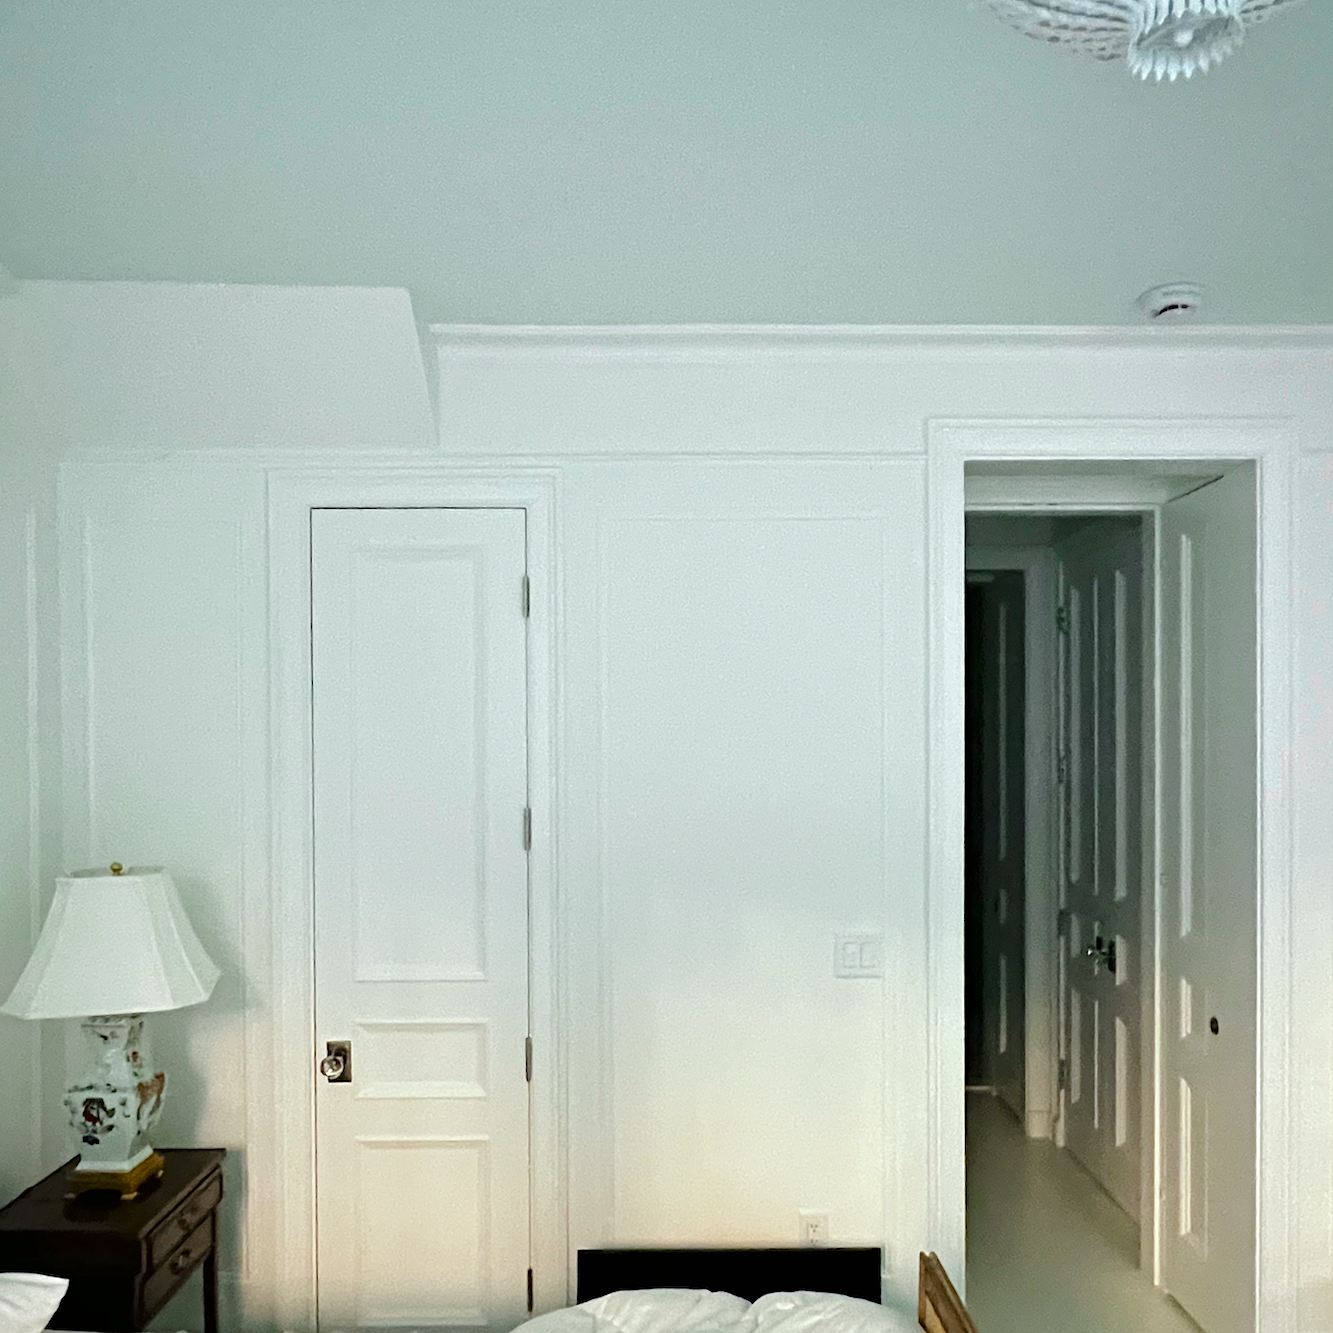
One of my goals was to address and get rid of the hideous soffit in the bedroom.
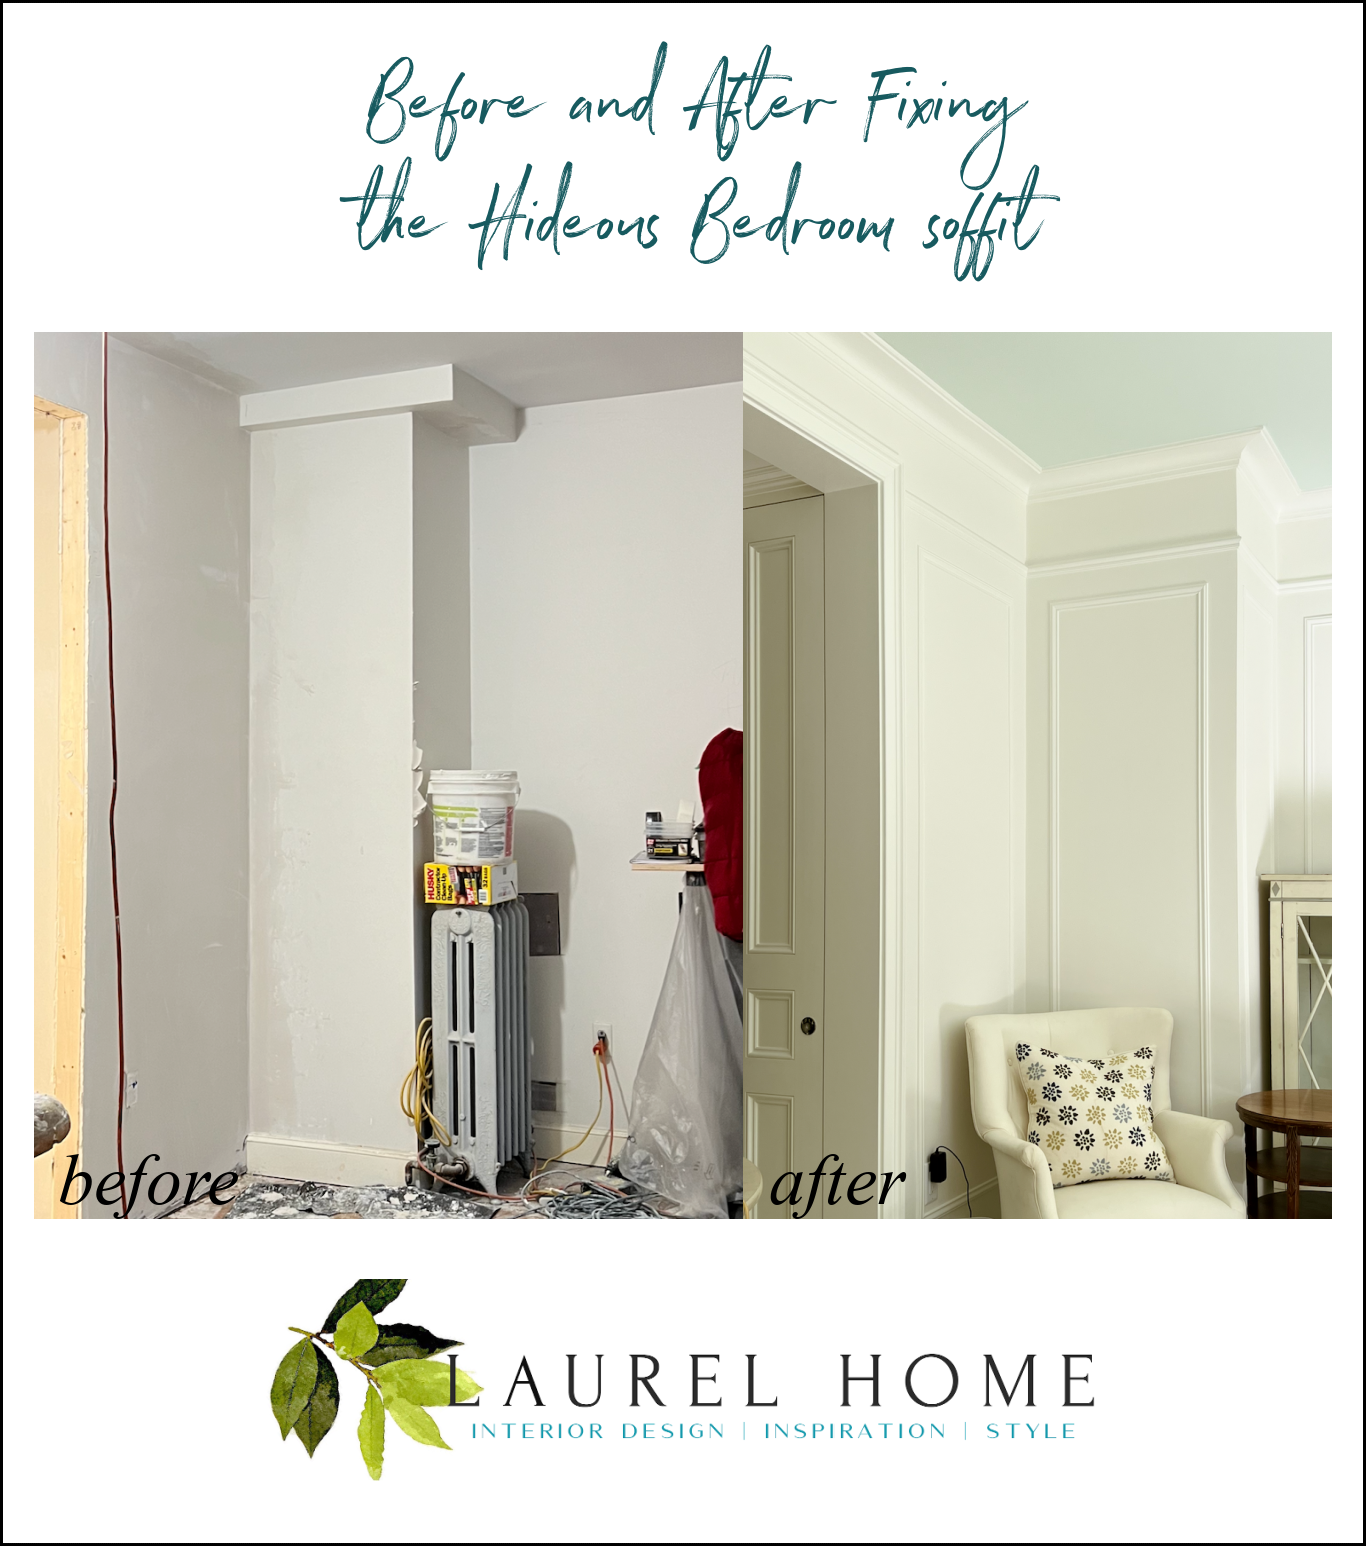
Below is a new image of that corner.
Let’s take a closer look at the architectural details in the bedroom.
Laurel, I’ve been dying to know how you knew where to begin the picture rail.
In an eight-foot or nine-foot ceiling, it’s about a foot or so below the ceiling.
One thing I wanted downstairs and am so glad I did this, were extra tall 96″ doors and doorways.
I hated the only 78″ doors. They looked so dumpy in the nine-foot room. And especially because the door to the outside has a tall transom, and the window is also quite tall.
In fact, it was reminiscent of the door and window height in my Bronxville apartment. (below)
The picture rails in my Bronxville apartment were about a foot below the coved ceiling.
And, they intersected the door and window frames as seen in these images.
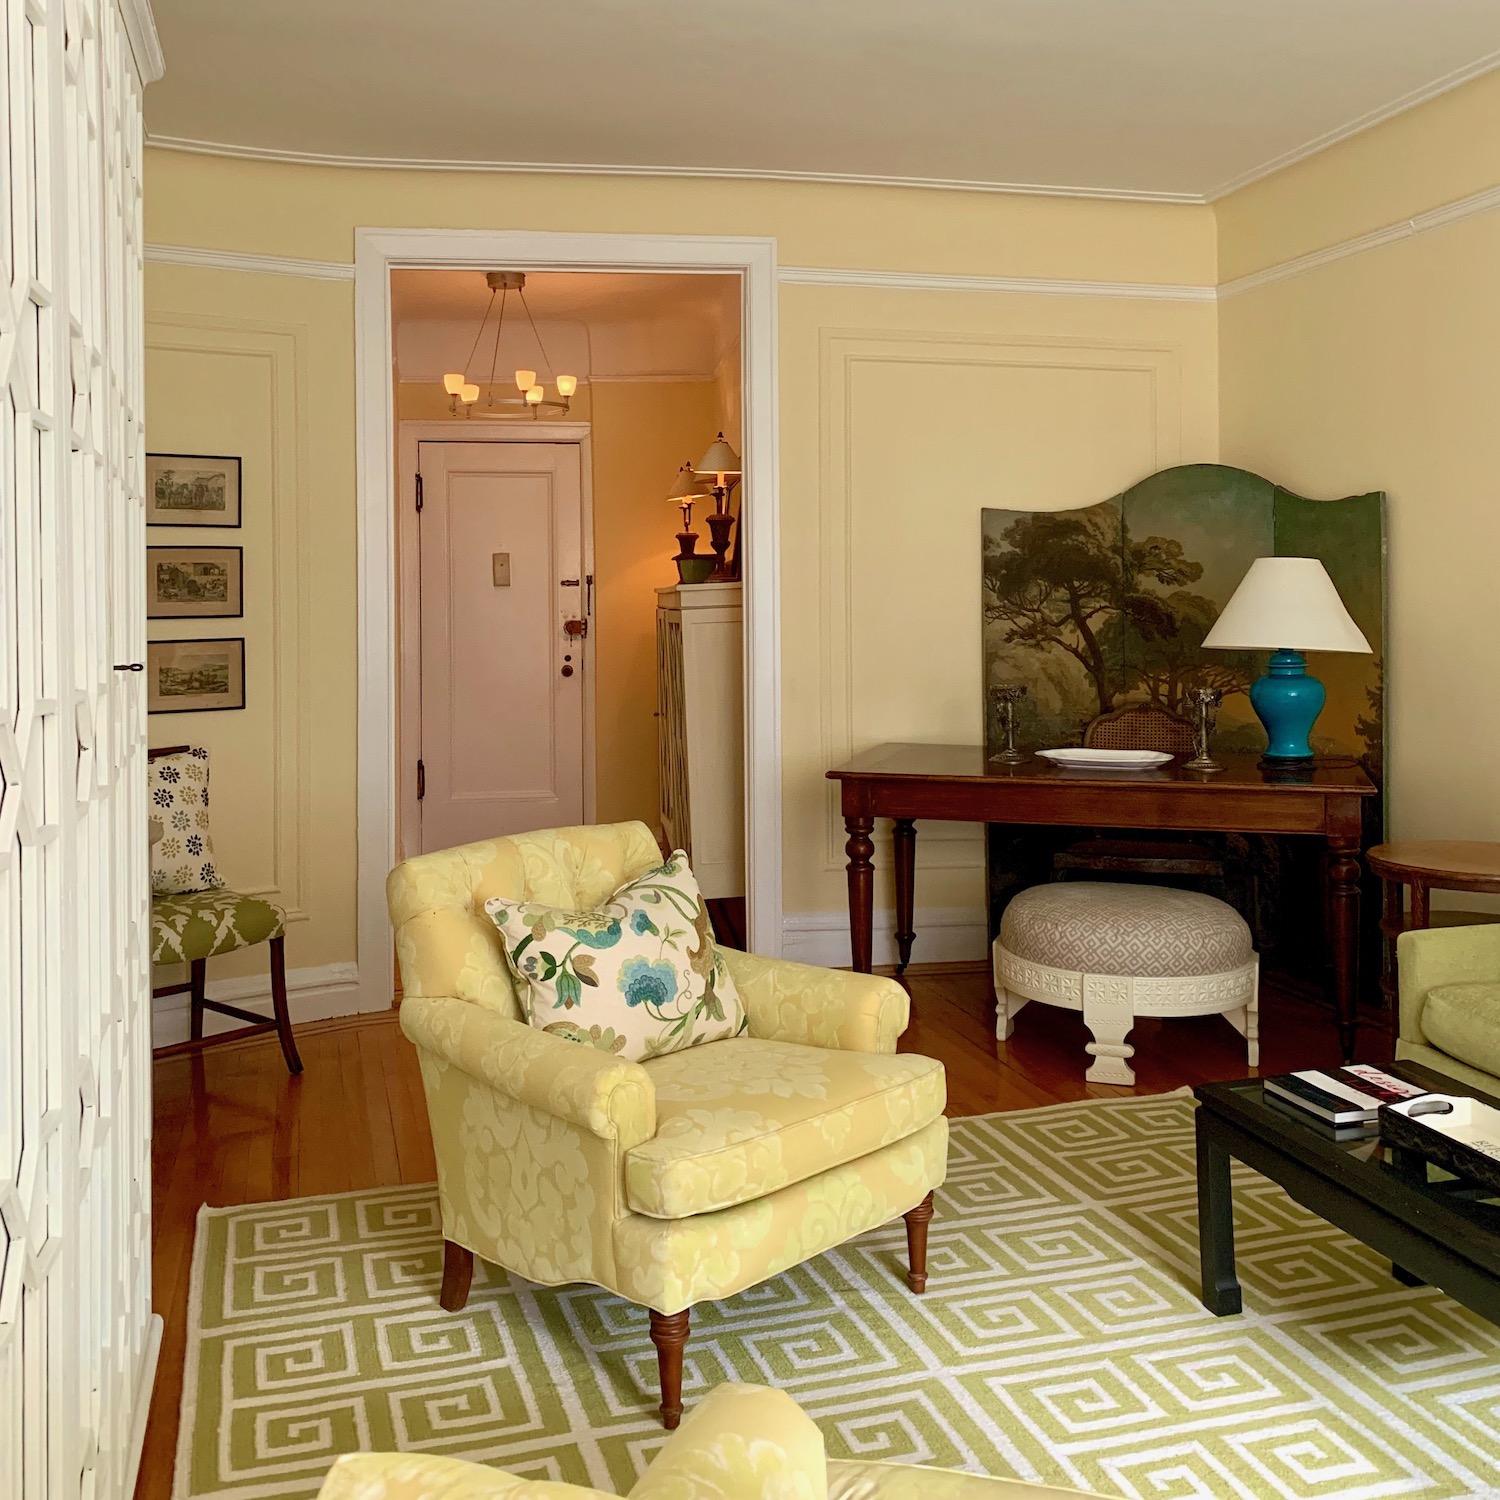
Below is my pretty bedroom that I hated to leave.

However, I’ve recreated all of the beautiful architectural details that I adored in that cozy room.
As it happened, the staircase ceiling break-through met the wall at exactly 12″ below the ceiling.
I know. It’s not ideal. But, there was no choice if anyone ever wants to put in a queen-sized bed.
This isn’t the best image, but it gives an idea of how it ultimately turned out.
So, it worked out perfectly.
For the picture rail, we used the same moulding as is upstairs for the wainscoting.
However, it’s a hunky moulding and I felt that something with a bit less heft would be more suitable for the lower level.
For the panel mouldings and wainscoting, we used the moulding shown above.
Note: A widget is coming up that includes links to all the moulding and bathroom tile, too!
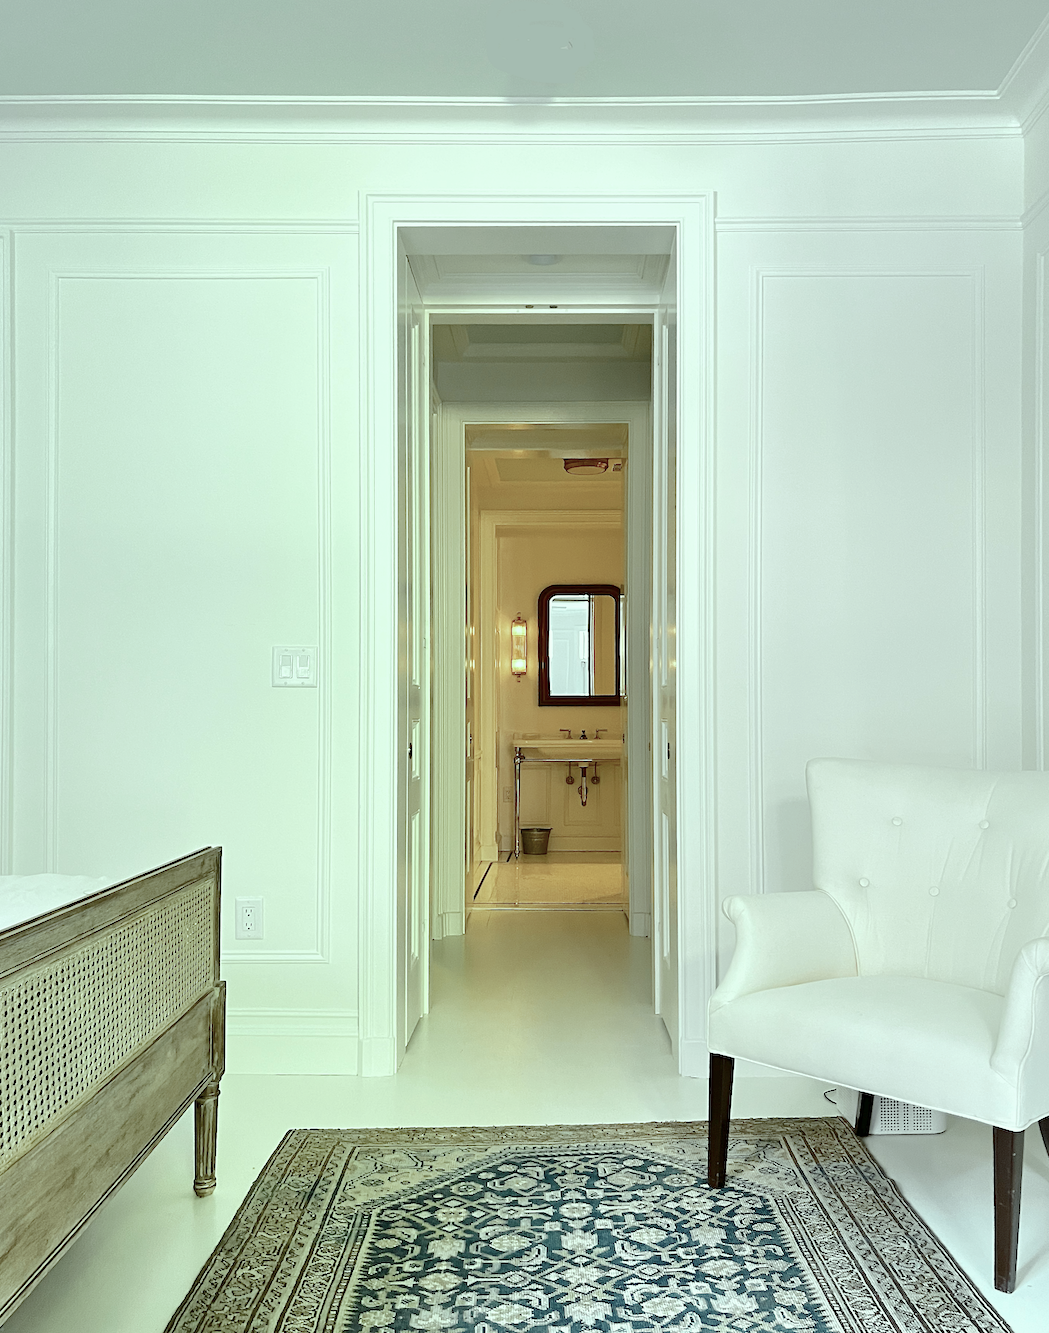
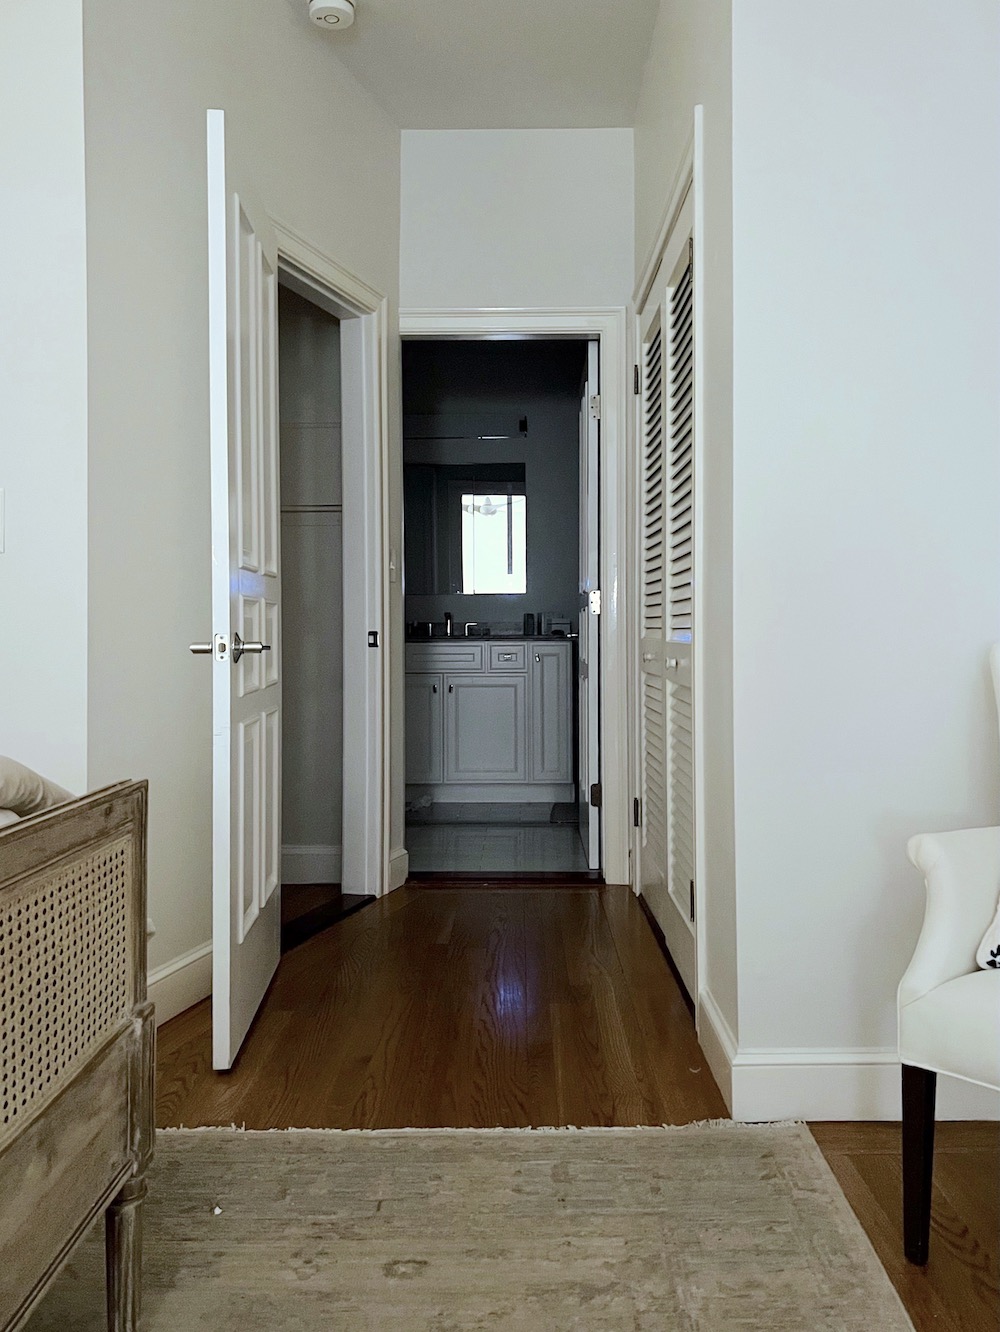
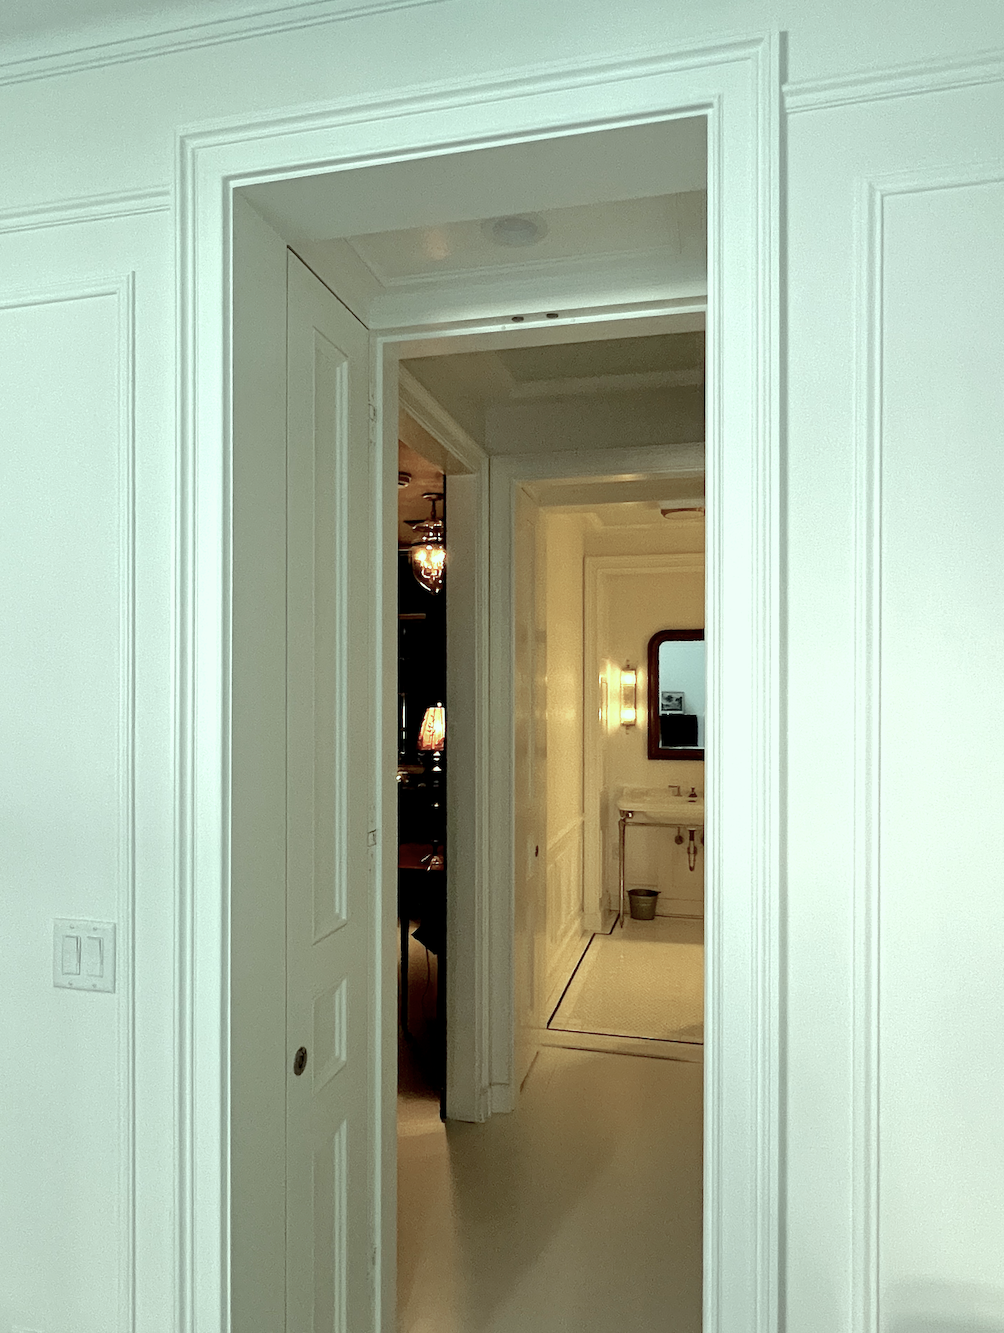
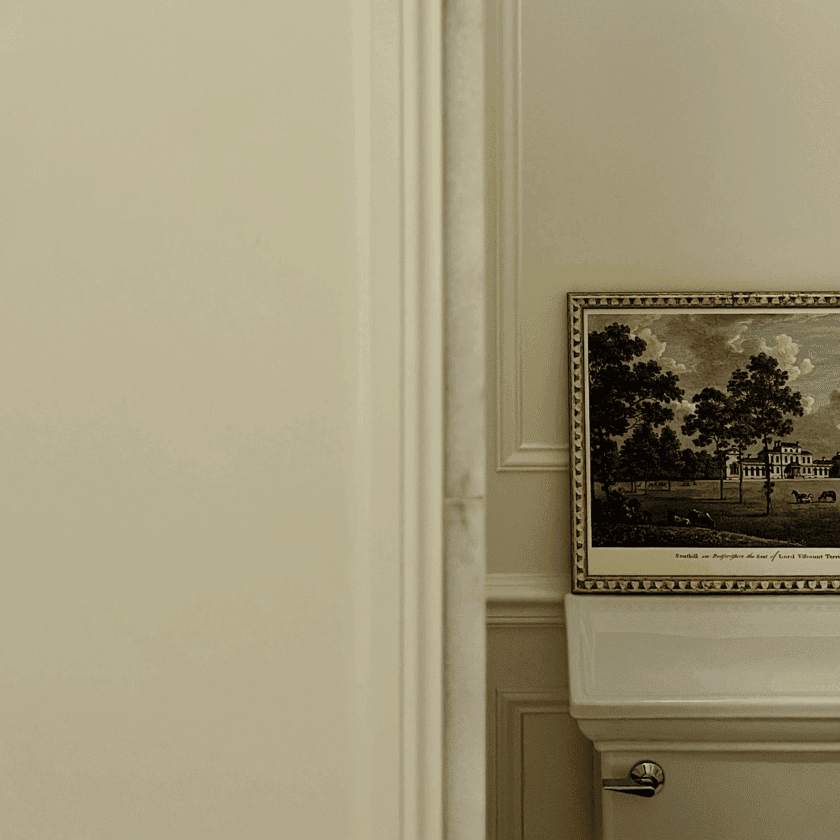
The view from my bedroom into the bathroom. I had to erase the smoke detector. I don’t know why they put it at the entrance of the bedroom, unless it’s a code thing, but I don’t think so. There’s another smoke detector in the lower entry, and there are two smoke detectors upstairs. It’s code, as there must be a detector in each bedroom and one in the living spaces.
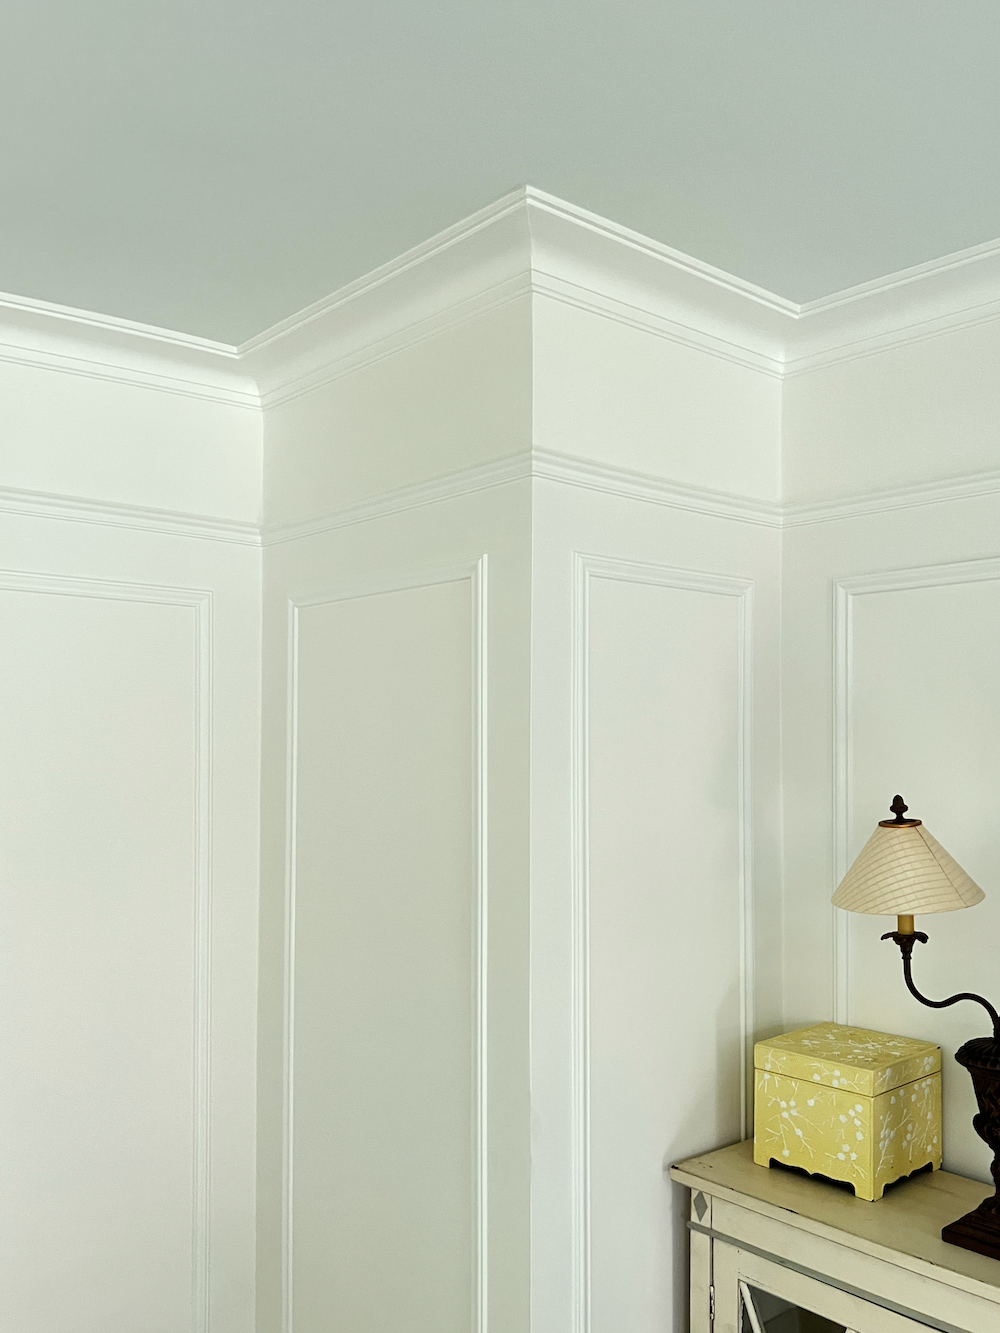
Below, we can see the beautiful mouldings from Orac Decor. Again, if you missed it, there’s a widget at the end that links all the mouldings to where they can be purchased.
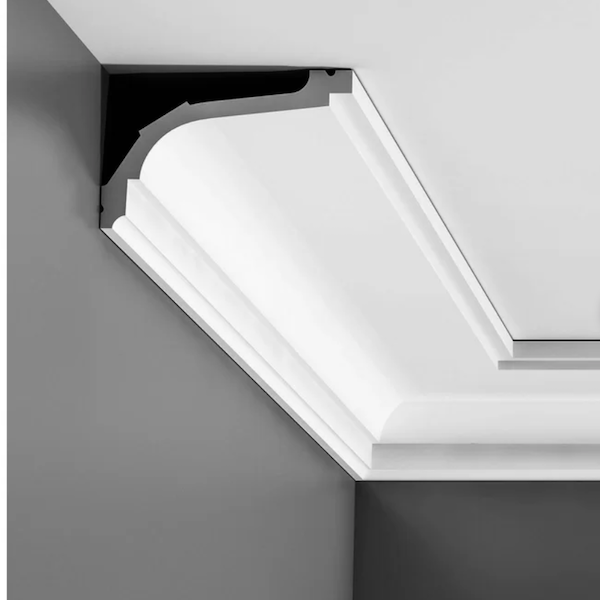

I adore this crown! It worked out perfectly to transform this once banal space into something that looks like a 19th-century home.
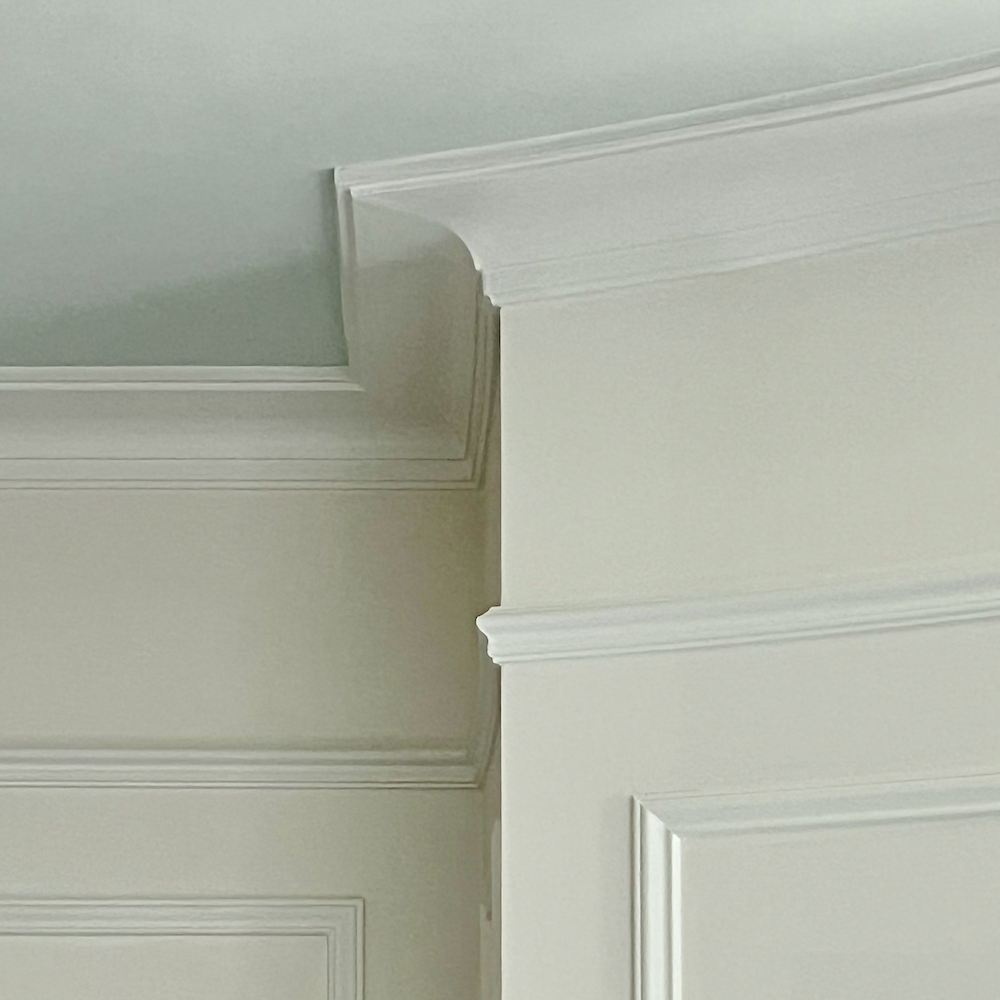
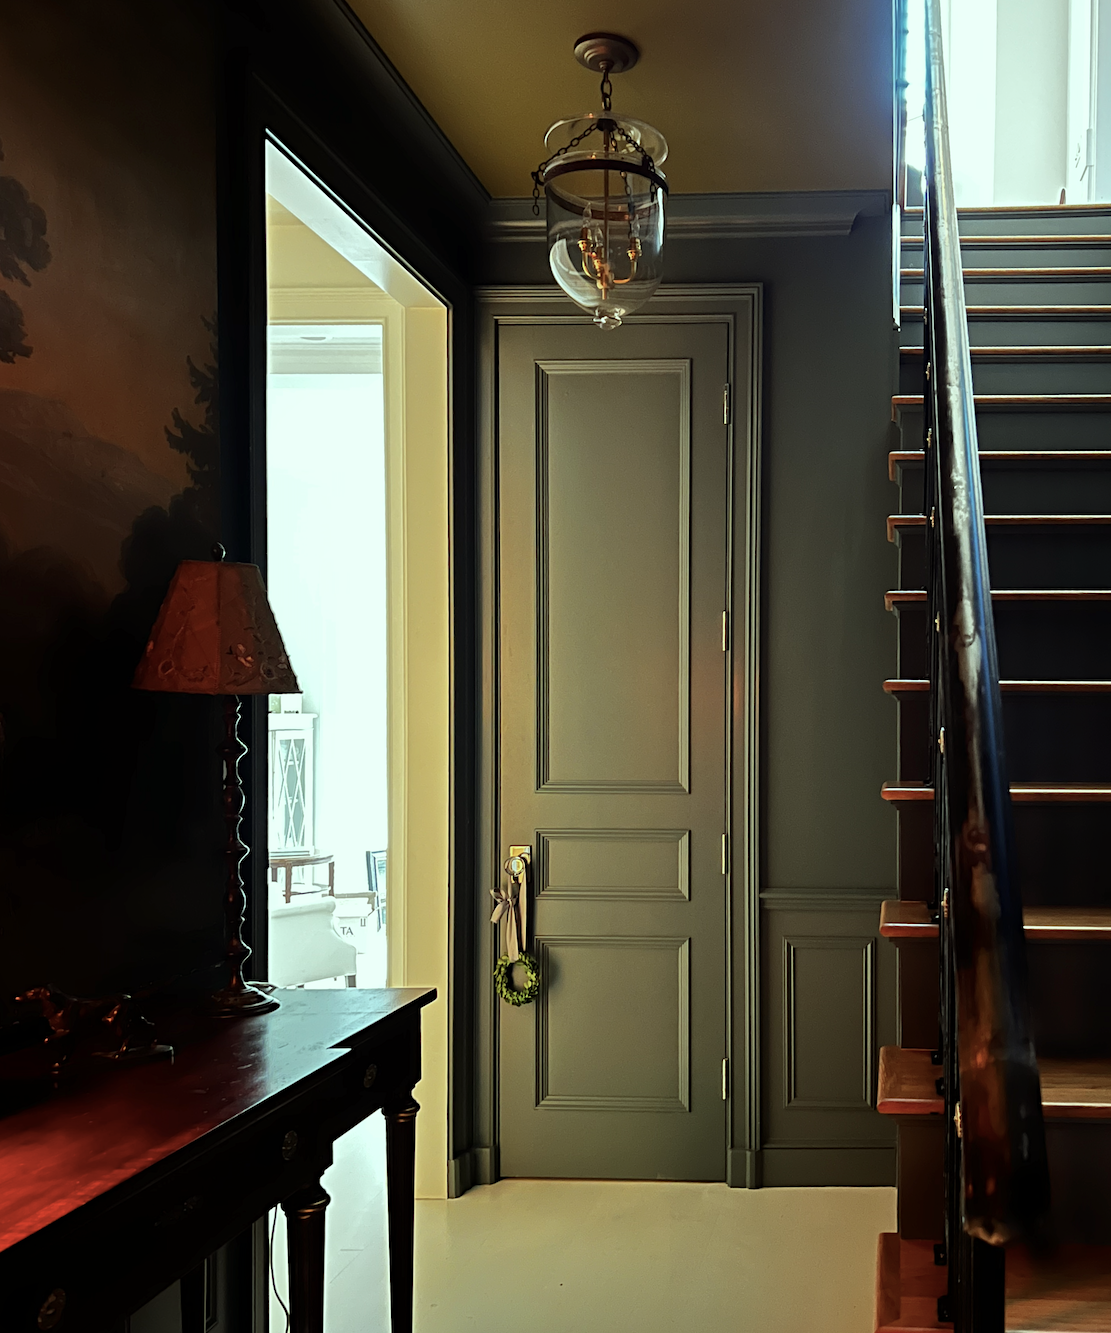
We used the same mouldings in the entry. Only in the entry, we did wainscoting instead of the large panel mouldings and a picture rail.
Below, we can also see the crown moulding, door casing, and plinth blocks.
Why plinth blocks, Laurel?
That’s a terrific question.
I loved this door casing; however, it only came in eight-foot lengths, and the doors are eight feet. Since we needed a few more inches to make the mitered corner joint, the solution was a plinth block at the foot of the casing.
The wainscoting is at 33″ as it is upstairs. I followed Brent Hull’s advice and am so glad I did.
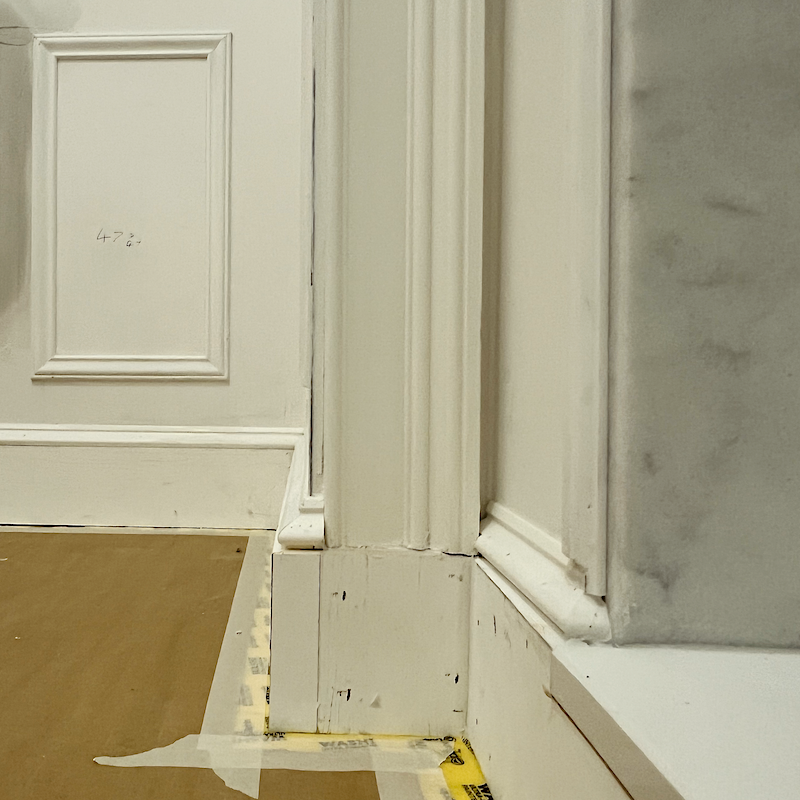
It’s not all that visible in the entry, but you can easily see it here on this small wall by the staircase. To the left is the linen closet.
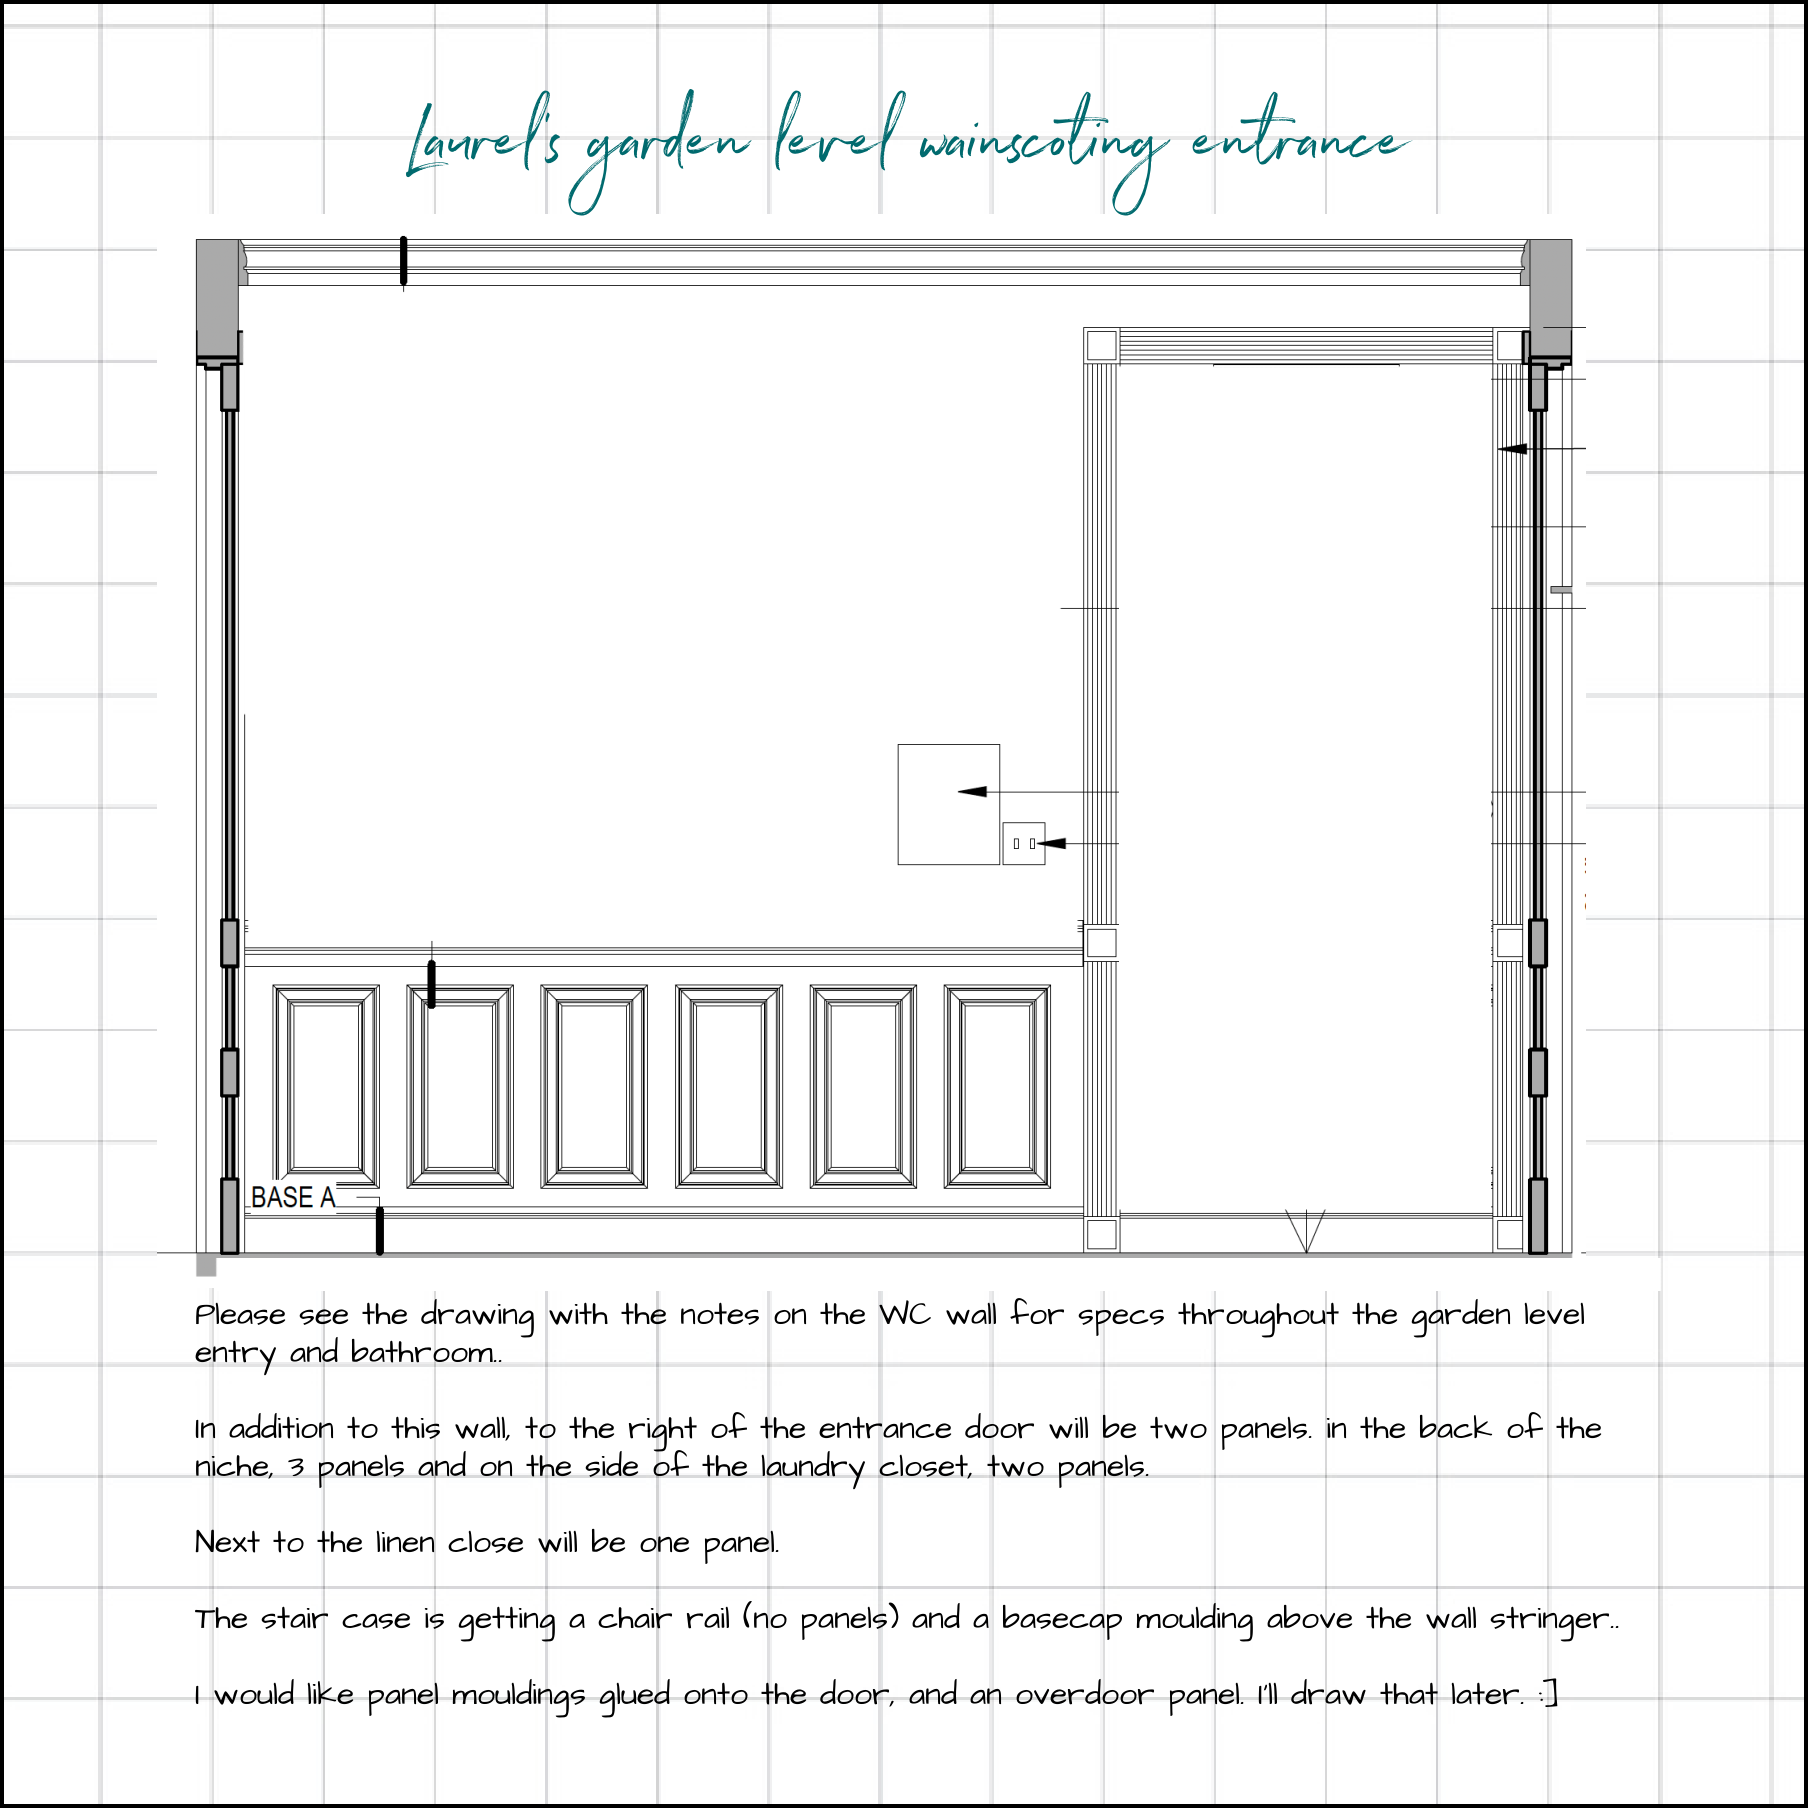
The chair rail is the same one we did upstairs.
We did the same baseboard that was original in the bedroom.
However, in the bedroom, we added a small piece of moulding as we did in the entry. Only the entry is upside down. lol
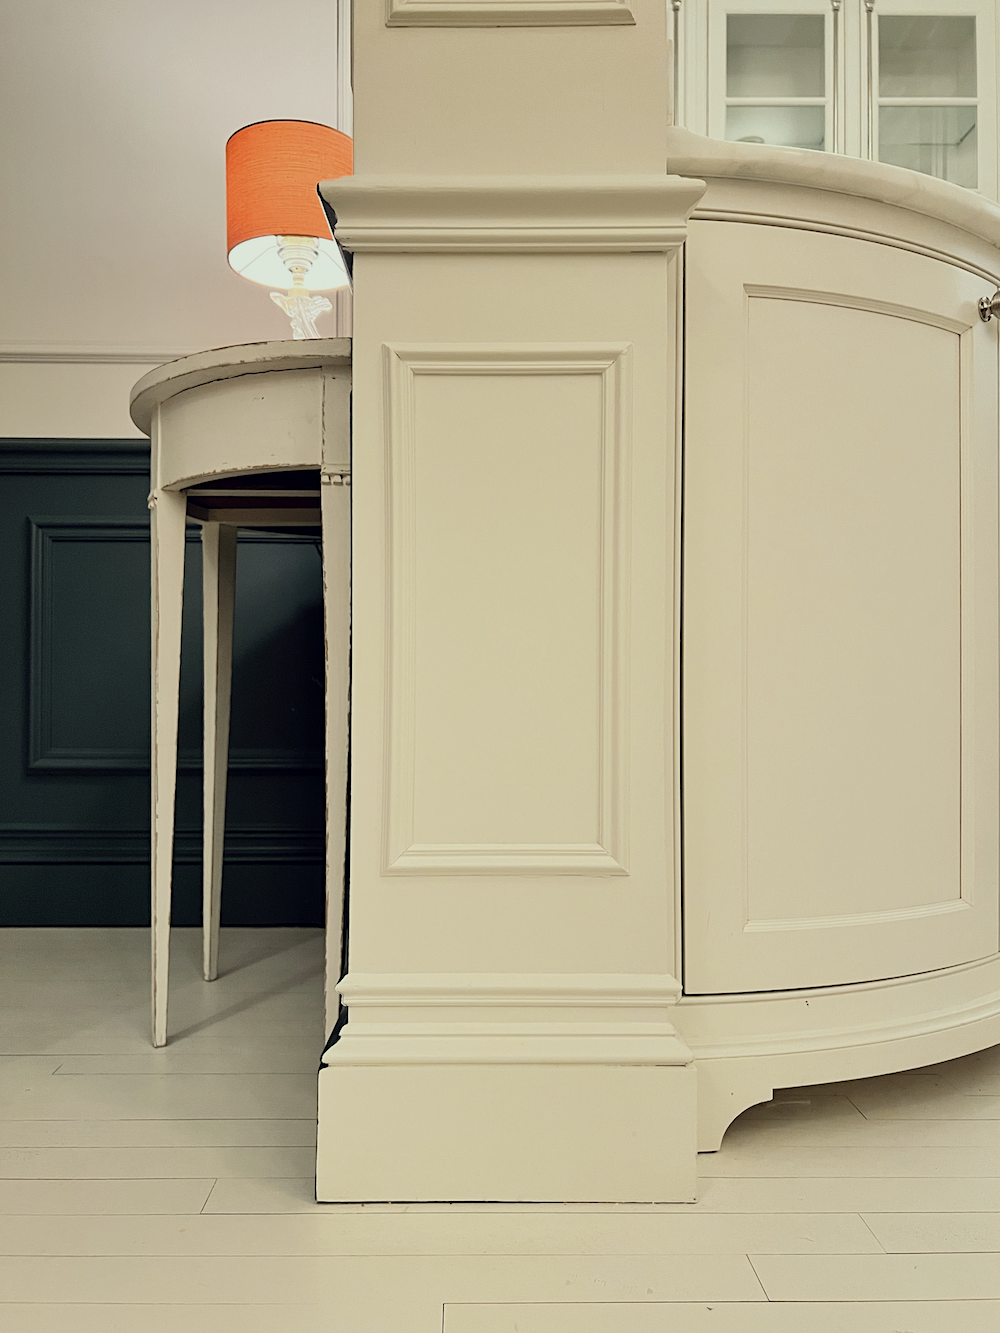
Above, you can see the baseboard with the 1″ panel moulding above it in April 2024.
One thing to remember is not to stress too much about applied wall mouldings.
That’s because at least half of it might be covered with the furniture, anyway.
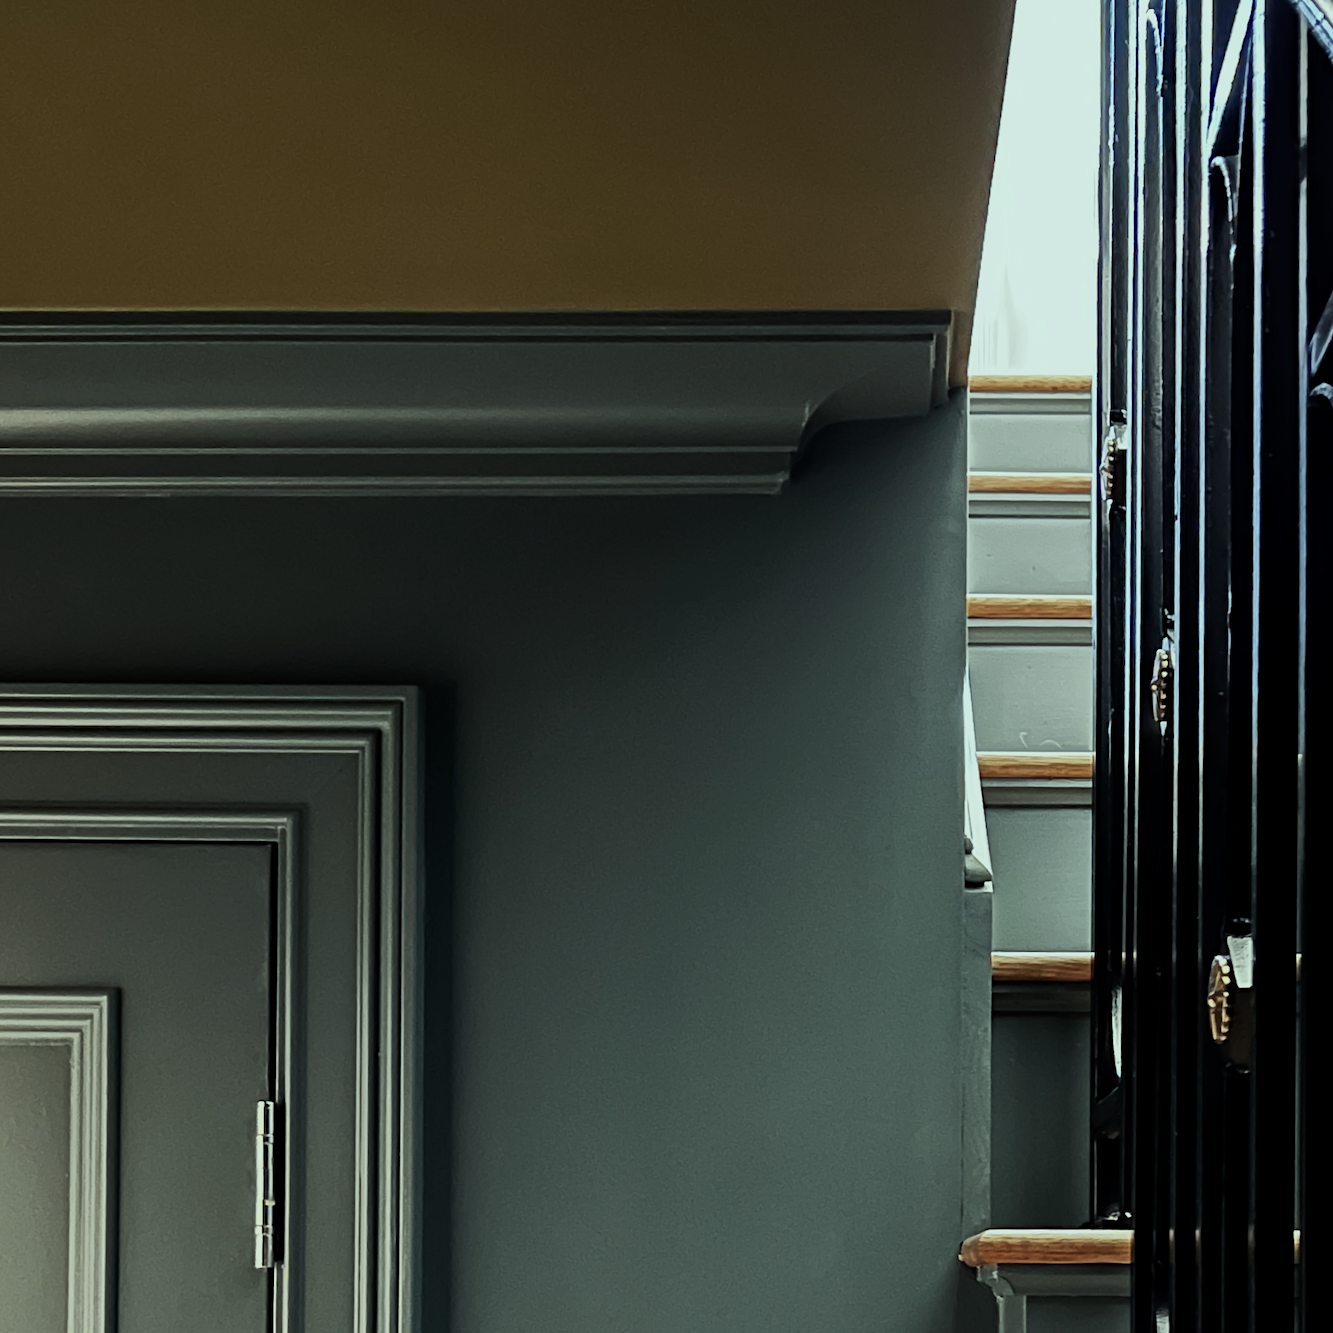
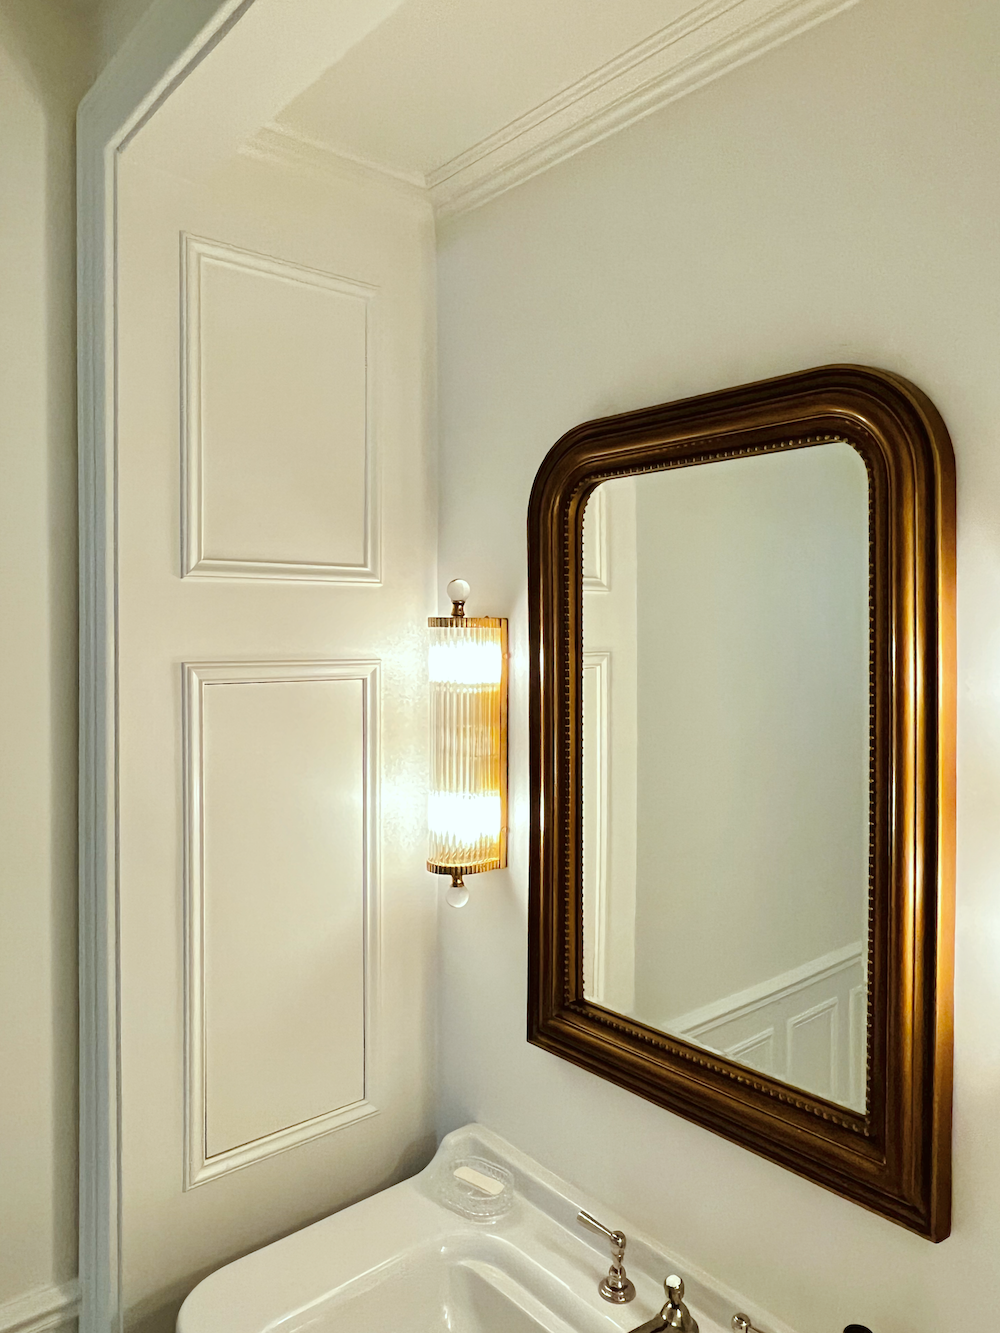
The carpenters did a superb job of the crown moulding return.
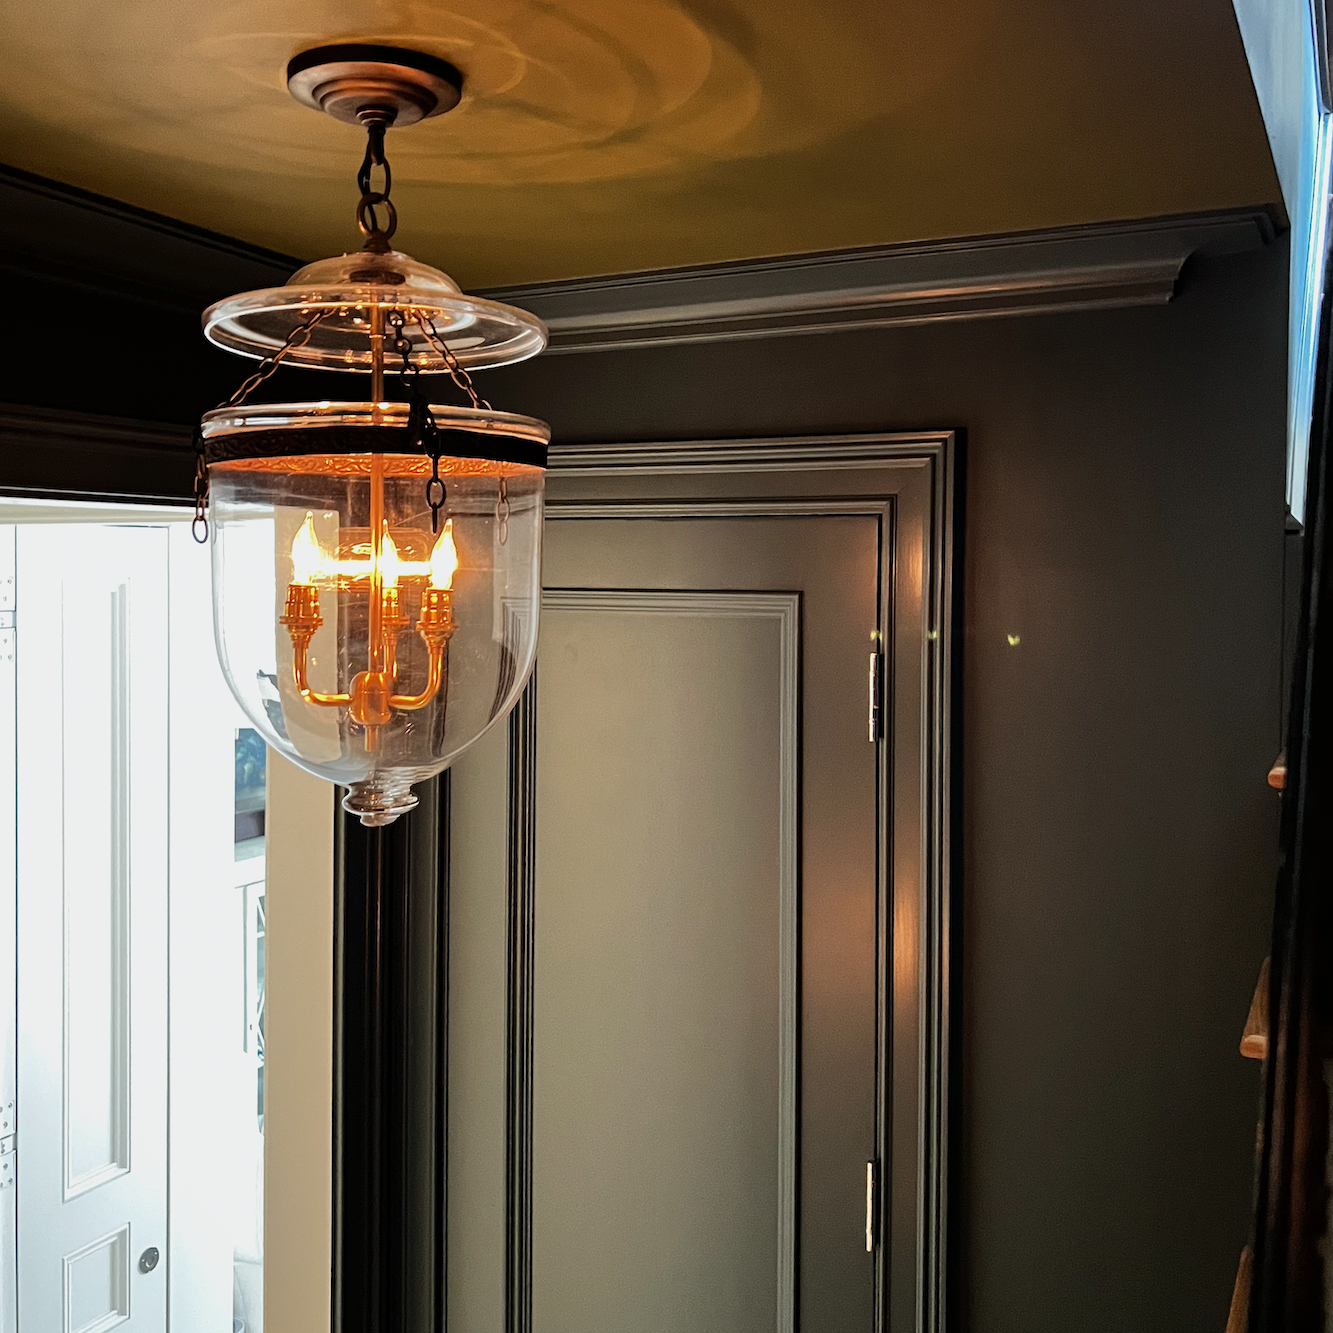
The Anglo-Indian smoke bell lanterns are the perfect size. They could’ve even come down one more link, but they are fine as is.
We need to stop for today. We’ll continue with the embrasure hall and bathroom shortly.
However, I would like to leave you with the image below of some of my favorite architectural details.
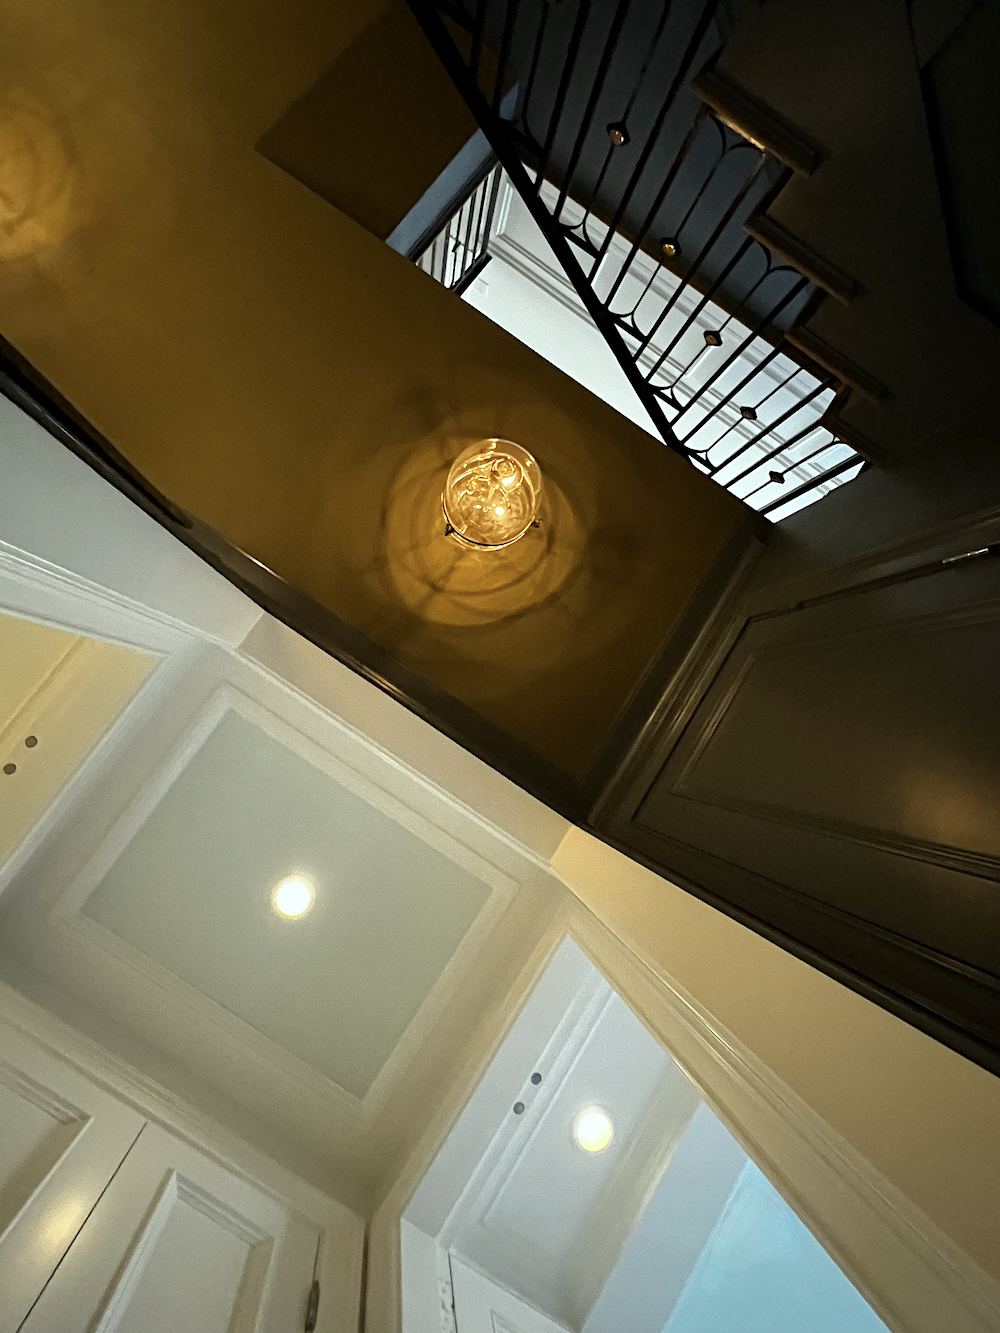
How did I get this shot? I was lying on the floor. It’s amazing what one can see when looking up. We’ll pick up here for next time.
Oops! Sorry. I’m an hour late with the widget. Here it is!

xo,

***Please check out the recently updated HOT SALES
and
Part 2 Begins Here
*********************************************************
Part 2 Begins Here
Hi Everyone,
Oh my, the weather has gone from steam bath to positively divine. Like, the coasts got switched or something.
This post is a bit misplaced. It should probably be in the post where I talk about my bathroom. However, that post is already pretty long, and I’m also including the ceiling mouldings in the embrasure hall. And so, what I’m doing is linking back to the bathroom post. And in the bathroom post, linking back here.
We don’t have a lot left to cover, but the bathroom is the most concentrated area in the entire home for mouldings and special architectural features.
Additionally, we haven’t reviewed the tile I selected.
However, let’s begin with the ceiling in the bathroom and embrasure hall.
The original bathroom had a drop ceiling that was approximately two inches over eight feet. Yet, as we know, there are nine feet to work with. Well, it ended up being a bit less than nine feet due to some narrow copper pipes. In the end, the center section of the bathroom, like the center section of the embrasure hall, measured close to nine feet. All of the other areas, the embrasure door, vanity, and WC niches, plus the shower, are 8′-3″.
I was so impressed with the Orac Decor polyurethane mouldings that I decided to use two more crowns for these areas. The two tall areas have the moulding below.
style=”text-align: center;”>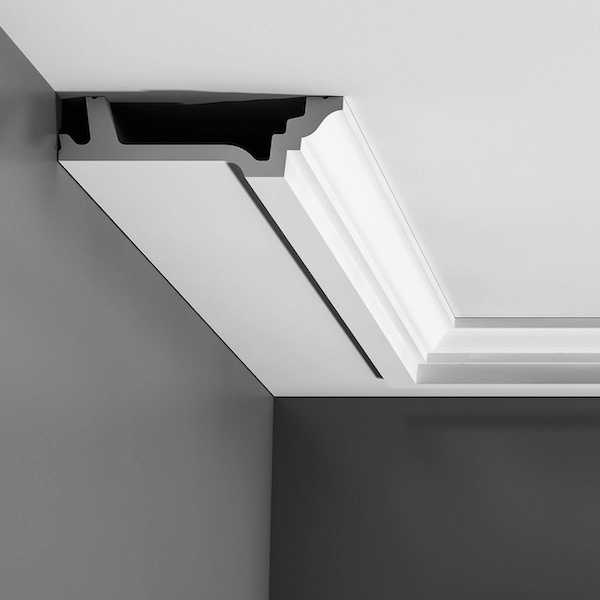
Below you can see it in the hall in front of the primary closet.
I had to bring down the lying on my back image again.
And all the other areas, including the shower, have moulding below. This moulding can go in either direction. Below, the long side is on the wall.

However, we put it on the ceiling.

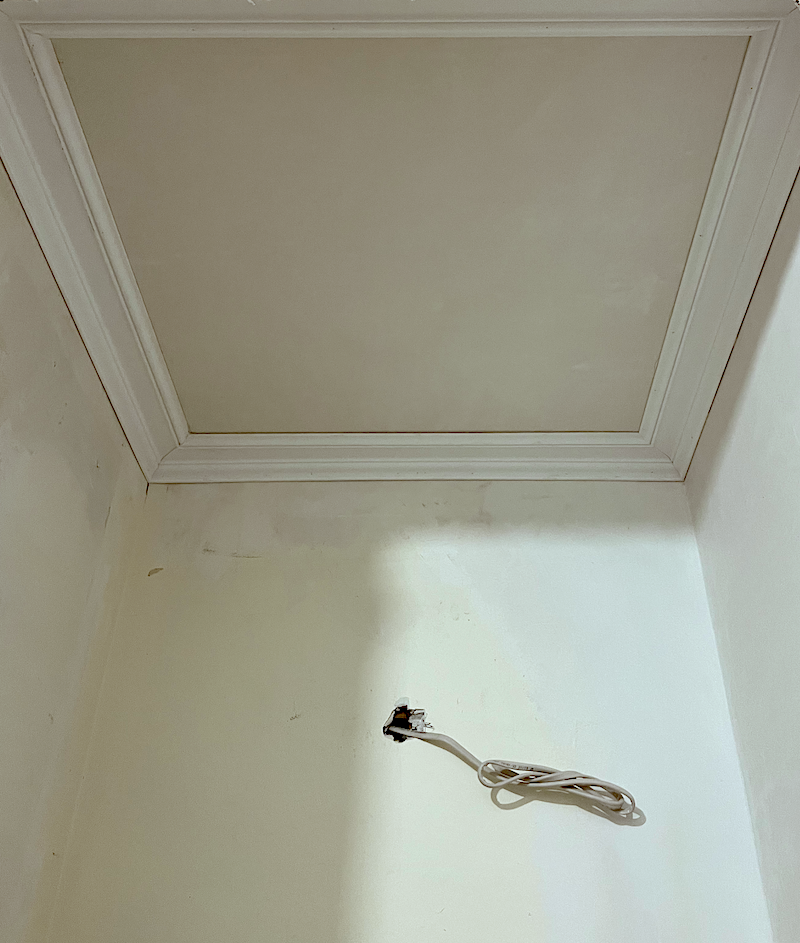
Below is right after it was installed in the WC niche.
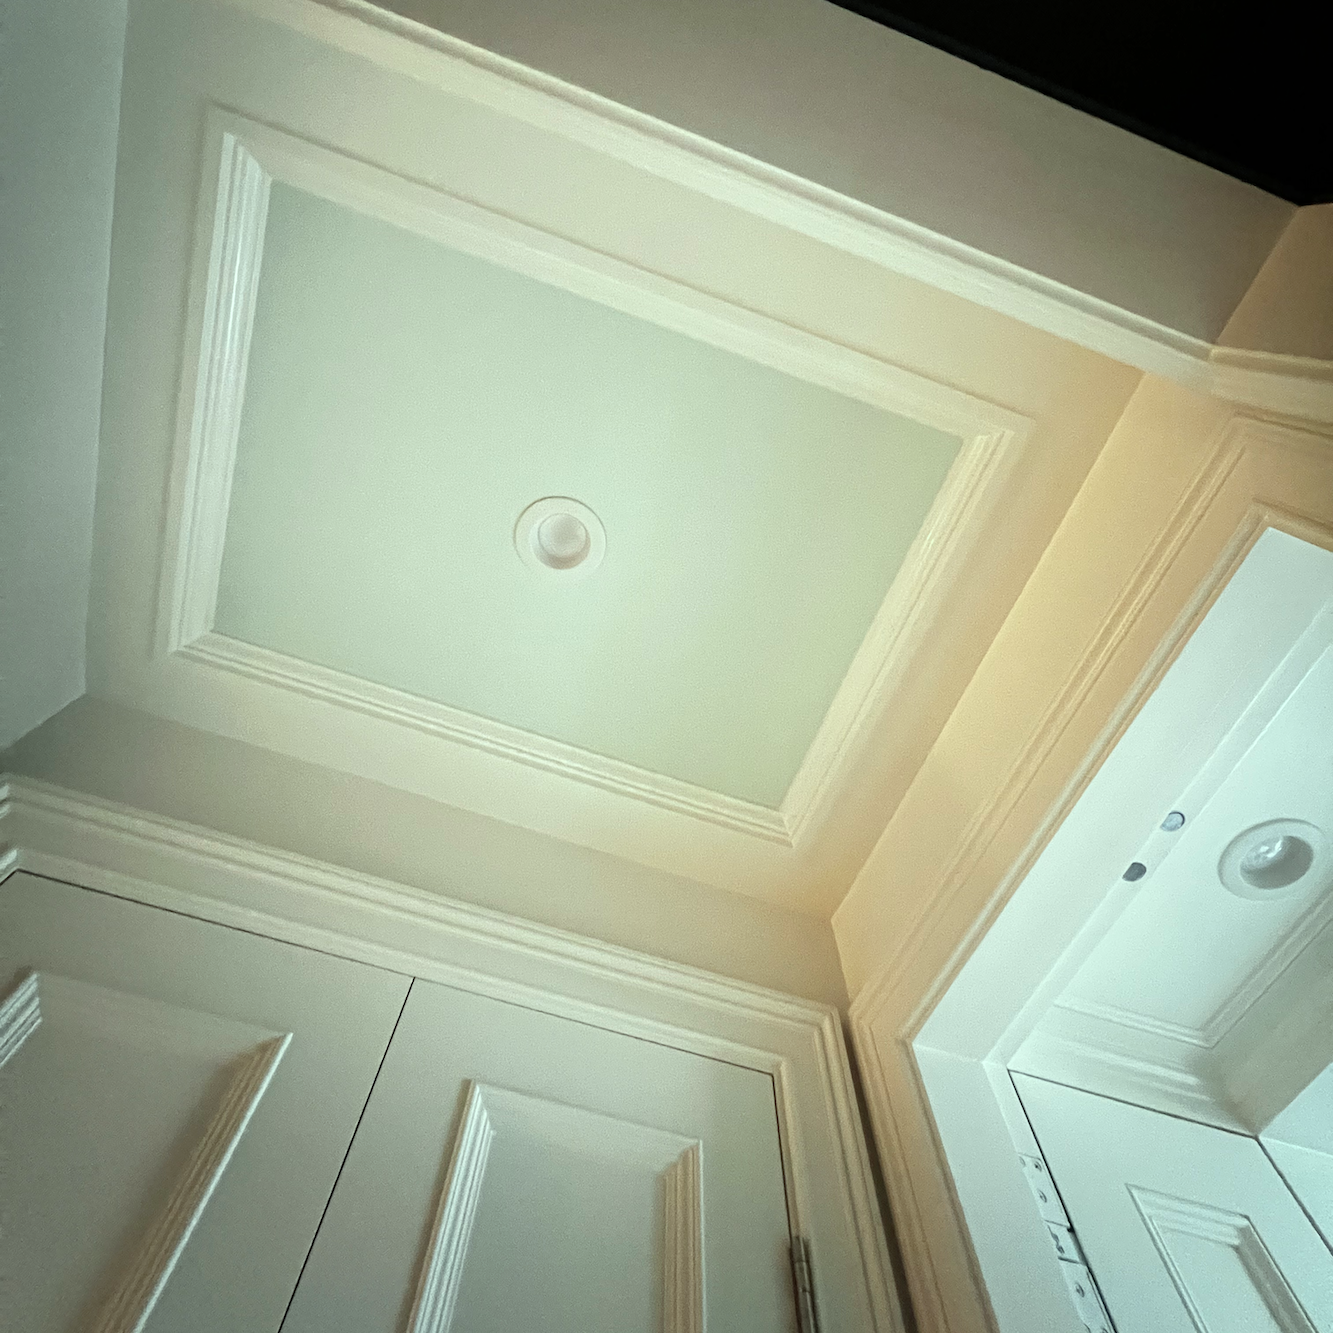
Below is another construction image of the embrasure hall ceiling looking towards the bedroom at night.
And this is how it looks today.
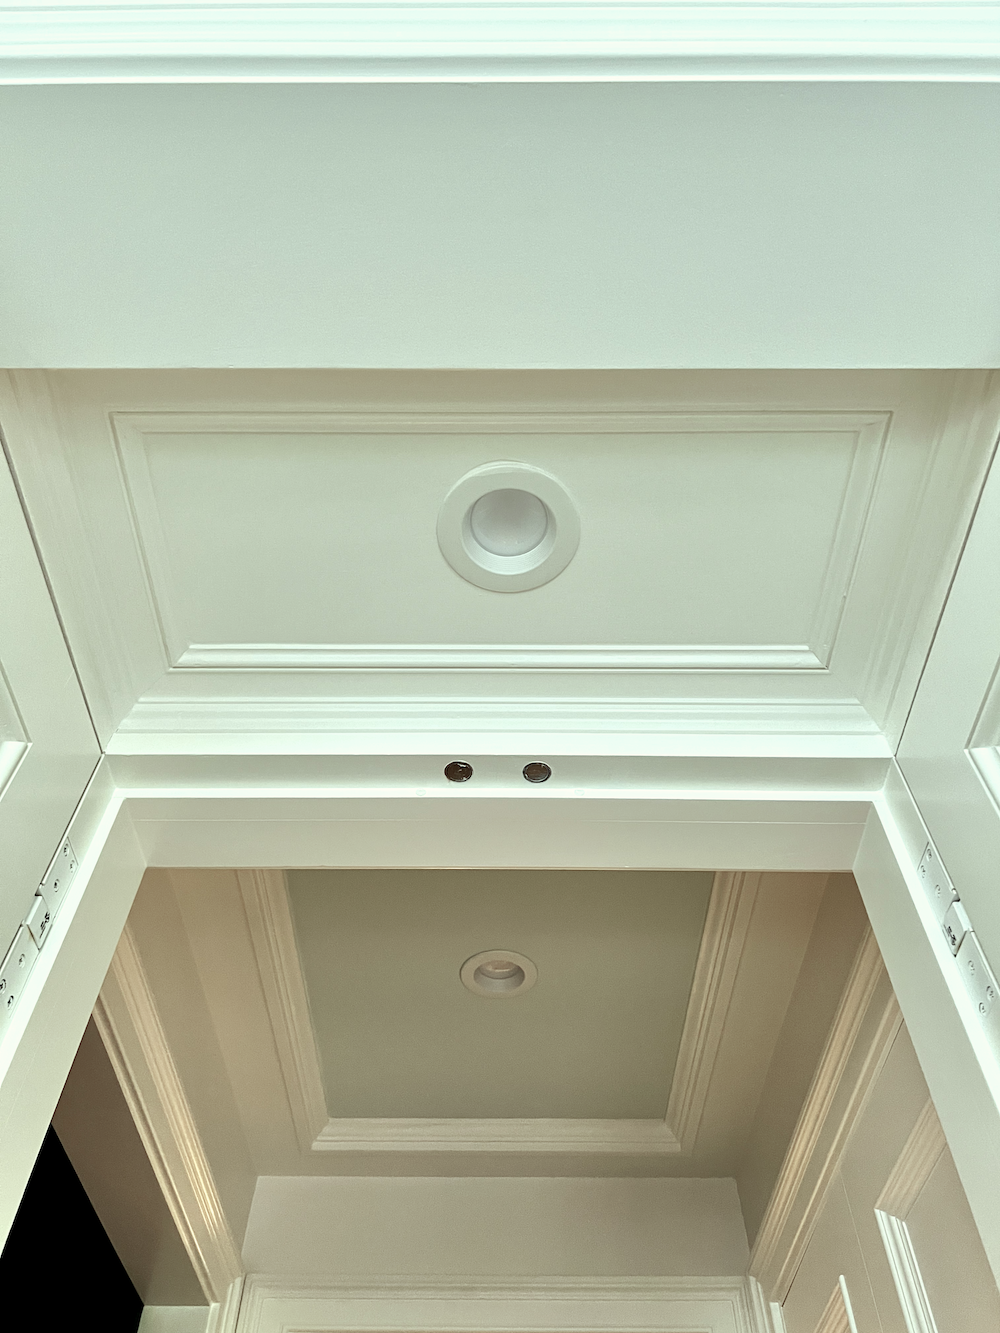
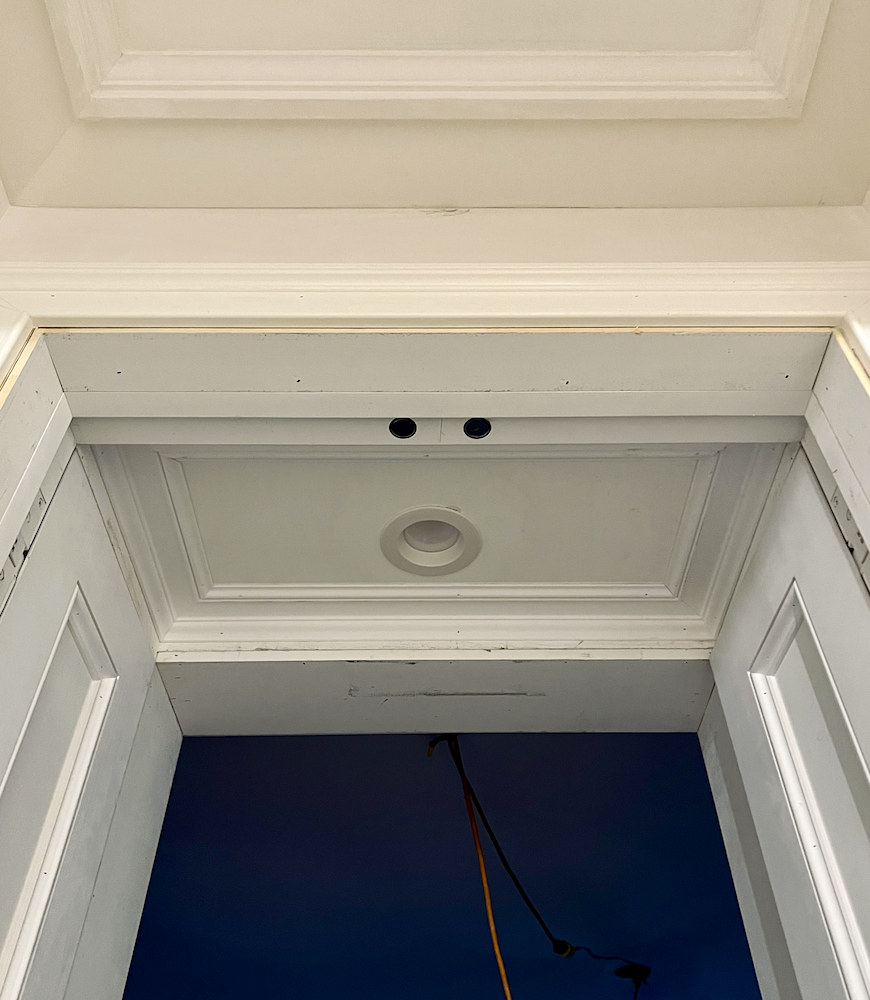
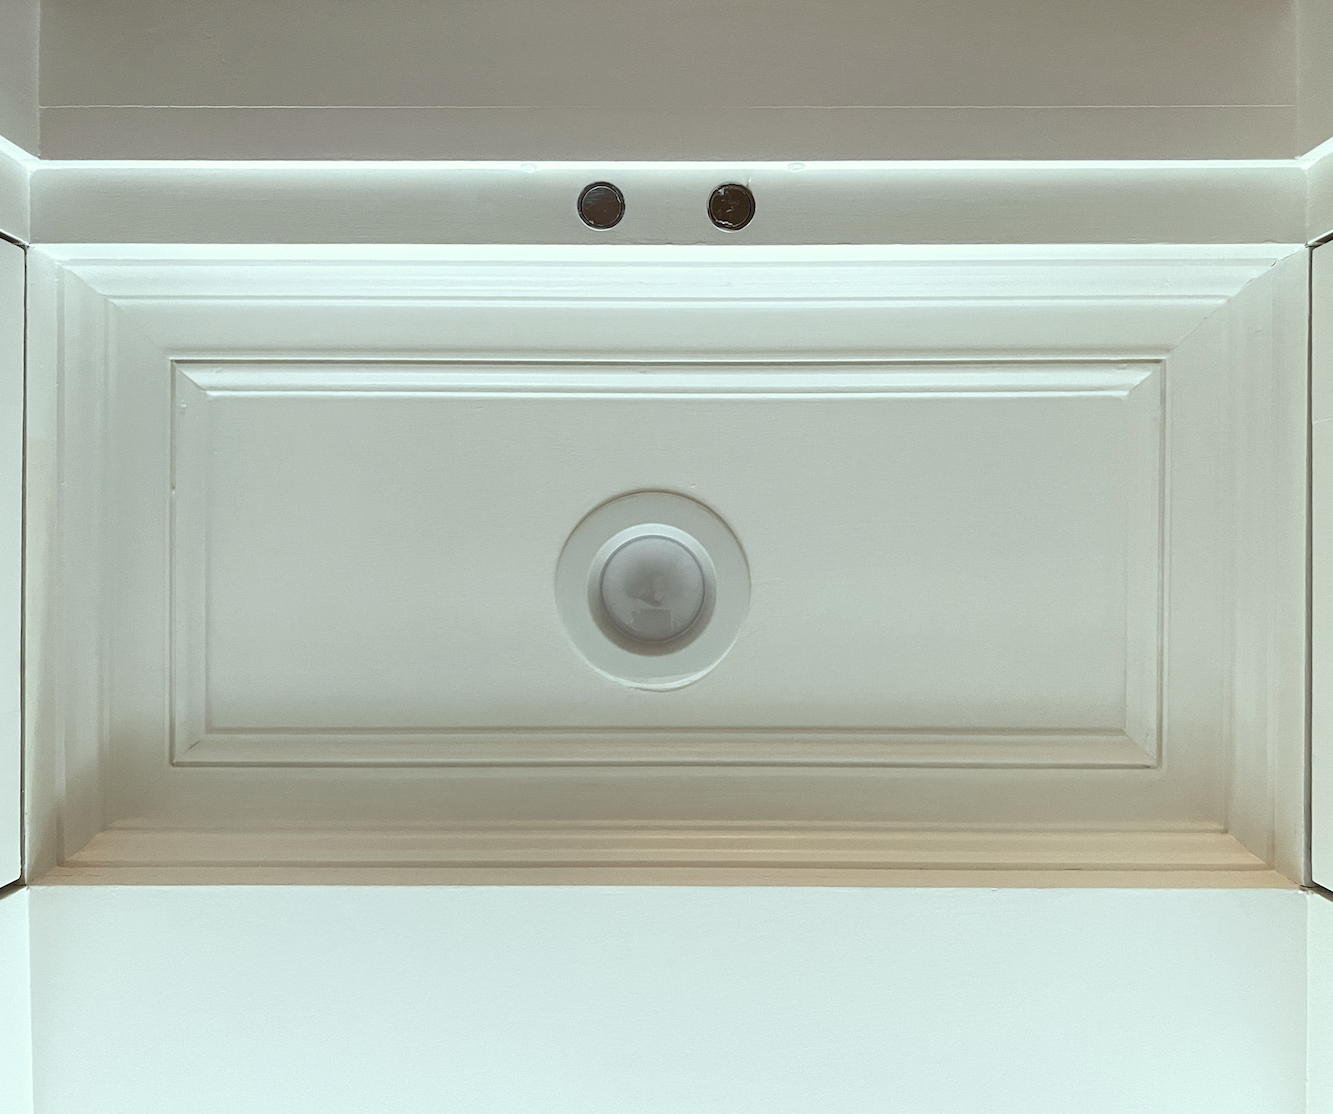
Below is a photo of the smaller moulding in one of the embrasure door niches. The round things are magnets to hold the doors in place.
Wait! You put crown moulding in the shower, Laurel?
Uh, huh. It’s made of plastic and is meant to get wet. It will not warp, crack, or rot like wood is capable of doing. In addition, it’s incredibly light-weight, easy to cut, and install. Theoretically, it can be applied with their special adhesive alone. But my guys also used carpenter nails.
The shower stall required a five-inch piece of marble. I found a source online, but it only came in a four-foot length, so there had to be a seam, as all of the doorways are eight feet high.
Since we did the shower, for continuity, we also did the WC niche.
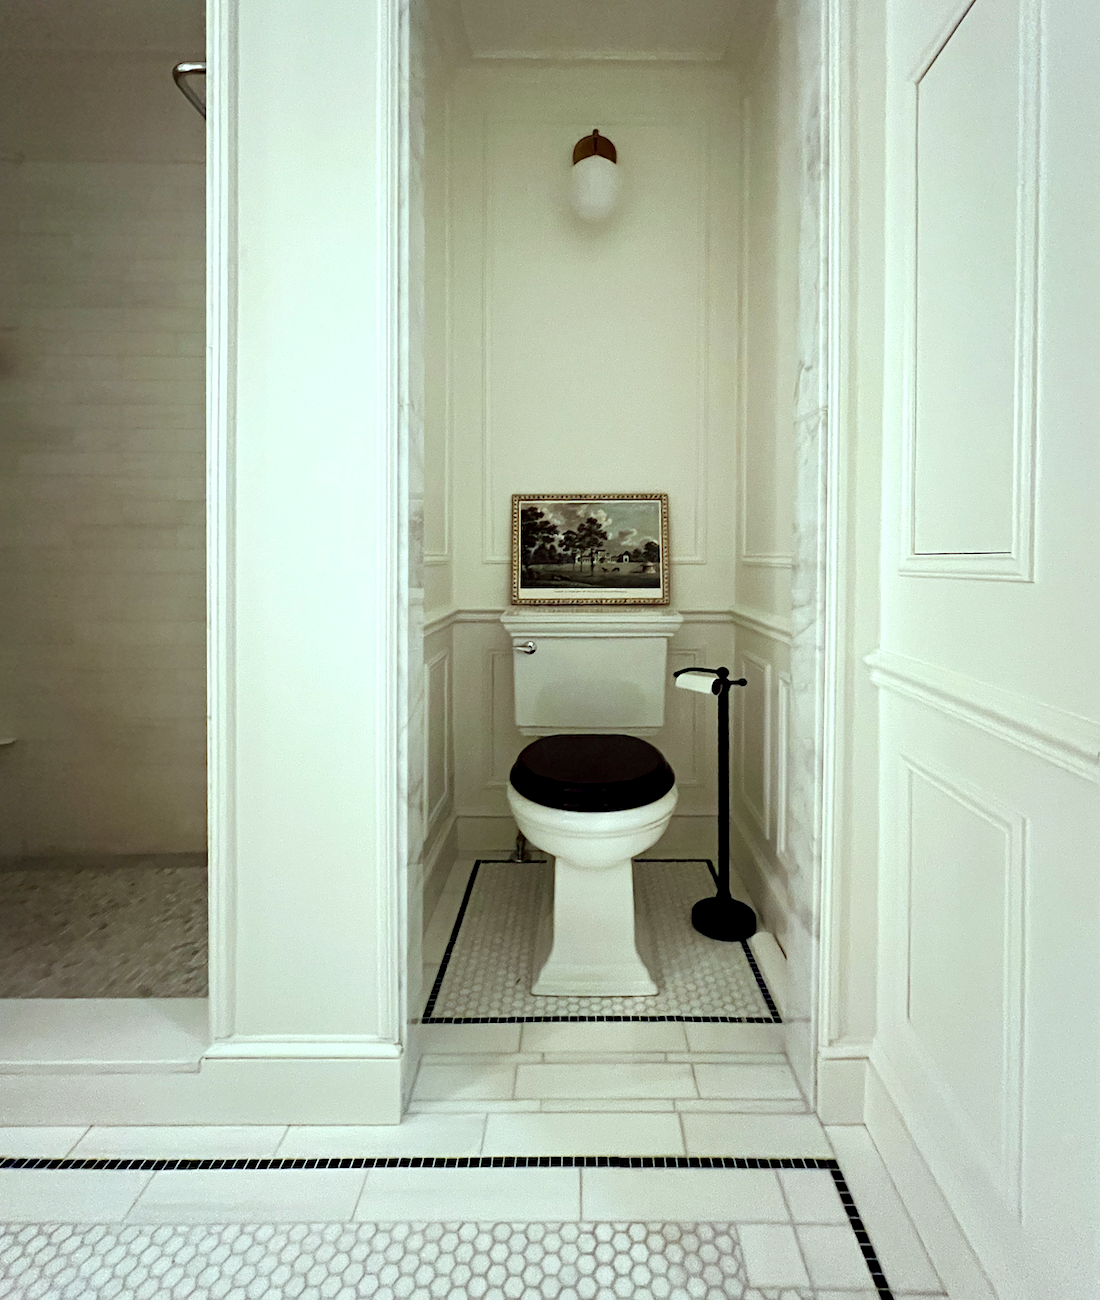
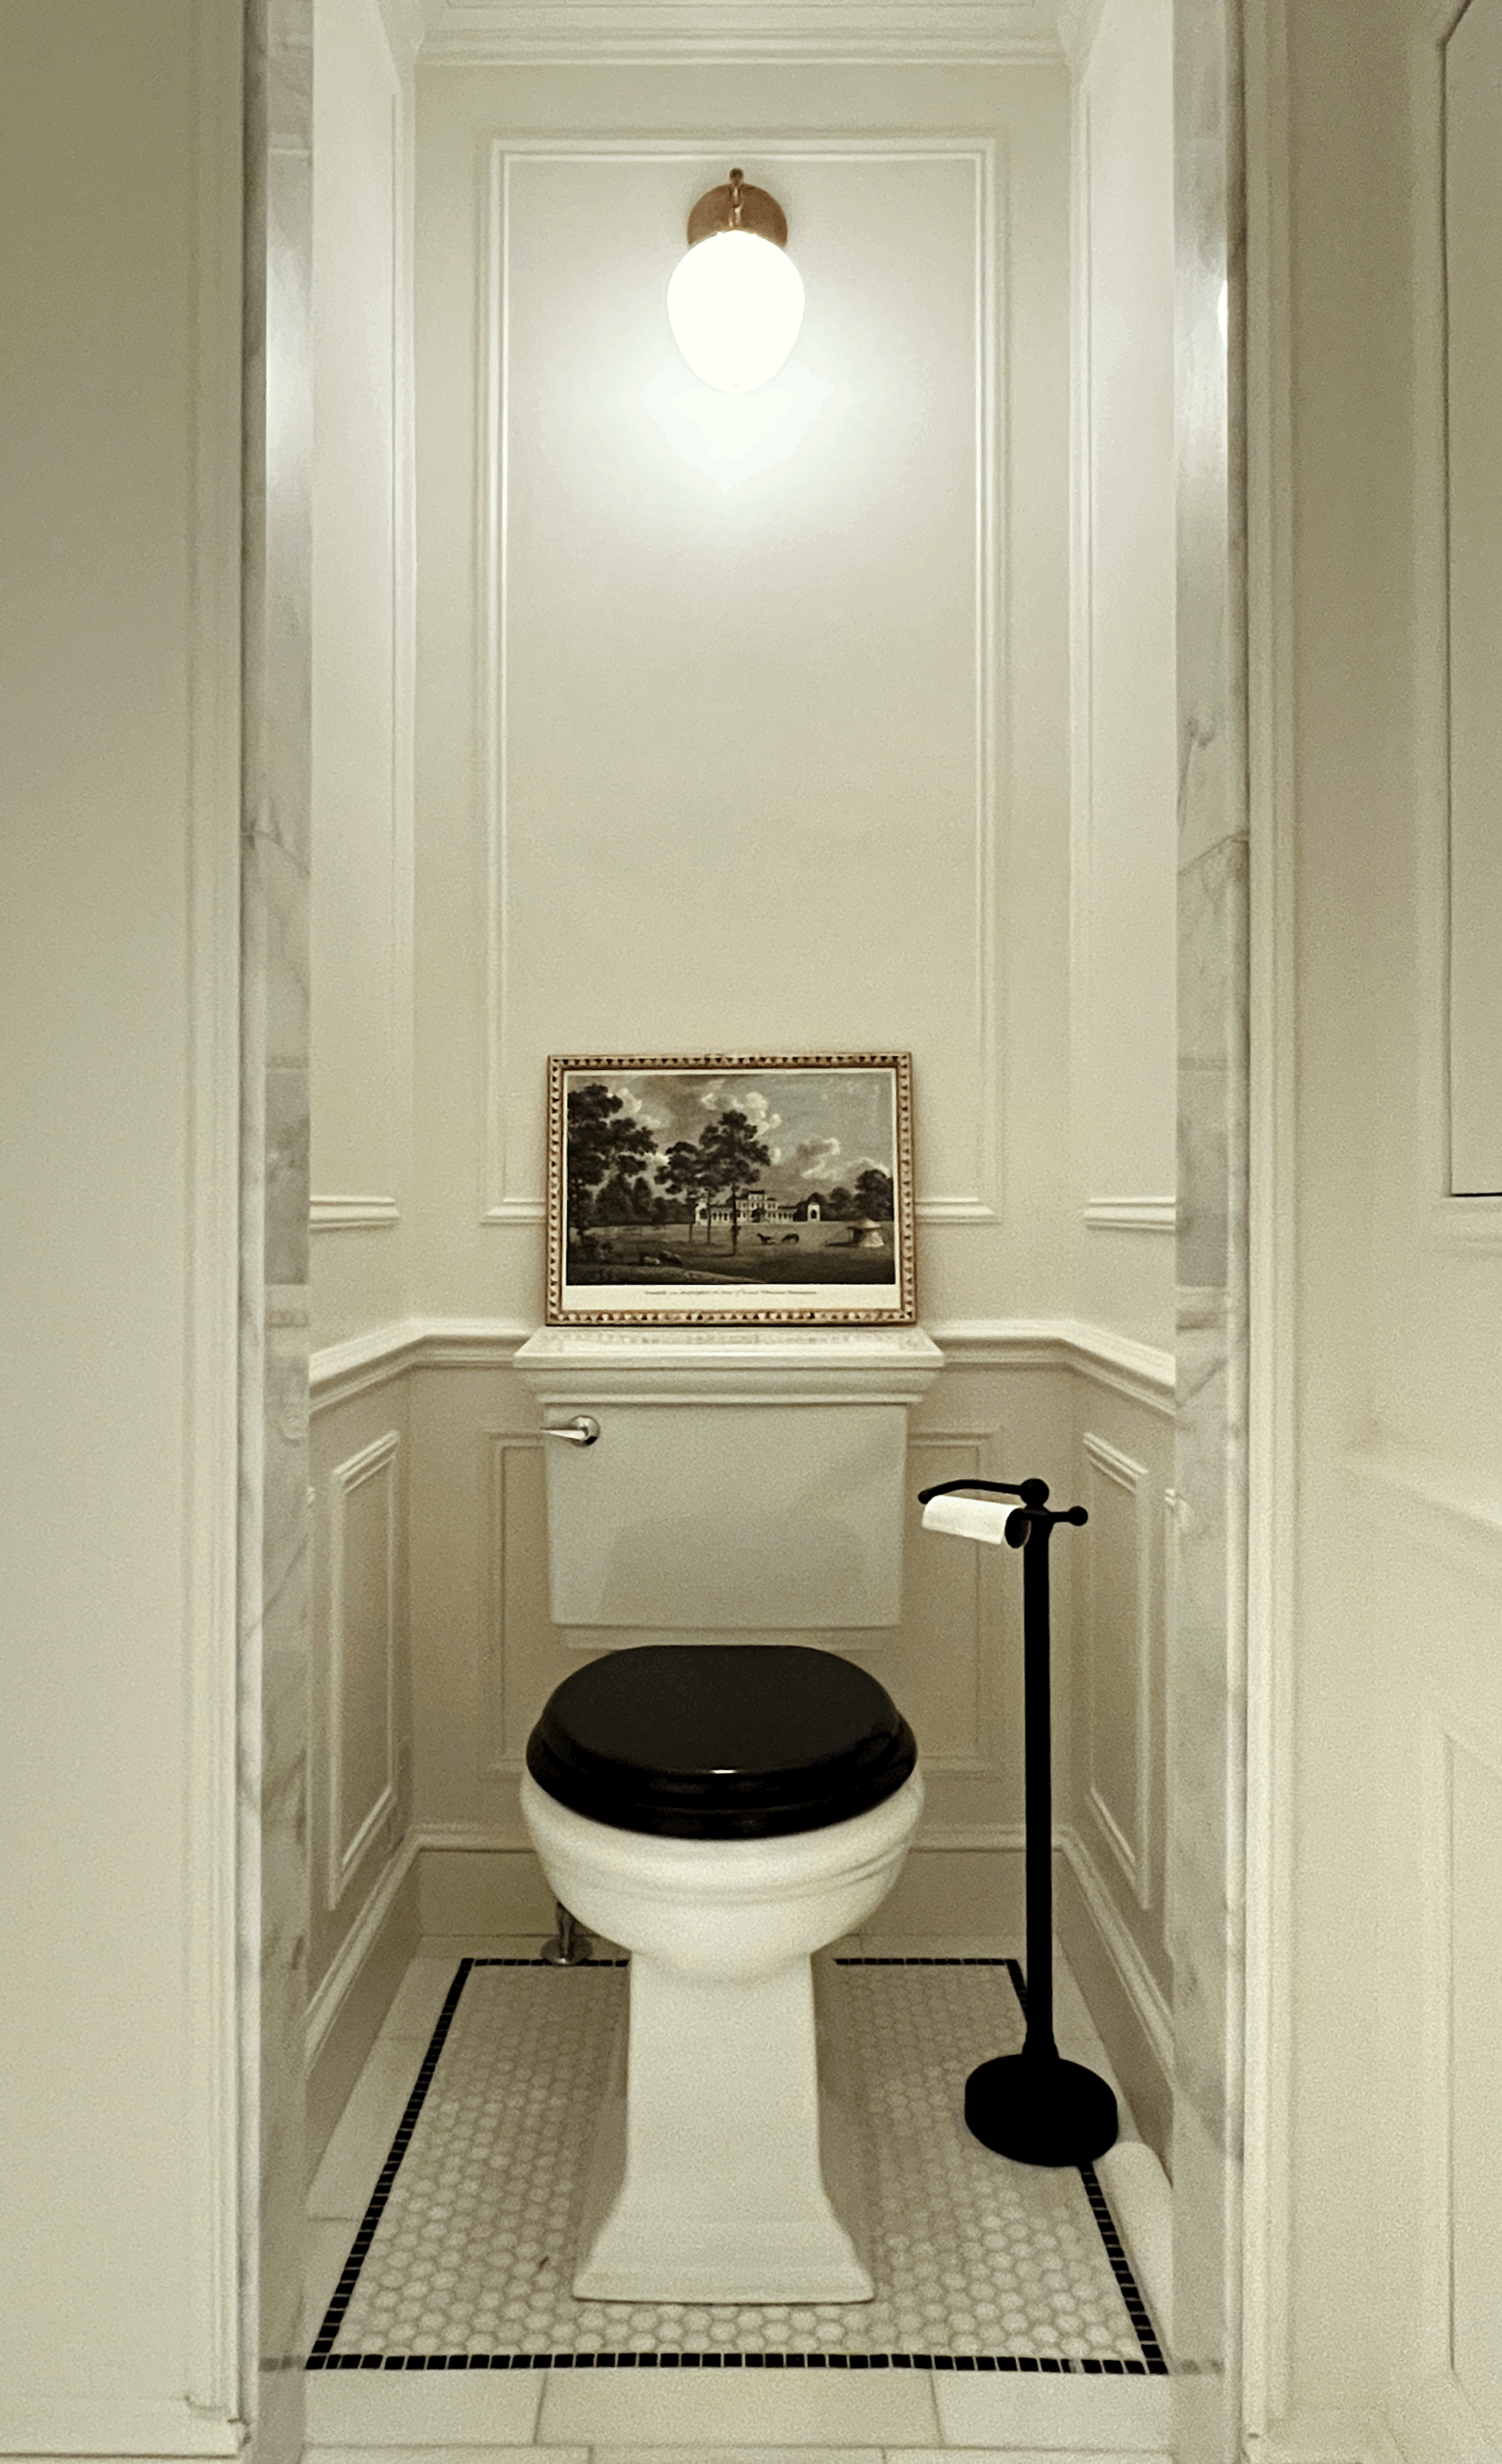
The marble gives a feeling of luxury.
Above is a close-up of the moulding we used to cover the seam between the wall and marble jamb.
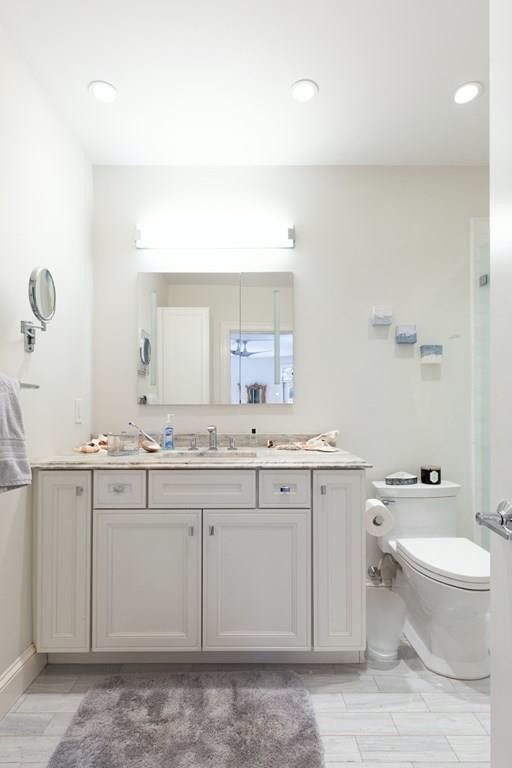
Above is the vanity niched. Here, you can get a good view of the crown moulding and hidden cabinets.
Below is a construction image from last year.
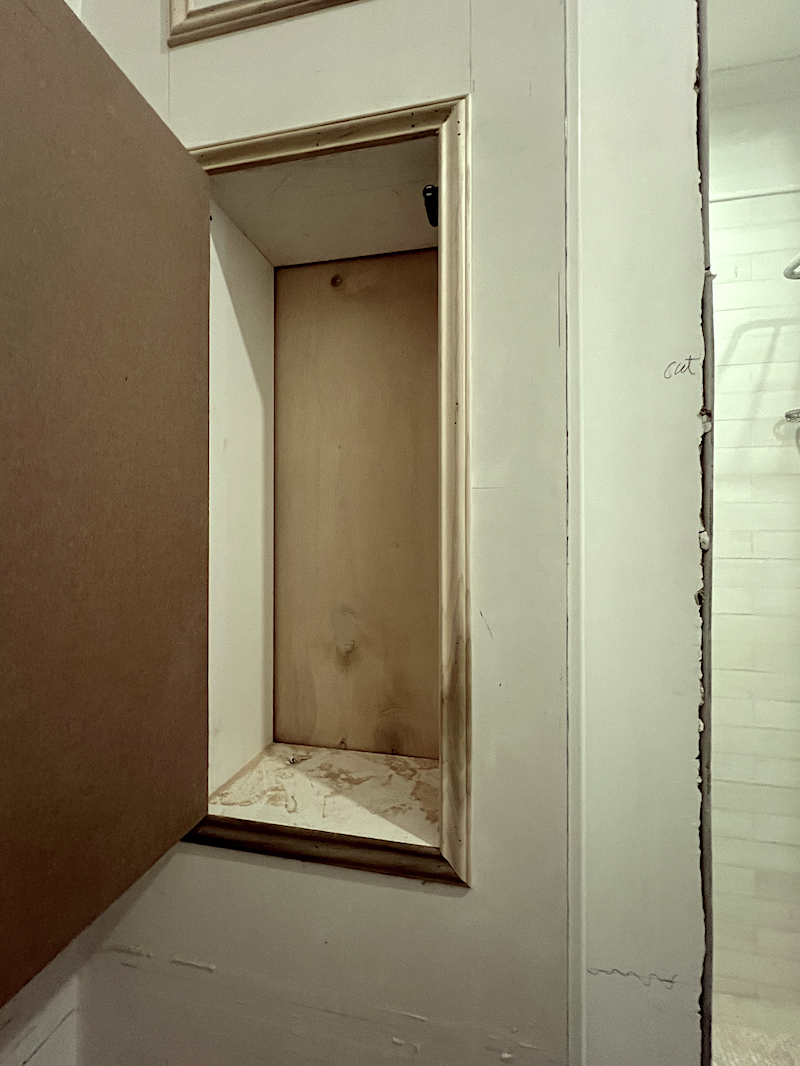
Often I think… “Last year at this time…”
Do y’all do that? Some things are now two years ago.
The baseboard. Ahhh, I don’t have the strength to get into it. haha I never notice it, but indeed, it is weird.
Okay, the floor tiles– at last!
Once I decided to redo the bathroom floor, one of the wisest decisions I’ve ever made, I had to come up with a plan quickly. You can read about the design of the bathroom floor here.
And this post is after the installation of the floor.
I have no idea how I managed to live through this.
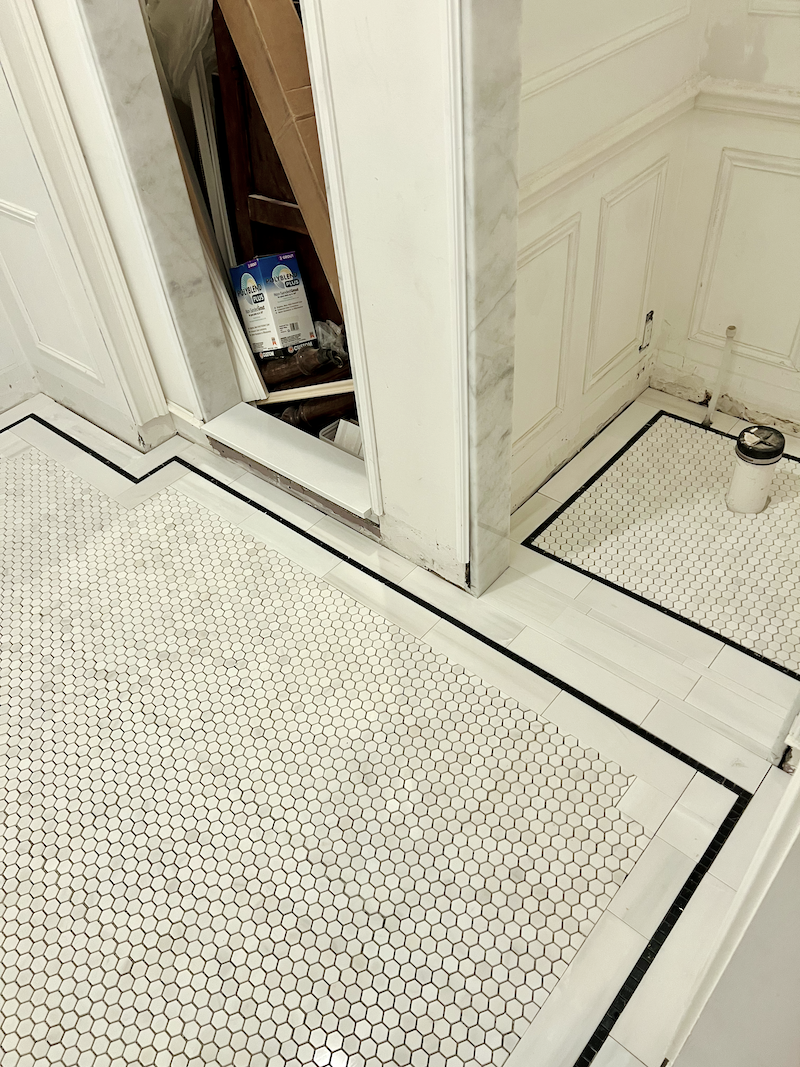
Above and below, shortly after the tile was installed.
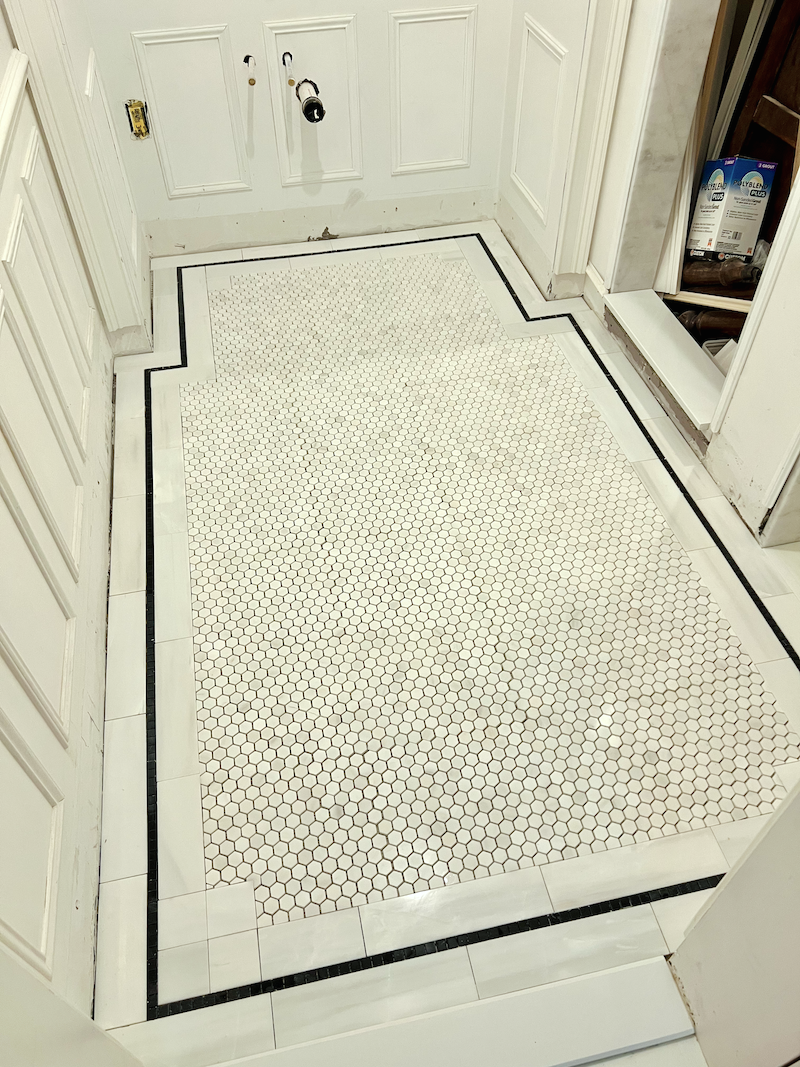
Below is a recent detail of one of the corners.
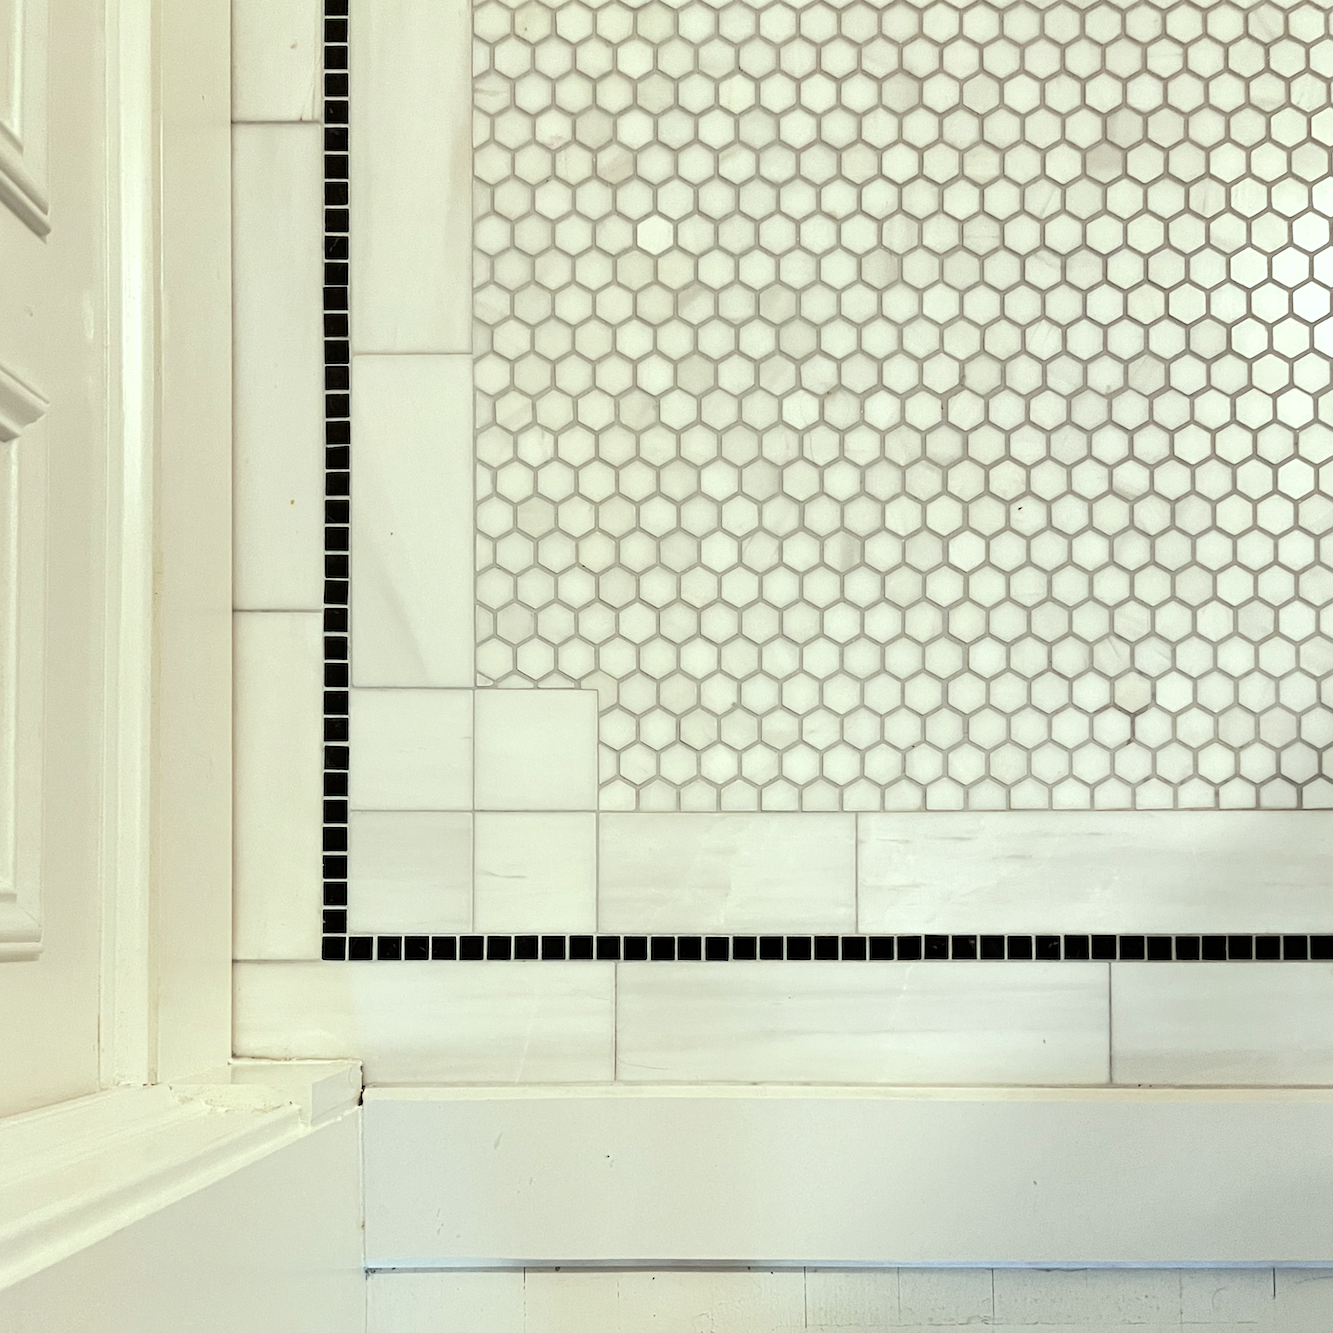
I also loved the way the tile mason did the detail below. Mind you, I didn’t leave it entirely up to him to decide.
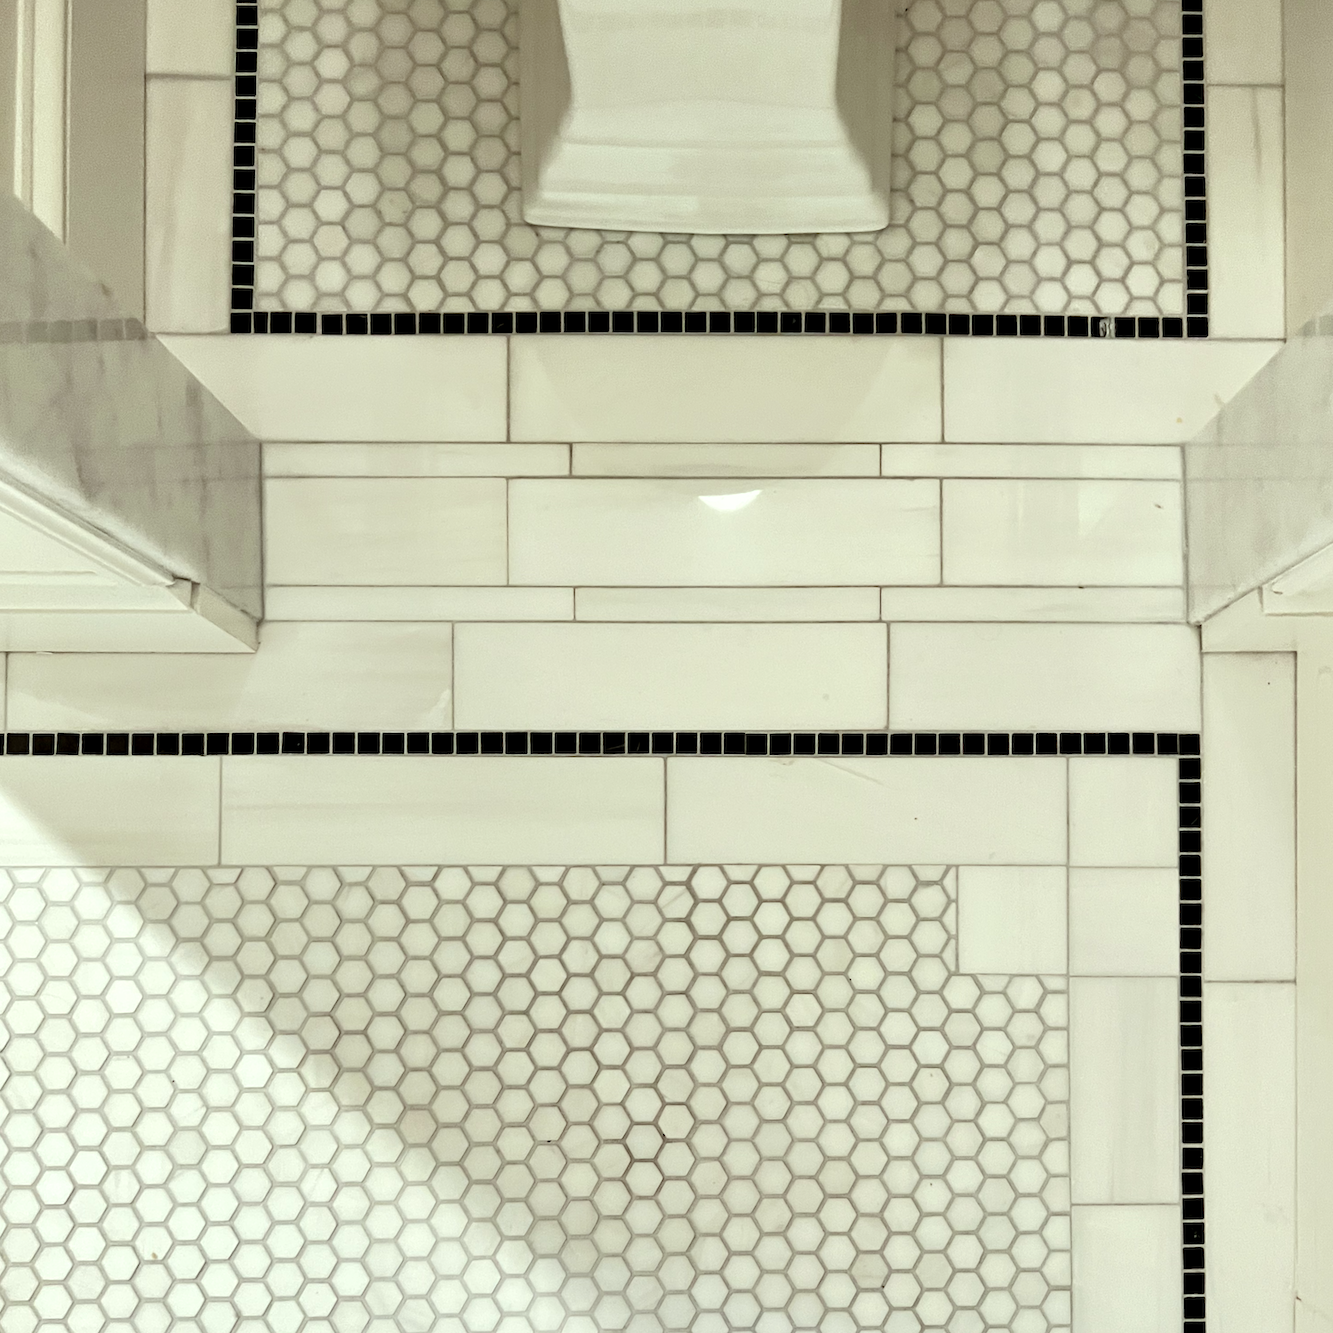
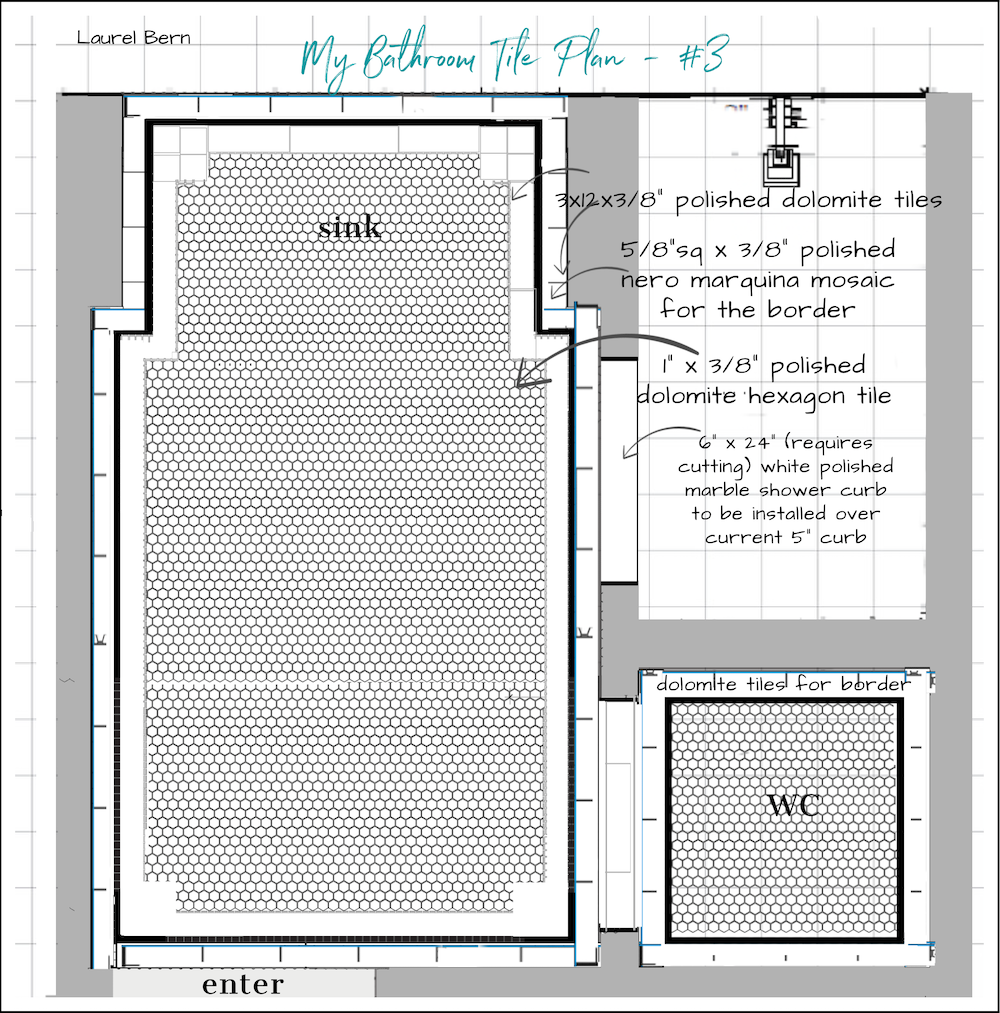
So, what is this tile?
Well, I already needed to order the Bianco Dolomite tile for the new 30″ wall in the shower.
So, I decided to use it for the floor border.
The one-inch hexagon mosaic tiles are also Bianco Dolomite.
And the 5/8″ mosaic used for the border is Nero Marquina.
There are links to all of the tiles and mouldings in the widget below. Please click on the images to find out more info.
Okay, we’ve covered all of the architectural details, the mouldings and finishes for the primary bedroom suite and lower entry. Hooray!
If there’s a particular renovation topic you’re interested in, please visit the sidebar, where you’ll find the topics displayed in a word cloud. Or, you can do a search in the search box.
xo,
***Please check out the recently updated HOT SALES!
the Nordstrom Anniversary Sale now in full swing!
And please go here to discover some of my favorites in clothing, beauty items, and home furnishings!

There is now an Amazon link on my home page and below. Thank you for the suggestion!
Please note that I have decided not to create a membership site. However, this website is very expensive to run. To provide this content, I rely on you, the kind readers of my blog, to use my affiliate links whenever possible for items you need and want. There is no extra charge to you. The vendor you’re purchasing from pays me a small commission.

To facilitate this, some readers have asked me to put
A link to Amazon.com is on my home page.
Please click the link before items go into your shopping cart. Some people save their purchases in their “save for later folder.” Then, if you remember, please come back and click my Amazon link, and then you’re free to place your orders. While most vendor links have a cookie that lasts a while, Amazon’s cookies only last up to 24 hours.
Thank you so much!
I very much appreciate your help and support!
Related Posts
 Renovation News and Deets!
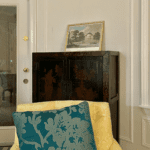 14 month Renoversary! and I’m Back In My Bedroom!
 Under the Stairs Hidden Closet – Finalizing the Plans!
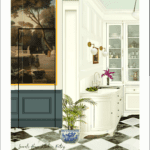 Jib Doors – So Cool, Yet Such a Nightmare to Build – Parts 1 & 2
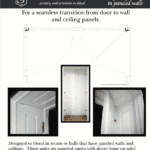 May Day 2024 – The Embrasure Doors are Fully Installed!
 The Renovation Countdown Is On! + A New Idea
 Little Known Secrets On The Design Process


19 Responses
Dear Laurel, I am very sick and have been deleting things in my inbox and just had to reread this post of yours. I may be trying to simplify my life, but this just has to stay in my inbox! Your charming and informative posts are a delight to read. Your attention to the tiniest details is amazing and so educational. Love it! You’re inspiring me for when and if I can do more!
Lauralee
Hi, Miss Laurel,
I’m curious to know why you chose BM Italian Ice Green for bedroom, kitchen and entry ceiling; and why you chose BM Opal Essence for Hall and bathroom? They are both beautiful!
Thank you,
Lidia
Hi Lidia,
Both are beautiful colors, but my bedroom has all kinds of odd reflections due to the curved wall and see of red brick outside the room. The bedroom was Opal Essence like the other spaces that have only artificial light. The bedroom was really fine, however, the ceiling had to be re-painted anyway due to the first painter’s inadequate prep job.
Italian Ice Green is the doppelganger of Pratt & Lambert’s Pistachio that I lived with for 16 years in my suburban New York townhouse. I loved that color and felt it might work just a tad better in the bedroom. It’s beautiful and a touch more ethereal, but both are beautiful ceiling colors.
Thank you, Laurel! All the very best!
My favorite statement:
“I have no idea how I managed to live through this.”
Priceless. I’ve had that feeling too. (Referring to my own odyssey.)
Love the bathroom.. the details! Could almost live in it…
Hi Laurel,
I always love your discussion of mouldings and am inspired as you delve into the depths of how you used them in your home. I love the look of it in a formal space. It seems perfect and appropriate in your beautiful Bostonian brownstone. I live in the San Francisco Bay Area in a condo that is classic 1980s with a vibe that is typically California style, more informal, lots of windows with an indoor/outdoor feel. I have been trying to imagine the walls with moulding but wonder if it is appropriate for this architectural style? To mould or not to mould? That is the question.
Hi Laurel,
It’s all so beautiful. I had no idea so many different types of moldings were used. How did you keep it all straight? It would make my head explode.
The widget for the crown molding that can be applied either vertically or horizontally (the one in the lower right corner) lands on an entirely different molding. Could you post the style number? I can’t find it (my vision is not what it once was, and scrolling through white moldings…) Thanks Laurel. It has been so informative following your exquisite renovation!
Hi Martha,
It’s the same moulding, but a different image. It’s the Orac Decor cx176.
Absolutely loved both parts of this series, your eye for detail is inspiring! These additions prove that good design is in the details.
Dear Laurel: Would you please share the name and manufacturer of the pale blue/green ceiling color in your bedroom?
Hi Rosemary,
It’s Benjamin Moore Italian Ice Green. It’s also on the kitchen and entry ceiling.
The color in the hall and bathroom is Benjamin Moore Opal Essence, which is similar, but a touch more blue. Both are beautiful ceiling colors.
I love your Mouldings. It’s what separates the men from the boys. If an award was given for best moundings of the decade it’s yours! Thank you for setting the standard.
I love, love, love when you write about moldings!
Have you provided your source for the smoke bell lantern? If so, I must have missed it. It is lovely.
Hi Laurel,
I had forgotten my desire to have crown molding installed in my bedrooms. You have reignited my wish to have it put in. The hardest part of having it installed is finding a contractor.
I don’t think I’ve seen pictures of your new bedroom. Since the windows aren’t as tall as your windows upstairs, do you have curtains? Have you hung any artwork?
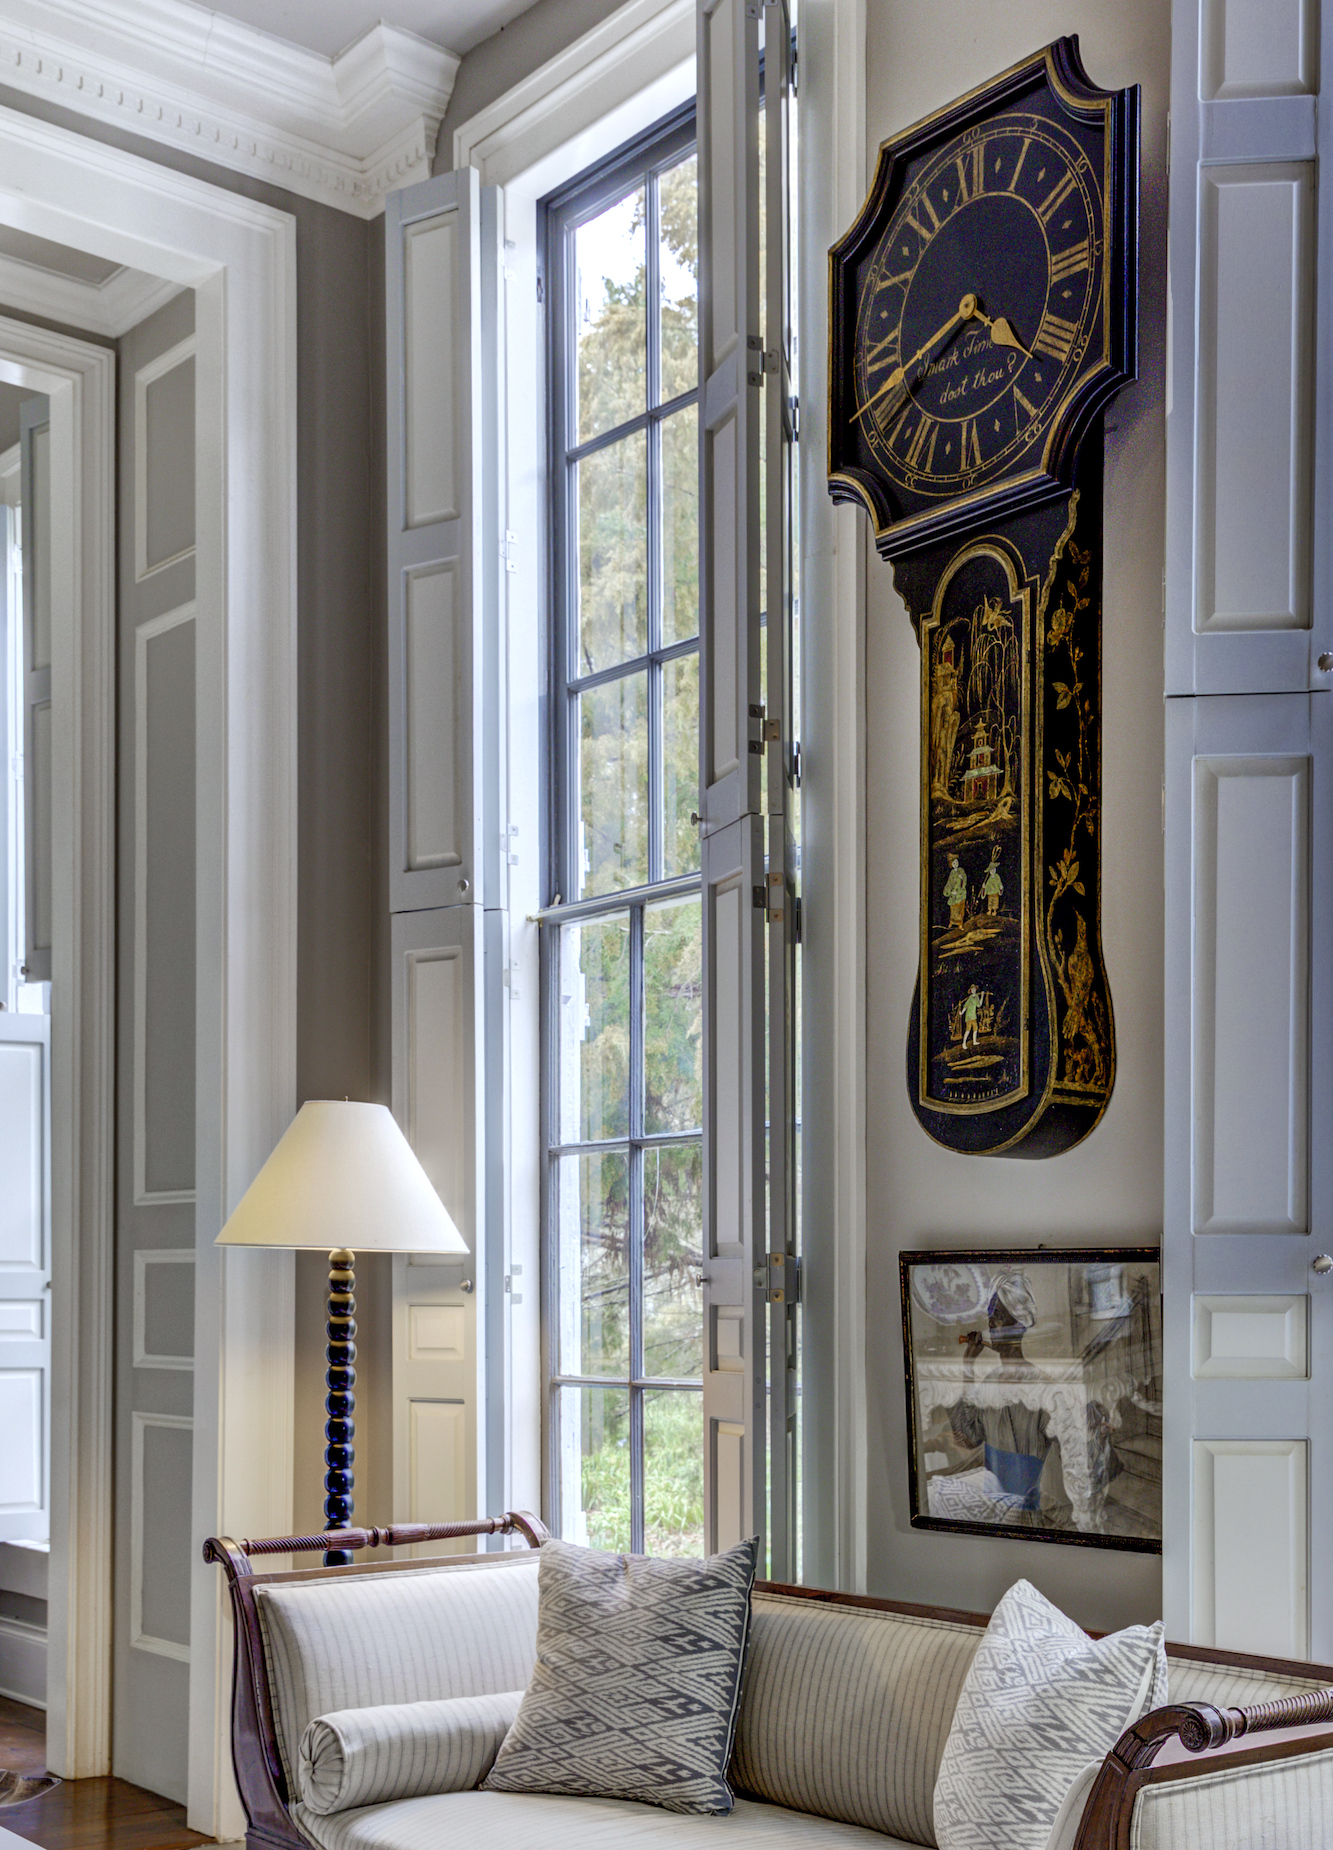
I love the black and gold oriental wall clock pictured above! Can it be found?
Hi Cheryl,
Furlow Gatewood passed in October 2022 at 102 I think he was. Thousands of his belongings are supposed to be auctioned, but I don’t know when. I just googled it and I found my Furlow Gatewood blog post, lol, but nothing about an auction.
Maybe there’s some sort of dispute amongst family members or something of that nature.
Otherwise, I’m sure that clock is a priceless antique.