Hi Everyone,
Oh my. Well, I’ve posted on Instagram and promised to share more of the process for the hidden entry doors. AKA: the jib doors.
A recent post already goes over how the pivot doors were installed, including the hinge we used.
I admire folks who do those elaborate Youtube tutorials.
I can’t say I have the patience to stand there with my cell phone videoing every conversation and then carefully editing to reveal the gems. Plus, as you’ll soon see, my video skills still kind of suck. However, that might add to the enjoyment as Laurel videos the floor, the ceiling, etc. while on her way to see what’s going on.
In addition, you’ll hear me say “wow” a lot. I truly am wowed.
However, it always seems that the best bits aren’t caught on video.
Little moments like when Brendan and Eugene asked me:
“When’s the painter coming back?”
B&E: He’s not?
Me: No, he’s not. I fired him!
B&E: With a look that was mostly bemusement tinged with a drop of fear, one of them said, you fired him?
Me: Yes, he is SOOOOOO FIRED! GONE. HISTORY. Just look at the f-word mess he made of your beautiful work.
B&E: chuckles
Brendan: With a mock nervous smile, said, “Are you going to fire me?”
Me: Ohhhh, Brendan, I wouldn’t dreeeeeam of firing you. Kill you, yes, but fire, no way!
However, this week, there were no evil thoughts, and I’m just kidding; there rarely are.
Brendan and Eugene have been hard at work all week.
So, let’s take some brief looks to see how they did at the application of the wainscoting over the new jib doors.
Below, B & E adjusted the wainscoting panel on the new wall separating the entry from the kitchen. We needed to get this one right to ensure the jib doors had the correct placement.
Below, is a little demo of the wainscoting being built over the doors.
(and my gleeful reaction) You have to strain your eyes to see where the mouldings break to open. That’s just how good these guys are.
Below is when I go to inspect the finished doors.
Every time I came to check things out, there was something new to see, which is why I repeated the all-important question, “Do they open?”
Some small adjustments needed to be made
The next day, I noticed one fine point I hadn’t noticed before. However, I zoomed in for a closeup.
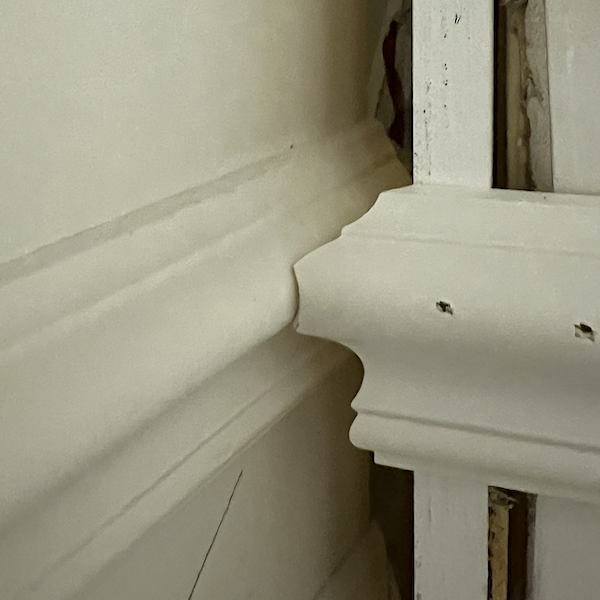
What brilliant engineering. By the way, there will be a doorstop inside the door to prevent someone from forcing the door into the mouldings and breaking them.
Below are the entry hidden doors, closed. Well, duh. Please remember that because I didn’t do the virtual spackling this time, the outside larger gap is where the door jam is attached to the wall. That area will be spackled and invisible.
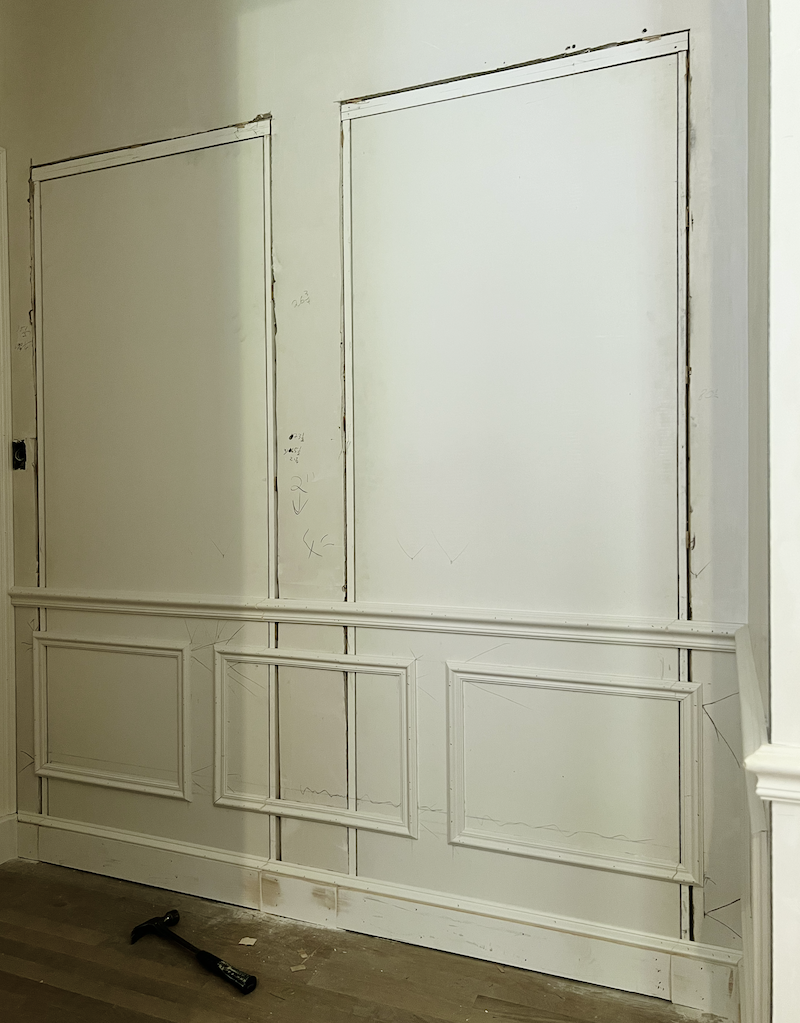
Now, let’s look at a close up of the center and right side door.
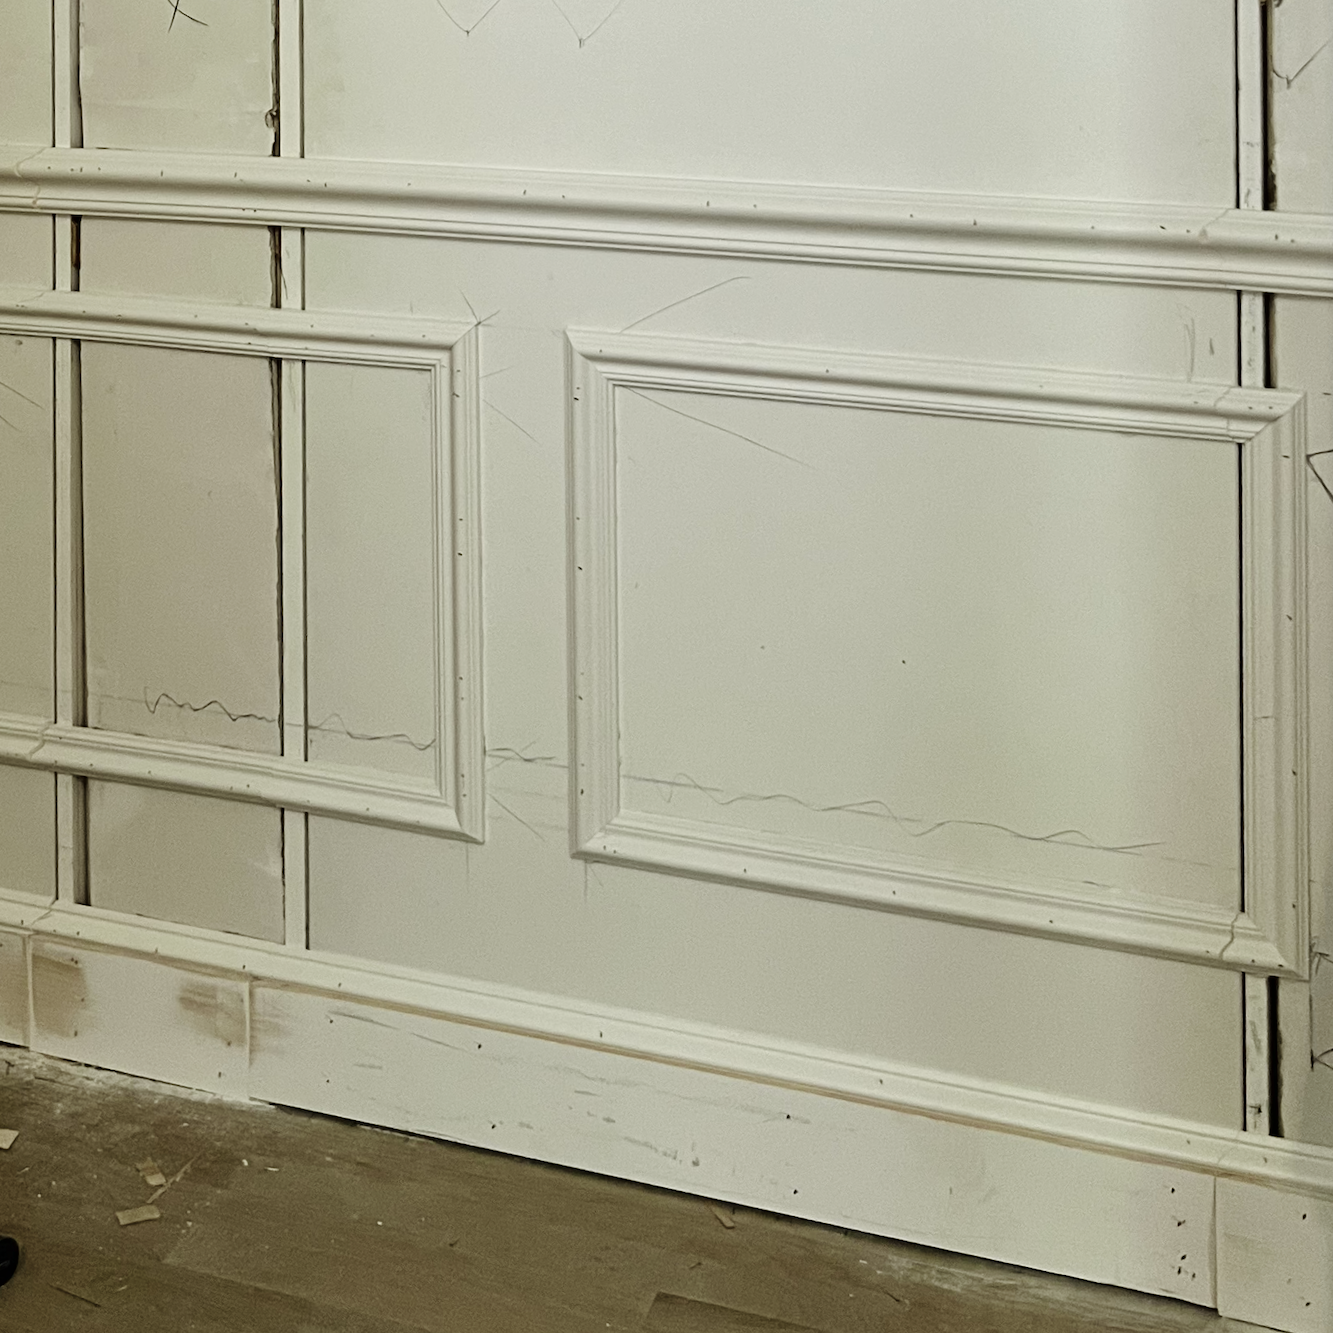
Most of the joints are barely noticeable. The most noticeable is at the floorline because there must be at least 1/4″ so the door will open smoothly.
Next, let’s look at the door partially open. This is my favorite shot.
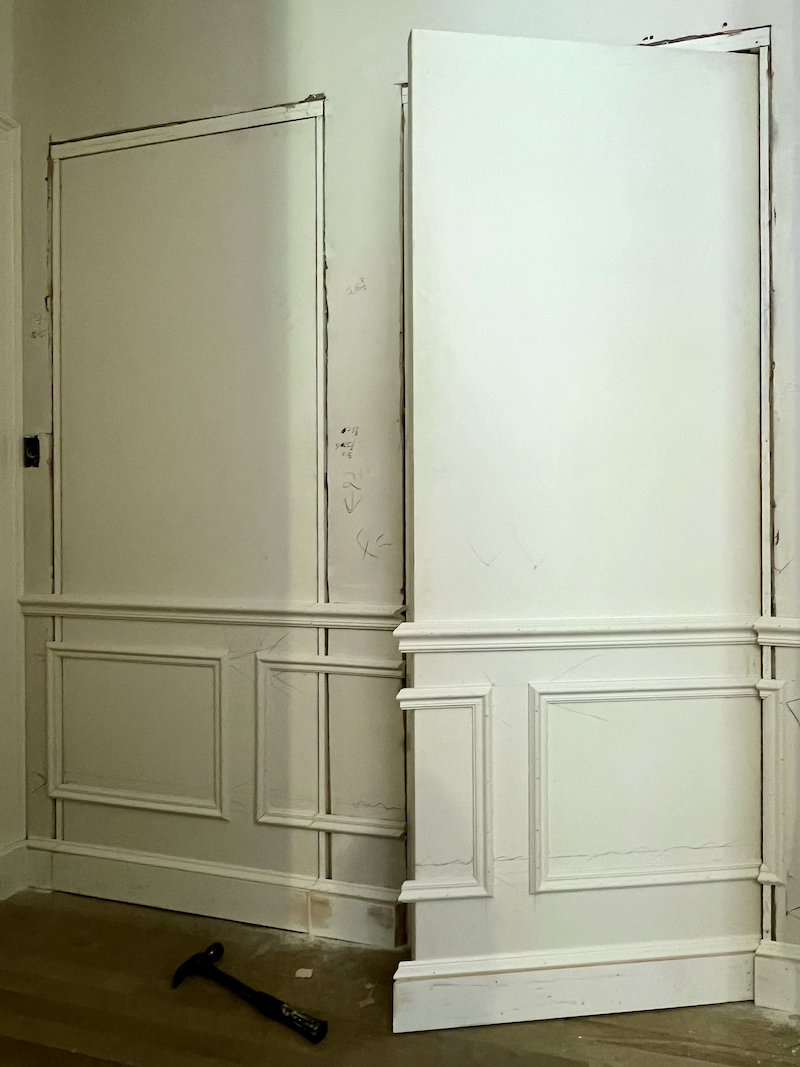
The trick, of course, is making the cuts at a 45-degree angle AND at the precise point necessary.
Again, I have a detail shot below, to make it easier to see.
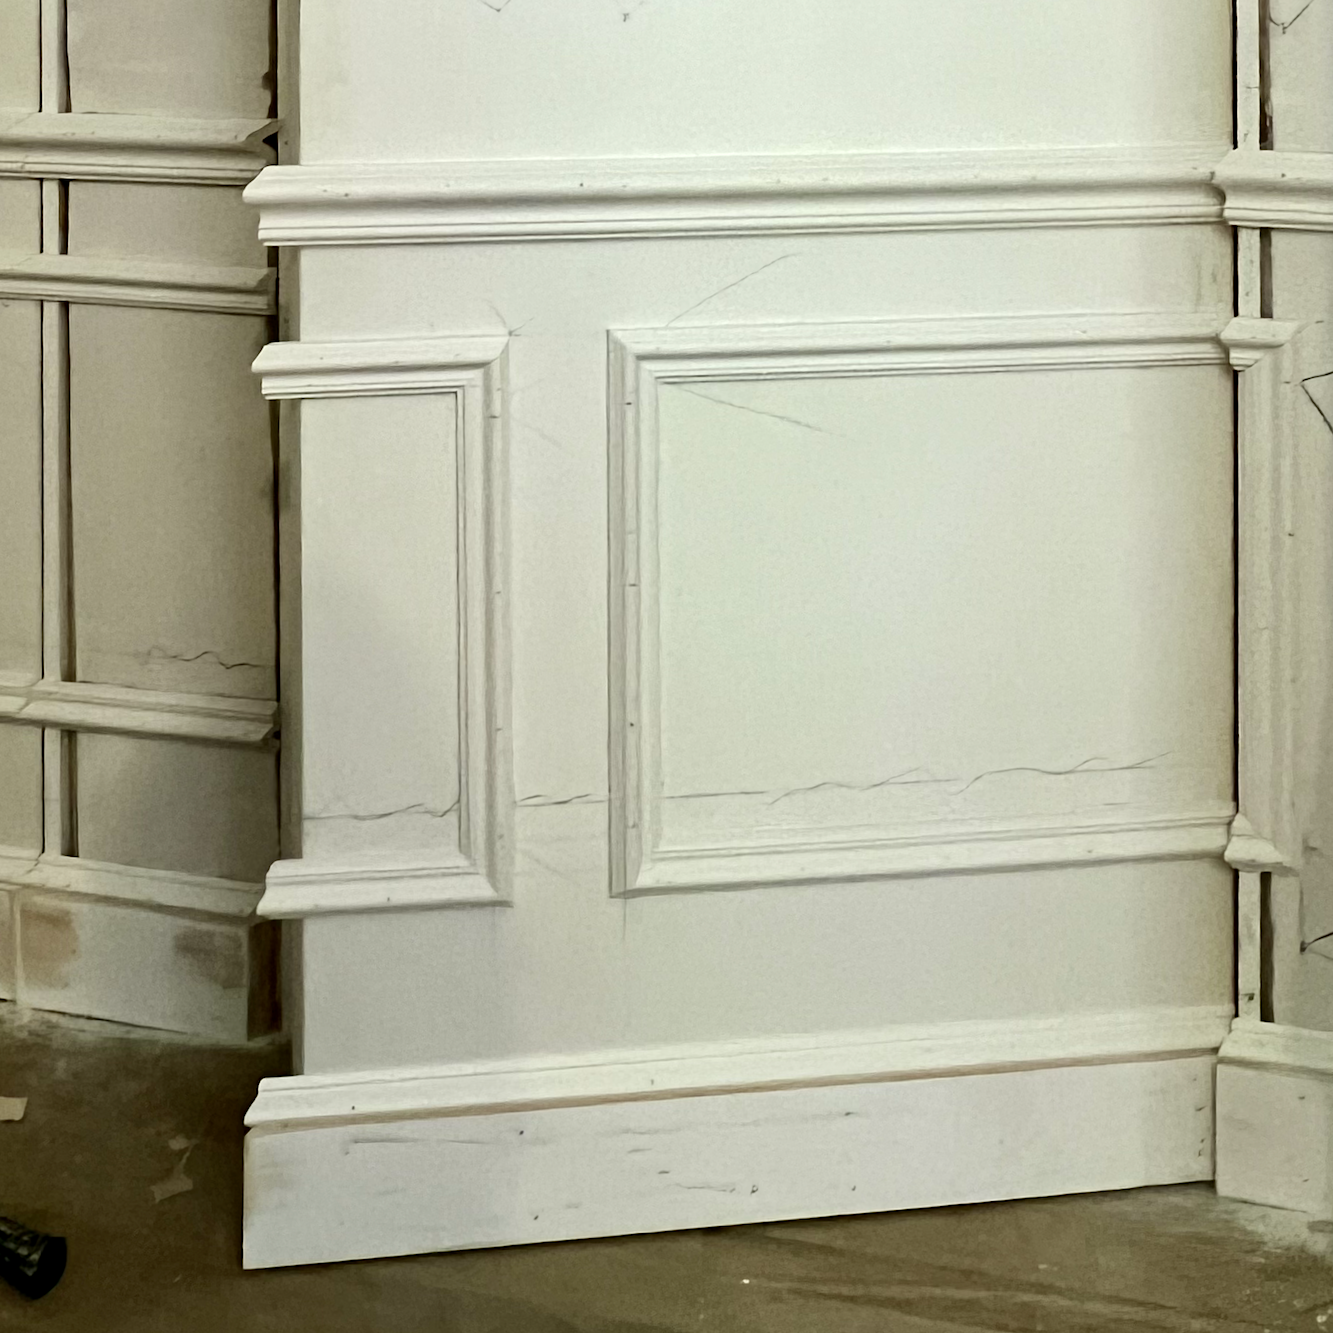
The squiggly line is where they would put the panel, which was too high. But, we worked it out.
Now, let’s look at the hidden entry door open as far as it will open.
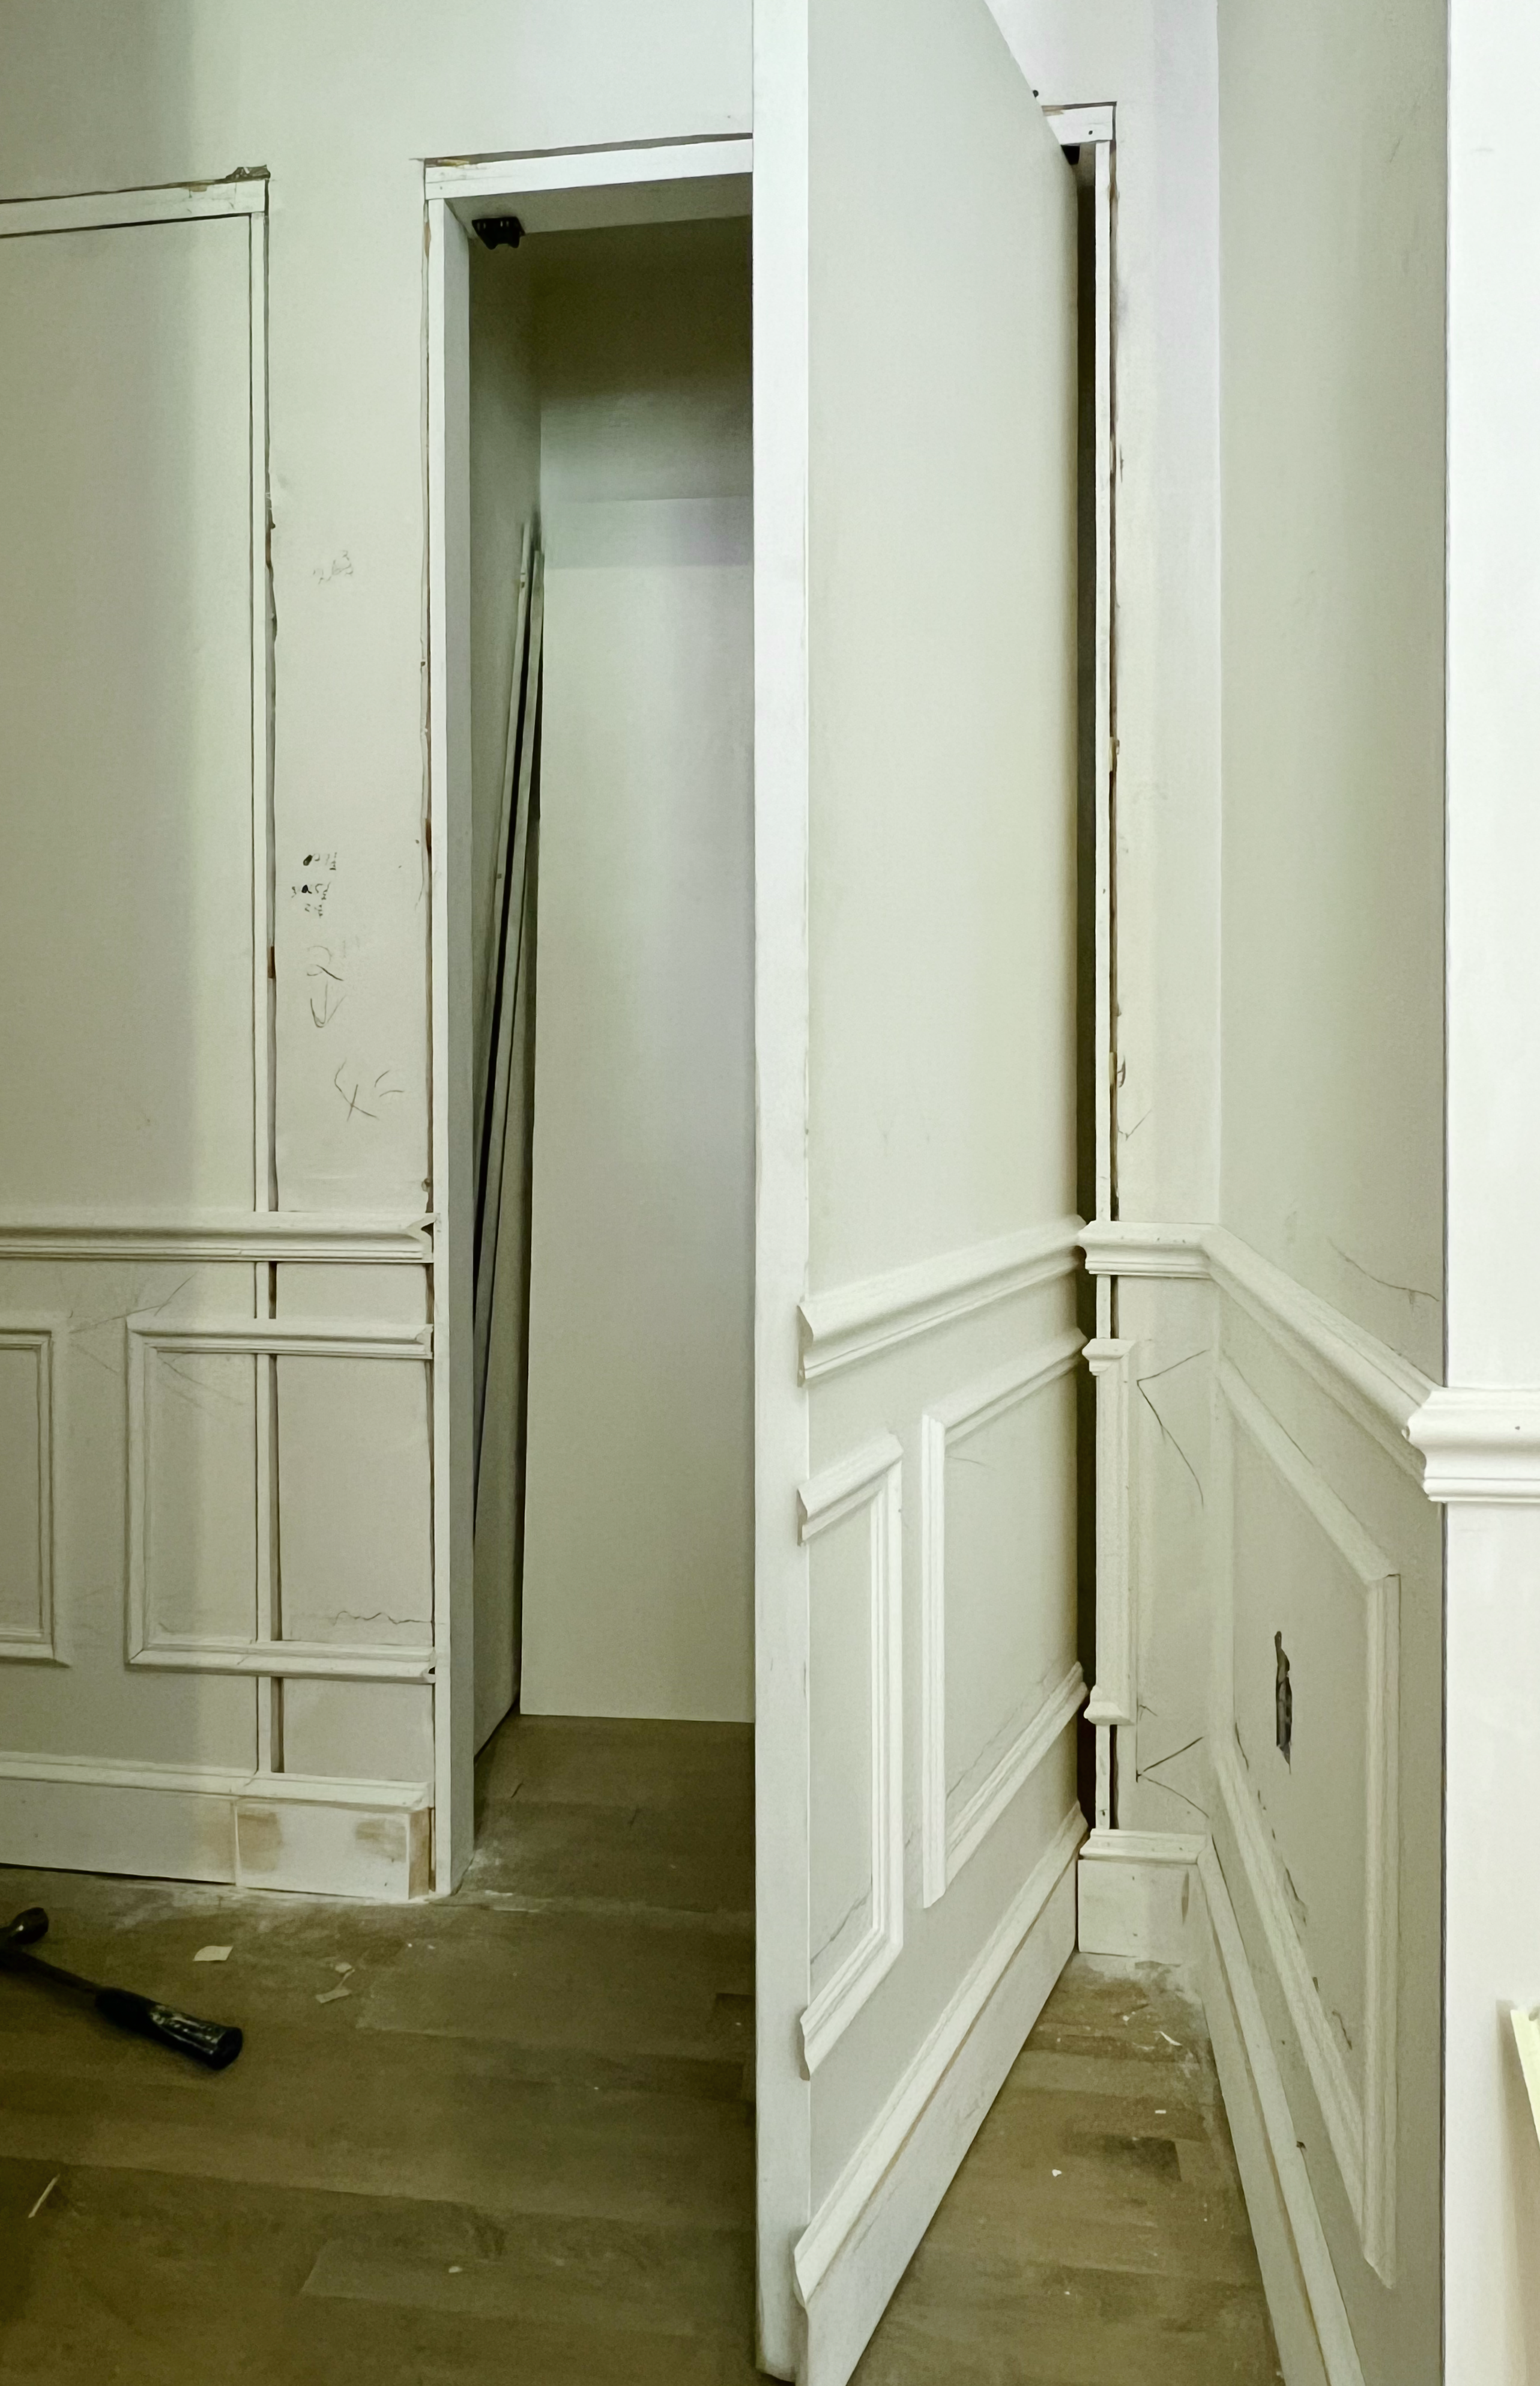
This is plenty open to access everything I need to get. If you watched the video I shared with the master carpenter who did a hidden door for a little girl’s room, he had the same problem. If opening out, it is very difficult to create the necessary space so the mouldings don’t hit each other.
But, this is why you often see the moulding cut on the outside on a 45 degree.
While it’s not terrible, it’s the “tell” that this is a regular ol’ door, not a hidden door with wainscoting on a wall.
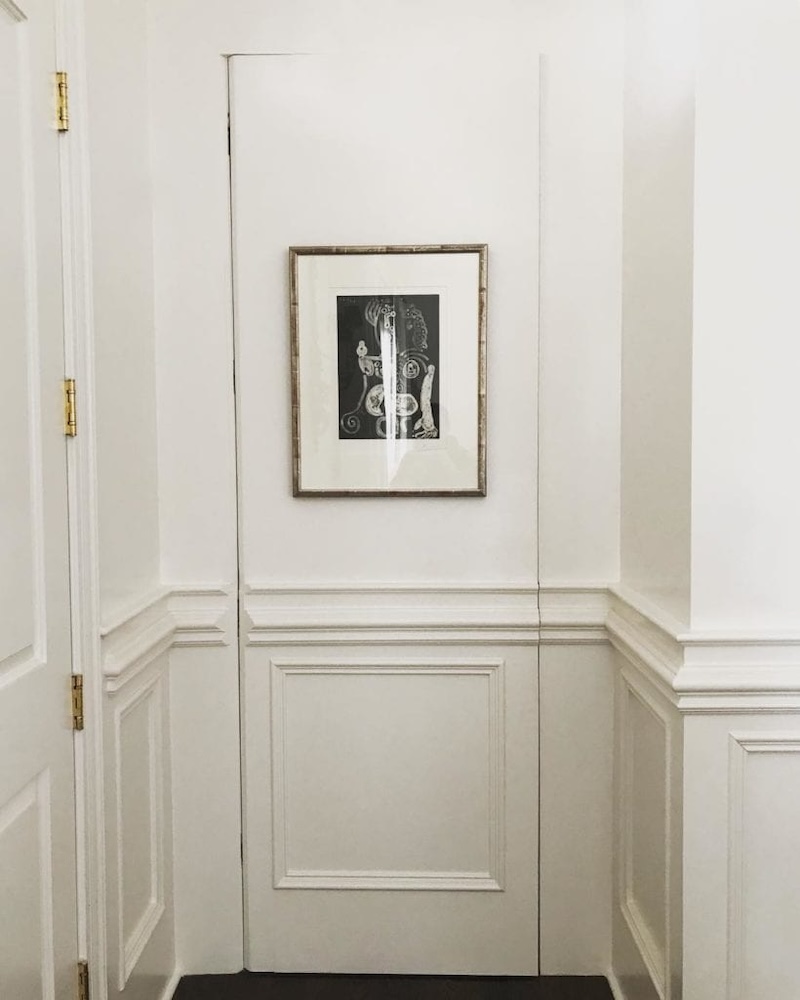
This door, designed by Ann Wagoner, is quite beautiful. Now that I’m an expert lol, I can see that they did not use pivot hinges. In fact, not only is the moulding cut on an exterior 45-degree angle but so are the door and the door jam. By doing so, it makes the panel look a little lopsided. Again, this is only noticed because it’s under close inspection.
The point, however, is that this exterior 45-degree cut is not necessary if one uses a center-hung pivot hinge, which we looked at in detail in the jib door post.
Yesterday, for fun, I made a little rendering after the moulding went on.
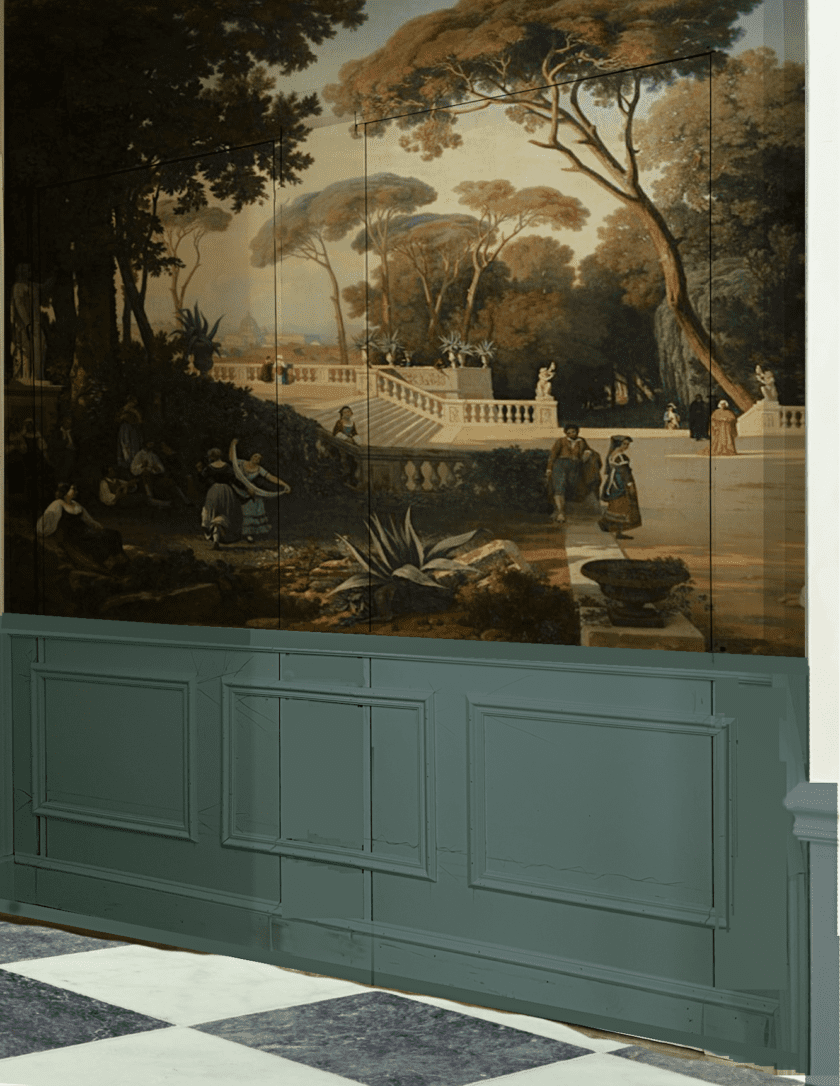
This took me a couple of hours. I used the image of the doors closed (above), and I had to hide the jam openings. Then, I could layer on the paint color and mural art. And yes, I decided to keep it unframed. I don’t think the guys would’ve minded. In fact, I think they rather enjoyed this project and the challenge it presented. After they got the hang of it, it went a lot faster. But, it took one entire workday to get it all on there perfectly.
Incidentally, we do not have to open the doors by yanking at the chair rail. I have some small round pulls that sit almost perfectly flush and will blend in beautifully with the wallpaper.
Some of you may notice that the finished wainscoting doesn’t look like ANY of the designs I created over the last couple of years.
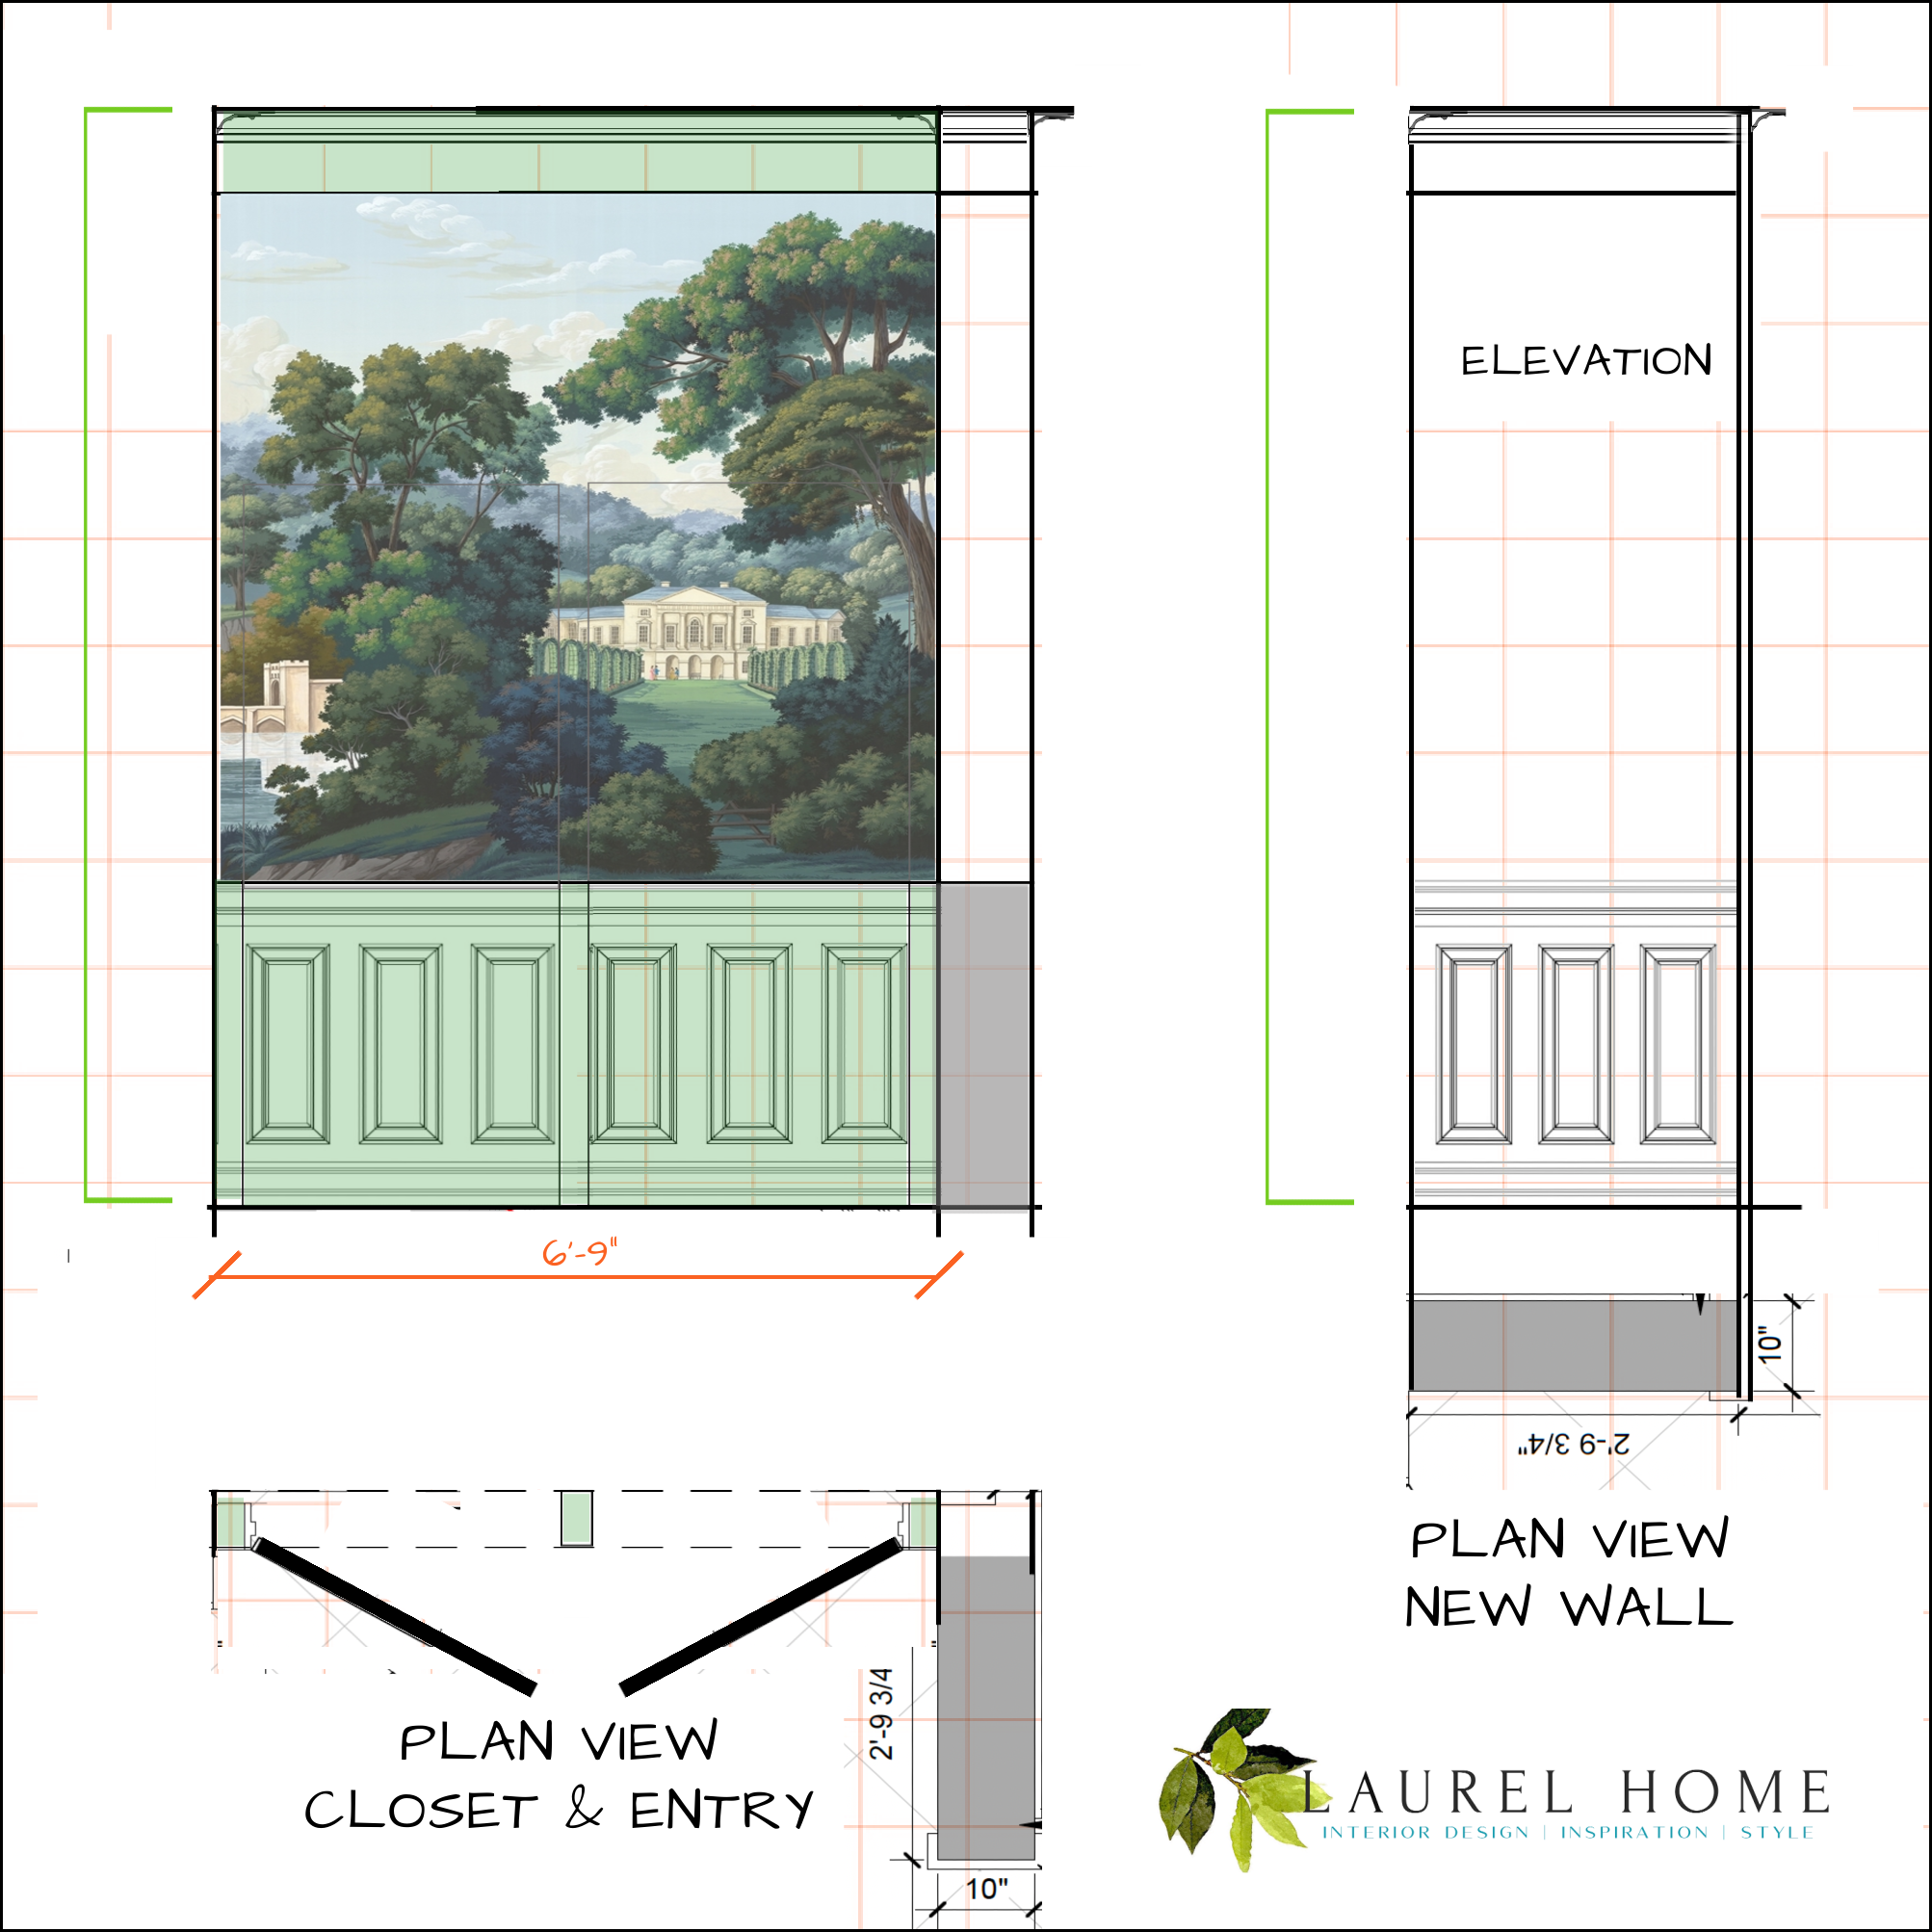
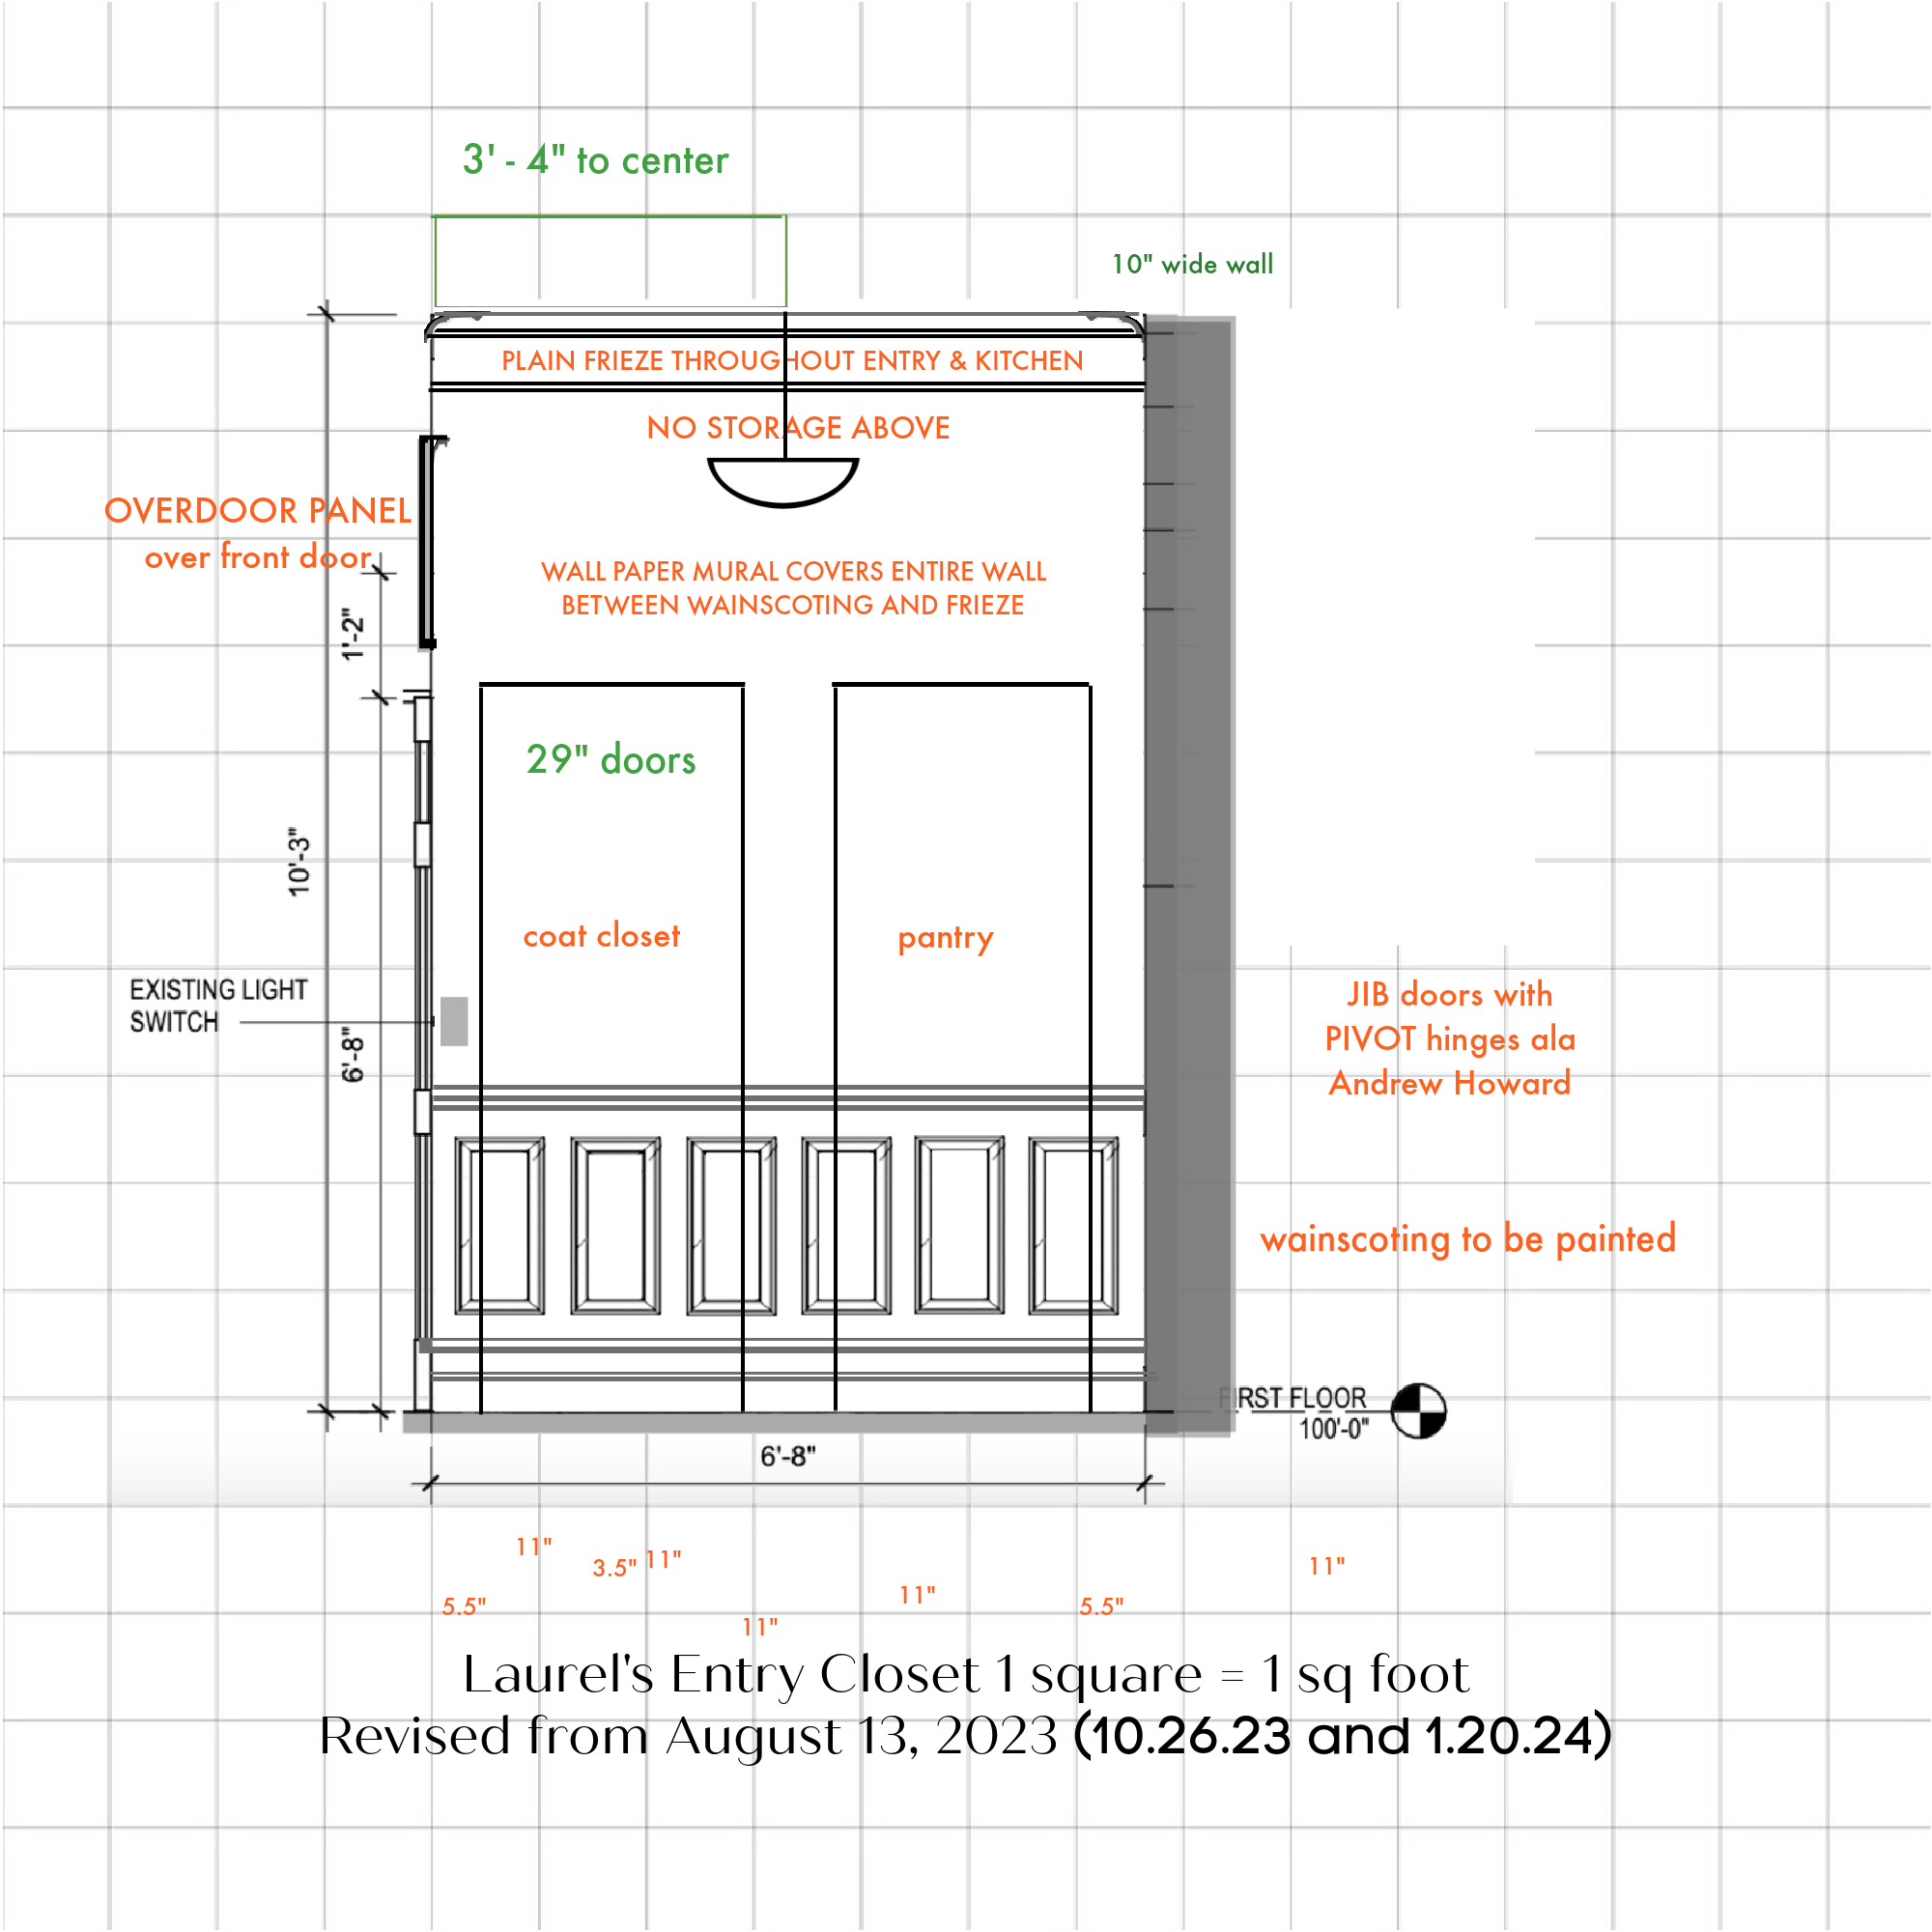
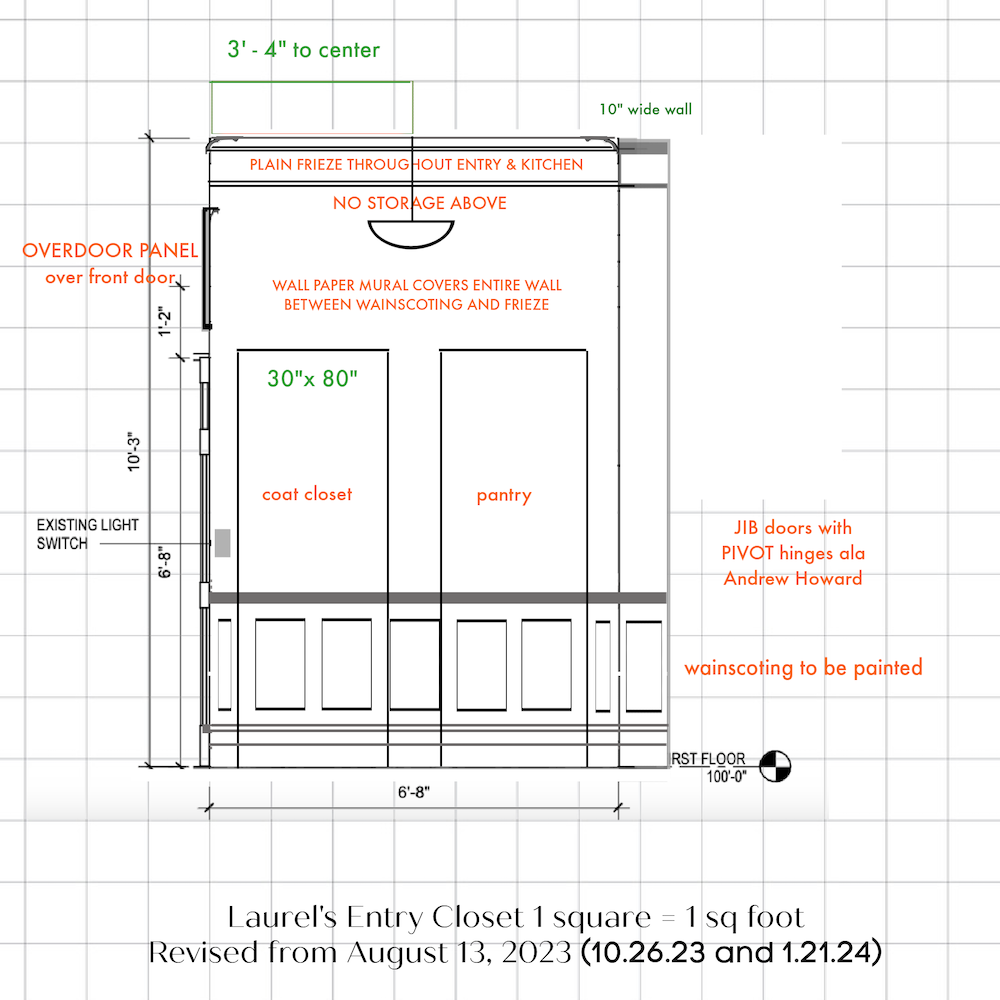
Here’s why: I wasn’t positive about what was possible, and I wanted to avoid the guys having to make zillions of carefully placed diagonal cuts. However, the doors are built about two inches closer together than my plan called for. Somewhere along the line, they changed from 29″ doors to 30″ doors, and that’s why we lost the two inches.
If the doors had been closer together, that also would’ve worked.
Still, these panel mouldings are in keeping with the rest of the mostly horizontal patterns in the living room and entry.
Today, the guys and I spent a good thirty minutes cleaning the living room.
One reason is that my darling son Cale is FINALLY coming to visit on Saturday evening. It was his birthday on the 18th, and of course, I made him our favorite chocolate cake. It is marinating in its yummy chocolate icing in my new Blomberg refrigerator which is fantastic! The door actually closes and stays closed! Plus, it doesn’t make weird whining noises.
Brendan isn’t allowed to eat chocolate cake. (Please go here for the recipe for the world’s best chocolate cake.) Poor guy. But, I gave Eugene a piece of the last chocolate cake I baked, and said he loved it. So, while making Cale’s cake, I adjusted the amounts slightly and made Eugene the sweetest baby cake.
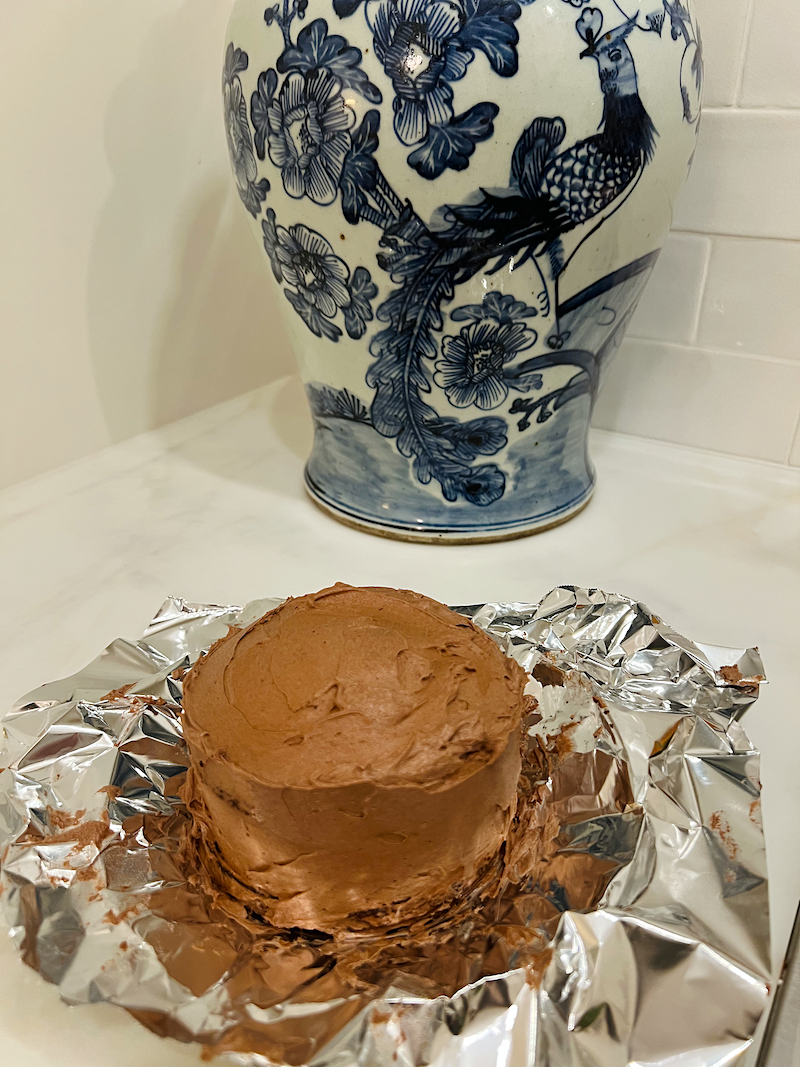
Awww… What’s hilarious is that TODAY of all days is the day they cleaned out the craptastic Bertazonni fridge and transferred everything to the new fridge while I was on a business call.
Of course, they saw the cakes. You should’ve seen Eugene’s eyes light up when he found out one was for him. Brendan deserves a cake, too, but his wife won’t let him have any. It’s none of my business but…
I have much more to share, but it must wait until Sunday.
However, I want to add one more image today.
I also posted this image below of the hidden entry doors on Instagram earlier.
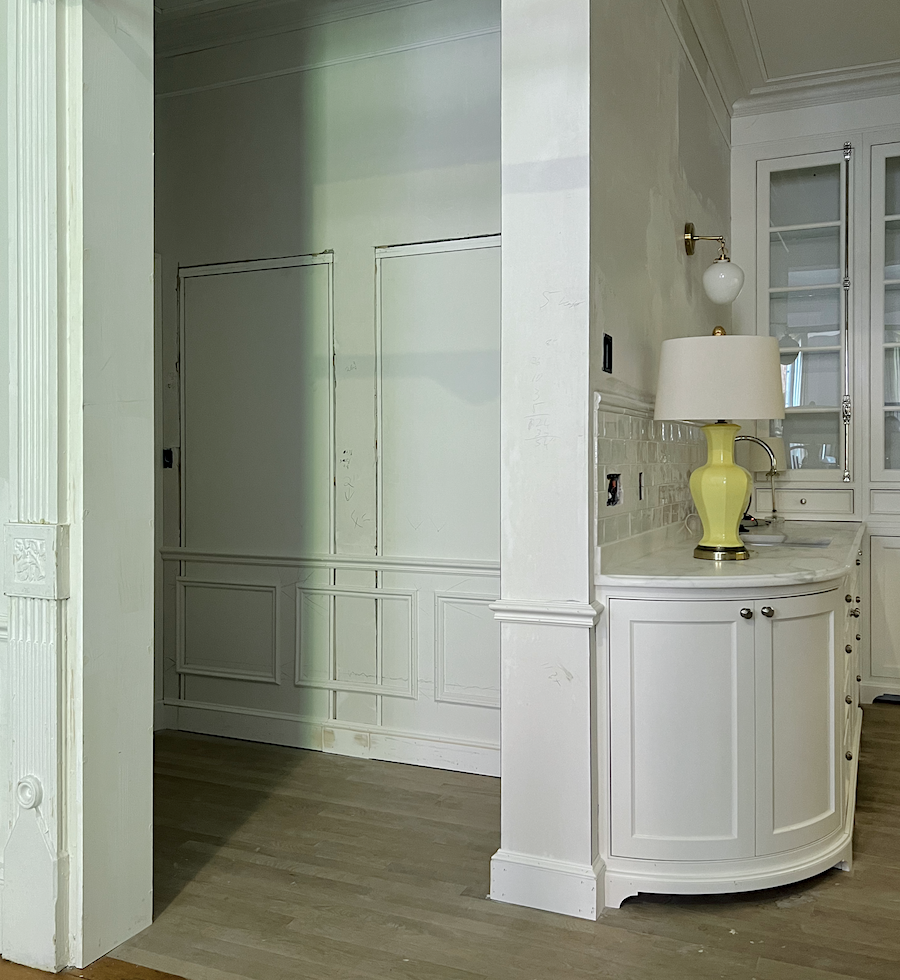
Yes! The toe kicks are installed! More about that soon. The new floor guy said we didn’t have to wait. But, talk about a dust maker. All cabinetry beautifully created by Crown Point Cabinetry.
But, something else big is happening tomorrow.
xo,

***Please check out the recently updated HOT SALES!
There is now an Amazon link on my home page and below. Thank you for the suggestion!
Please note that I have decided not to create a membership site. However, this website is very expensive to run. To provide this content, I rely on you, the kind readers of my blog, to use my affiliate links whenever possible for items you need and want. There is no extra charge to you. The vendor you’re purchasing from pays me a small commission.
To facilitate this, some readers have asked me to put
A link to Amazon.com is on my home page.
Please click the link before items go into your shopping cart. Some people save their purchases in their “save for later folder.” Then, if you remember, please come back and click my Amazon link, and then you’re free to place your orders. While most vendor links have a cookie that lasts a while, Amazon’s cookies only last up to 24 hours.
Thank you so much!
I very much appreciate your help and support!
Related Posts
 Architectural Details That Will Elevate Your Rooms – Parts 1 & 2
 Happy One-Year Renovation Anniversary + Lots of News!
 Jib Doors – So Cool, Yet Such a Nightmare to Build – Parts 1 & 2
 Hidden Door Challenges and Update on the Kitchen Tile
 Stunning Architectural Features That Make a Big Difference!
 Under the Stairs Hidden Closet – Finalizing the Plans!
 Renovation News and Deets!





23 Responses
Dear Laurel,
Love your blog. Never miss a post. Can you please tell us about how/why you decided to do such an extensive renovation on your home? It is full of so many absolutely beautiful things that I would love to have in my home. However it is also taking a lot of time, money and energy. How did you decide to spend as much time and money as you have?
Btw I find it very interesting that you, an expert, also have trouble with contractors. I guess they misbehave for everyone, not just novices.
Best wishes,
F
Hi FC,
That’s a terrific question. I will try to address that soon.
Seeing the precision and artistry of Brendan and Eugene’s complicated work in installing the wainscoting has been inspiring. I hope they are proud! I can’t fathom how the inferior “painter” came to be counted among such a superb crew.
the jib doors opening!
the gorgeous rounded cabinet !
what a satisfying day for you…
sending good vibes…
Laurel,
What a beautiful space with the jib doors! Pivot hinge and all….. stunning…. am a big fan of mural wallpaper and cannot wait for the big reveal when that is installed. I have all of your emails in a file and your posts are such a delight to read…. challenging days and all. I see a bottle of Dom in your future to celebrate your home’s completion…… it is all around the corner!
Rhonda, you are not alone!
Laurel, The doors are Amazing! I am learning and seeing wonders in your blog that would never work in my 1967 ranch house, but the ride with you is fantastic!
1) I’ve made your chocolate plotz cake twice now and it was a big hit. However, both times when I brought the cocoa mix to a gentle boil, the oil separated. Should I take it off the heat just BEFORE it starts to bubble? No matter how much I whisk it afterward, hot or cooled, it never blends again.
2) Seeing the last shot of today’s post, with your kitchen tiles shimmering in natural light and your rounded cabinet also in view, it occurred to me that I would love seeing your tiles grouted with something approximating the finish on your cabinet hardware. Is dulled metallic grout even a thing? I emotionally associate dark-grouted white tile with the NYC subway system, so have been secretly hoping you might change your mind about darker grout. But today, seeing how your tiles glisten, I’m thinking of them as jewels that would be beautifully accentuated in a mounting that has a little luster of its own.
Hi Cyndel,
There’s also a stick of butter in the cocoa, water, oil mix. While it might separate as it’s cooling, it should blend back together with a good stir.
What a beautiful job! These men have done a very fine job!! Let them eat cake.
The entry doors—spectacular!! Beautiful work by B & E!! Give Brendan cake anyway!!
Is it concerning that the first thing I do in the morning, after I get my coffee, is to look for an email from Laurel Bern??? I’m addicted to this saga!
Hi Rhonda,
I’ve tried force-feeding Brendan cake. But, alas, he won’t budge. I did send him a little thank you text a couple hours after the guys left.
What kills me is they won’t fill those big cracks with compound (“it’s the painter’s job.”) But, they will empty out the contents of one fridge and transfer it all into the other fridge. So cute!
And, LOL on looking for an email from me. Well, that just made my day! I’m so glad I’m able to trip your dopamine receptors.
Sooo beautiful and really starting to look like your vision! What a ride. I’m just starting my kitchen reno and I just got the third set of drawings from the cabinet guy and they are still wrong. I had provided him my drawings and for some reason he keeps ignoring a hutch type end cabinet that is not optional!
Hi Kristi,
I understand completely. This seems to be a universal thing unless you’ve worked with that person for a while, and then they know. But, just keep repeating what it is you want and eventually, he’ll get it.
So glad you could end your week in such a positive way. Beautiful work and Cale coming is the cherry on top. Enjoy the weekend!
The guys did a phenomenal job on the doors! I could watch them open and close all day. It’s like magic!
Laurel, that is some excellent, master carpentry. Beautiful. Love the photo of the entry & kitchen. Elegant! Congrats on getting your frig replaced. It is coming together. 🎉🎉🎉
Hi Laurel,
Your doors look amazing. Kudos to your carpenters for the wonderful job they did.
Ask them if they’d be willing to come to Illinois to fix the doors I had installed to conceal a laundry closet. My carpenter had never hung doors before apparently.😩
Happy birthday to Cale. I bet he was impressed with the progress since he was there the last time.
Hi Mary,
He left December 10th, but is only arriving tomorrow evening. I haven’t shared anything with him. He asked the other day if the walls were up yet. hahahaha
Amazing!!!!, your design and then the amazing carpenters, they are so talented, I have such respect for tradespeople that want to do the very best job. You are very lucky to have them. I just enjoyed the post today, the video, hearing your conversations especially the YES,YES,YES.
Can’t wait till the next post, Sunday seems like a long way away!!!
Getting there for sure-that is some world class carpentry from B&E!
Laurel, the jib doors are amazing! Hopefully, this won’t happen, but please stay on top of the painters and make sure they don’t paint the doors shut. In our condo project one of the windows and the bedroom closet bi-fold doors were painted shut. What a mess! We still can’t open the window.
Loved your videos (hand held, unscripted just fine), interesting hearing you and the guys (accents of all), the cute mini cake for Eugene, and the transcript of your conversation about firing the painter (hilarious).
I am super interested in your floor staining and the latest reveal of course!
Enjoy your weekend with Cale xoxo
Hooray! 🍾 What amazing carpentry! I could eat it ( and that chocolate cake) with a spoon! 🥄