Hi Everyone,
Before we get into the floor stains and finishes for my home, I have some news.
I’ve decided to redo the bathroom floor.
Please! Guys! My ears! ;]
Oh, Laurel, this is the best news I’ve heard all day!
Really? Well, I need to get this together asap.
In the meantime, I also needed to get the harlequin pattern for the entries and kitchen.
The lower level floor will get its white-ish stain next Monday, beginning July 8th. My floor guy, Gary, owner of Sequoia Flooring, likes Bona products. They are very popular because they are durable, low VOC, dry and cure relatively quickly, non-yellowing, and beautiful.
The other day, Gary brought over samples of both the white-ish stain and the wood stain for upstairs.
I sent him images of floor stains I liked, and he brought back Golden Oak and Pecan.
Sorry about that; I forgot to take some photos. However, I believe Gary will be bringing over more samples of stains next week or putting them on the floor.
In the end, I’m going with the AB Kasha look.
Boy, I sure have gone back and forth with the best color for my hardwood floors.
I think it’ll be beautiful with the black-and-white floor in the entry and kitchen.
The white stain colors Gary brought over were a little dark, so he said he’d work on them. For the red oak, he will use a product by Bona called Red Out. He prefers this product over bleaching the hardwood floors.
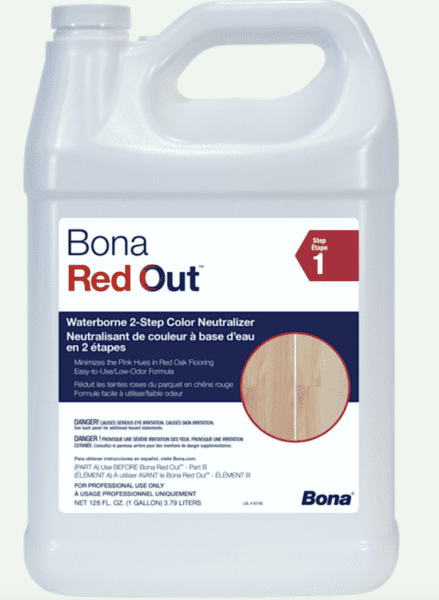
As the name implies, Bona Red Out neutralizes the red tones on the floor, so we don’t see any pink. If anything, I’d like the floor stain to be a hint of blue-green, like white marble.
Gary says they need six days to do the floors downstairs.
I hope the floor guys can also do the entry and kitchen in addition to the lower level. Then, when they do the living room, they can block off my poor, dust-infested kitchen.
They will end the following Saturday and then on the 20th; Chris, the painter is on the schedule for three days to stencil on the somewhat weathered-looking black-ish floor.
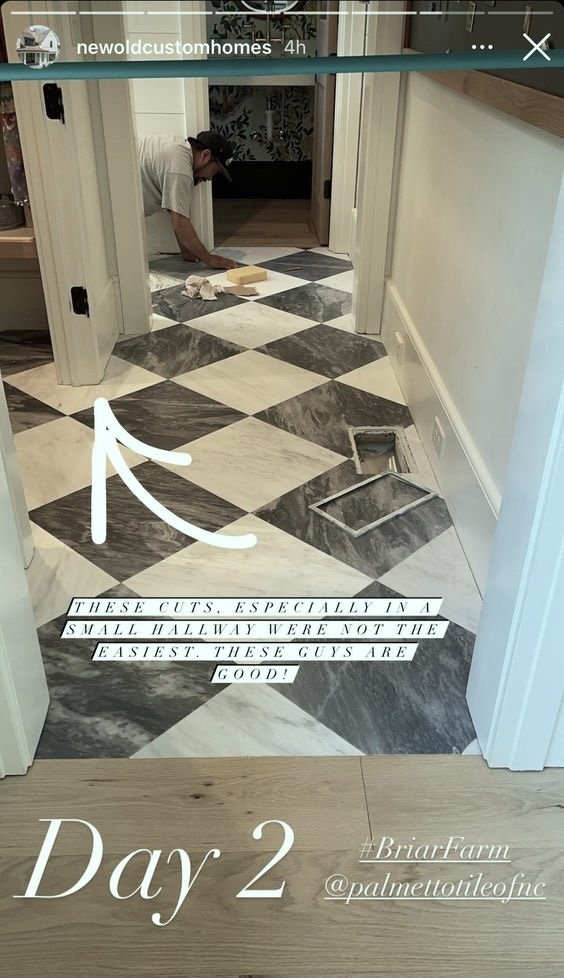
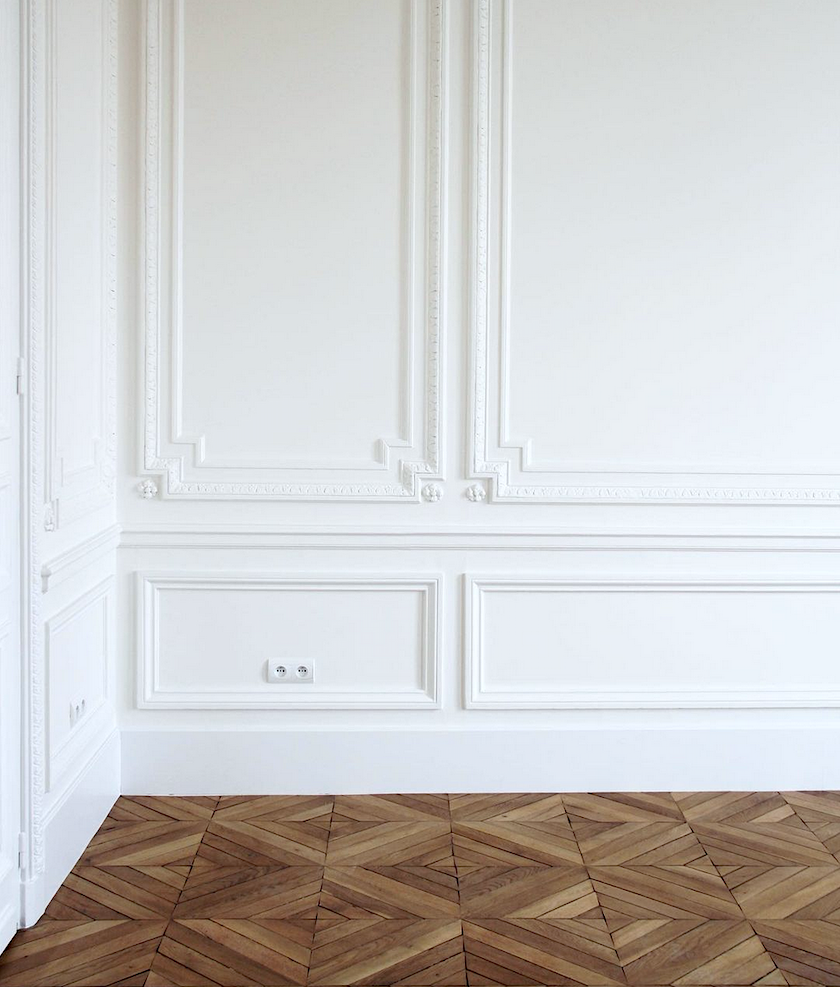
Lovely marble floor from New Old Custom Homes on Instagram
Above is the kind of texture I would love. However, no, I’m not having Chris imitate this. He could, but it would cost more than the marble would. So, he will use an easy technique. There will be more about that very soon.
So, yesterday and today, I’ve been working on the design. Well, not the design so much as the placement and size of the squares or diamonds.*
I’ve been calling this pattern a checkerboard, but technically, it’s a *harlequin pattern because the squares are at a 45-degree angle.
Since it will be stenciled onto the hardwood floor, we can make the diamonds any size we like. But it’s also whatever best fits the space.
It’s long been my preference for most spaces to use squares larger than the typical 12″. However, there’s nothing wrong with 12″ tiles. In fact, I had a 12″ black and white vinyl floor in our New York townhouse.
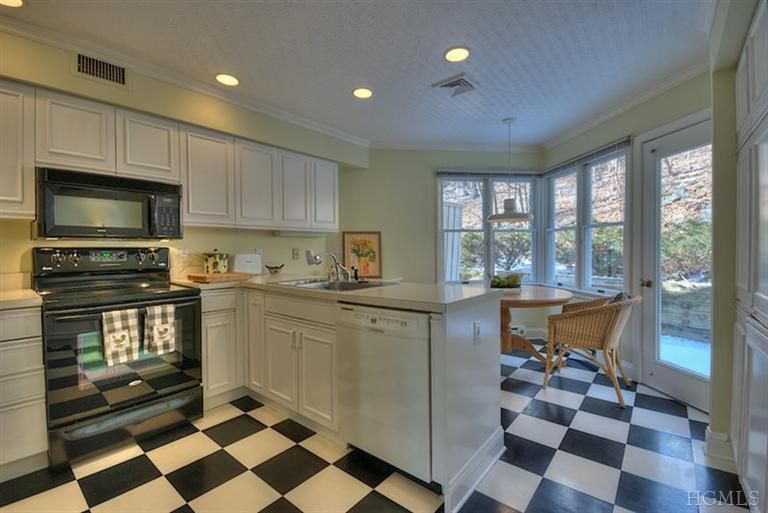

As an aside, these are real estate images, and the cabinets had been re-painted. I didn’t have anything to do with that, as I had moved out a few weeks earlier. They were formerly painted creamier white. Oh well. And, yes, they are melamine! The microwave and range were a hand-me-down about a year earlier because our appliances were dying.
That floor had some good points, such as being soft underfoot, but if you only looked at it, it scuffed, and the scuffs were not easy to remove.
But, getting back to the size of the squares, I think large-ish squares are stylish. That doesn’t mean smaller squares are wrong.
So, what I did was create a harlequin grid with no particular scale.

Actually, I made this grid a year ago!
Then, I superimposed it over my floor plans in PicMonkey. (coming up in a sec) My goal was to make the grid fit into the space in the most attractive way possible. Afterward, I measured the square to see its size.
One thing to avoid, if possible, is ending a wall with tiny triangle pieces. It’s best to have at least half a diamond. Ideally, the room would end with a whole or half diamond, but it rarely works out that way.
I started with the lower level, and a 17″ square looked the best for that space.
However, the 17″ square didn’t work for the kitchen. I didn’t want to go larger than 18″ or smaller than 15″. However, 16″ looks the best for that space.
I put both spaces on one board for you to see how they are.
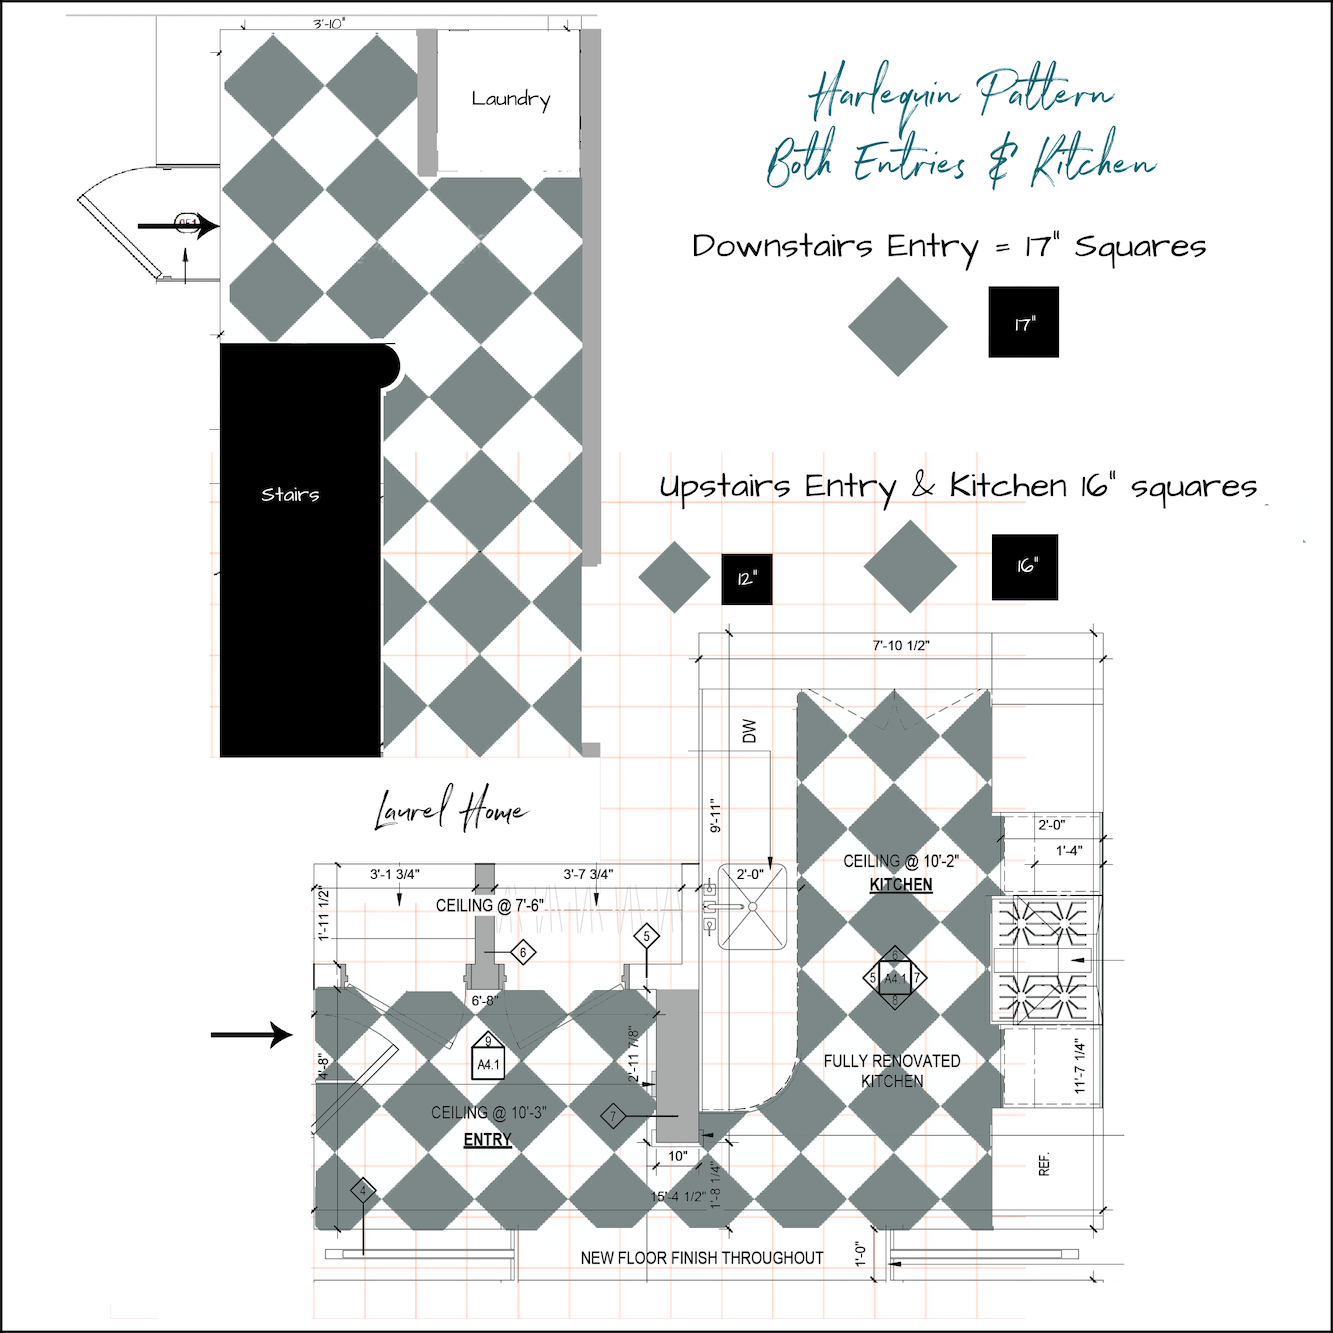
I don’t know yet about the floor stains for the black-ish squares, but I’ll be sure to report back! I did send this schematic to Chris but he hasn’t commented yet.
OH!!!!!! I almost forgot the second piece of news.
If you recall, from the last post, where I included a schedule for July and August, my GC, Robert, didn’t respond.
So, I called him up Monday morning, and he sounded cheerful.
“Did you get the schedule? I asked”
Yes, said “Robert, didn’t you get my email?”
Sound of Laurel checking her email.
Sorry, I didn’t get it.
Anyway, the guys can finish their work in the den beginning the week of July 22nd.
Laurel, what are you doing in the bathroom? Are you really doing it this time?
Yes, I’m really doing it. Please stay tuned. I will discuss my plans for the bathroom floor, hopefully on Thursday or Friday. The thing I’m trying to avoid is this taking months. While I can live with one bathroom upstairs as I have been, I do want my bathroom finished by my target end date.
Oh, and I did get the mirror you saw in the rendering the other day.
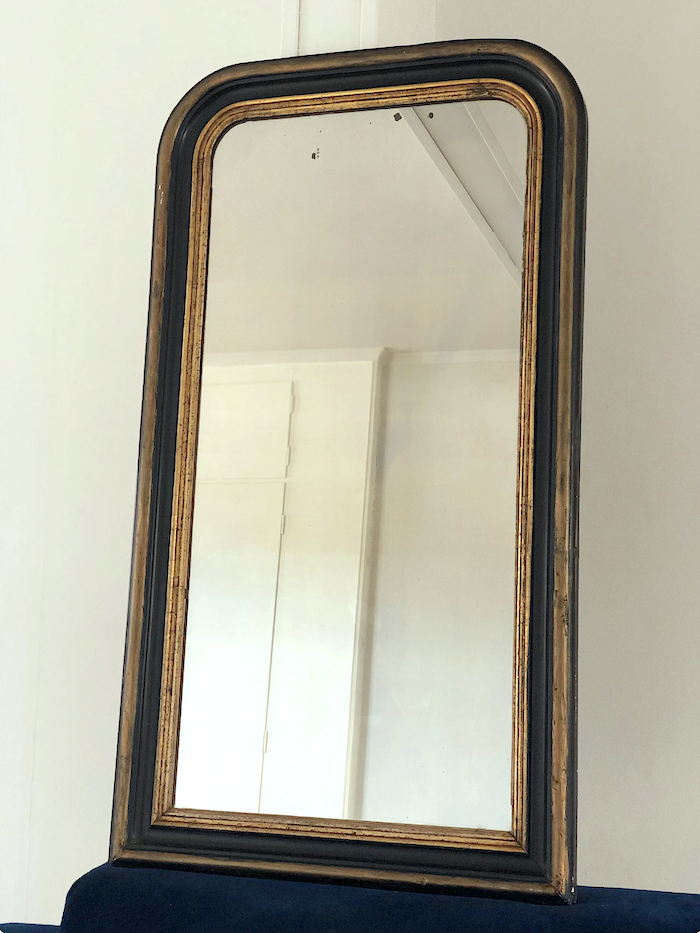
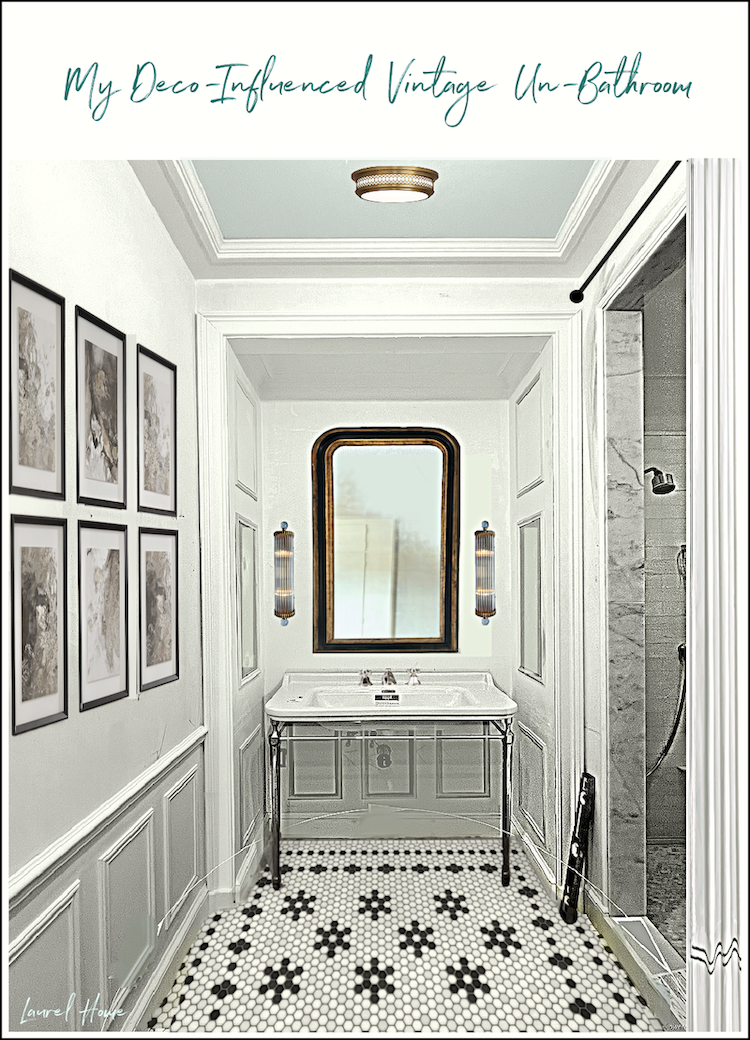
While the Louis Phillipe mirror is more than I wanted to spend (Isn’t almost everything? lol), it’s perfect for the bathroom in style, and authentic patina. It’s from the late 19th century, the same as my home. Plus, the most important thing is it’s a terrific size @ 26″ x 47″. It has a presence, which is what I want. Most of the new mirrors of this style are a little too small or too big. There are also a lot of mirrors that are hideously expensive.
Okay, please stay tuned for much more about the bathroom floor.
I can’t wait to share more about that with you.

In the meantime, for those that are interested, I’m running a very rare Flash Sale for all of my rockin’ interior design guides where I spill all of my secrets, and more!
They are all 20% off. (but I round up if there’s any change.) Please start here to read about each guide.
Or, if you’ve been waiting for a sale and know what you’d like to get, you can go directly to the order page.
I meant to run this sale last week, but with everything going on and Cale being here, it wasn’t possible.
In addition, of course, this is one the biggest sales weeks of the year going on right now for the 4th of July, so please visit the HOT SALES pages, if interested in seeing some of my favorite vendors and sales.
xo,

There is now an Amazon link on my home page and below. I so appreciate your clicking the link before making an Amazon purchase.
Please note that I have decided not to create a membership site. However, this website is very expensive to run. To provide this content, I rely on you, the kind readers of my blog, to use my affiliate links whenever possible for items you need and want. There is no extra charge to you. The vendor you’re purchasing from pays me a small commission.

To facilitate this, some readers have asked me to put
A link to Amazon.com is on my home page.
Please click the link before items go into your shopping cart. Some people save their purchases in their “save for later folder.” Then, if you remember, please come back and click my Amazon link, and then you’re free to place your orders. While most vendor links have a cookie that lasts a while, Amazon’s cookies only last up to 24 hours.
Thank you so much!
I very much appreciate your help and support!
Related Posts
 Laurel’s Home Renovation 2024 – News & Deets!
 Architectural Details That Will Elevate Your Rooms – Parts 1 & 2
 My Bathroom Design– Architecture, Lighting, Vanity, & More Parts 1&2
 The First Renovation Tour Of The Upstairs Living Areas! (Parts 1 & 2)
 The Renovation End Date & Schedule
 Under the Stairs Hidden Closet – Finalizing the Plans!
 14 month Renoversary! and I’m Back In My Bedroom!