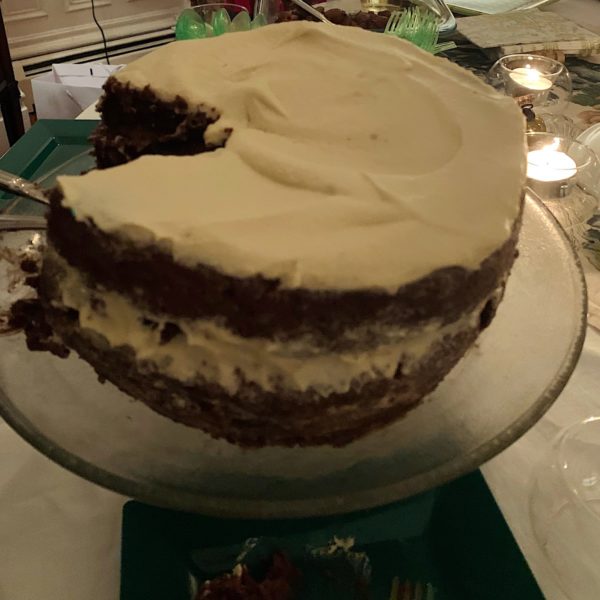
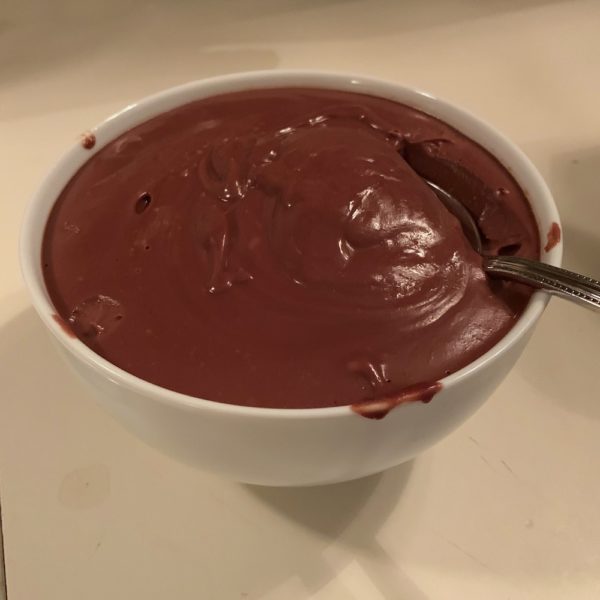
Here is my recipe!

2/3. cup of cocoa powder
1 cup of water
1/2 cup of canola or other cooking oil
1 stick of salted butter
5 eggs (room temperature)
2.5 cups of sugar
1.5 tsp. vanilla extract
2.5 cups of gluten-free flour (I used one cup of Bob’s 1-1, one cup of almond and one cup of coconut flour. Of course, you could try other variations.)
1.5 tsp. baking soda
2 pinches of salt (all of that gets sifted together)
1 cup buttermilk (room temperature)
Method:
put the first 4 ingredients in a small saucepan and stir it, bringing it all to a gentle boil and then remove from heat to cool, thoroughly
line three 9″ cake pans with waxed paper and grease (I like to grease under and over the waxed paper and the sides of the pan and I use some softened butter for this)
beat the eggs until fluffy and add the sugar and vanilla
preheat oven to 350 degrees
add cooled chocolate mixture to the egg mixture and beat gently
THEN add 1/3 the flour mixture and alternate with 1/3 buttermilk, and beat slowly, but don’t over beat each time, alternating and finishing with the buttermilk. Do not over-mix.
Divide evenly into the pans
bake for 20 minutes and check on the cake The center should not jiggle, but just past the jiggle stage. Therefore, it might need a bit more time in the oven. Do not over-bake! That can happen very fast. I read this somewhere and saw that the cake bakes quite quickly.
Cool in their pans for at least a half hour. The sides will pull away and the center might sink.
This is somewhere between a regular cake and flour-less cake. Sinking is typical for flourless cakes. The cake is quite fragile, so handle carefully. I did cool them on racks, but then transferred to aluminum foil, wrapped each one individually and put in the freezer. If in a hurry, an hour or two is probably enough. It makes it easier I find to deal with the layers when assembling with the filling.
Filling

This is an eggless, no-cooking chocolate mousse which, was a happy accident I could eat this on its own!
Ingredients
1 jar of whole peeled chestnuts in a glass jar. I got these at DeLuca in Back Bay. They are LaForestiere brand, 7.4 oz jar.
6 Tablespoons of Butter, softened
1/2 cup +/- of half and half
1/2cup – 3/4 cup of powdered sugar
1/2 cup of unsweetened powdered cocoa. I actually used Hershey’s. But, of course, you could use something better. 1 tsp vanilla extract
1 tablespoon of coffee liqueur
1/4 tsp. of powdered instant espresso coffee I am sure that this would be far easier to do a food processor. I don’t have one so I used a blender. You can adjust to taste and for the proper consistency.
When I was finished, it was silky smooth, creamy, thick and rich. I put most of it in a soup bowl, but saved a ramekin of it, for myself. I put the bowl and ramekin in the fridge, covered with saran wrap and in the morning, they had set up, beautifully into a lovely pudding or custard-like consistency.
I was astonished because originally, I was trying to make a chestnut cream. This was even better. It makes sense that it thickened as powdered sugar contains cornstarch. Plus, the chestnuts act as a thickener, too.
Icing
1 stick of salted butter, softened
2 cups of powdered sugar
1/4 cup of half and half 1 tsp of vanilla
1 tablespoon of coffee liqueur
1/4 tsp instant espresso coffee dissolved with 1 tablespoon. of boiling water. You can ice the entire cake, or you can ice the top and sides and then skim off the extra on the sides. Chill in the fridge an hour or more before serving.
The cake is even better the next day, so I would bake the cake at least two days ahead of when you need it and ice several hours later.


