Roman Shades are one of my favorite window treatments. And this post is going to go over everything you need to know (or at least everything I know) in great detail.
Years ago, I used a workroom owned by an Italian seamstress near me, named Josephine. Since Laurel was not a word in her vocabulary, she always called me Laurrrrie.
Josephine would say:
“Laurrrie, all you do are Drrrapes and Rrroman shades.”
Haha. Yes, I would say that was true 95% of the time. I have done valances, but the number of times, I can count on two hands. To see one job where we did valances, please click here.
As for swags, it is at most two times, but I think only once; It was a relatively loose swag.
But, Roman shades?
We did hundreds of them.
Well, I’ve never actually made one. However, I’m well-acquainted with how they are constructed. This business has such a steep learning curve. And, again, like so many other important aspects, none of this is taught in interior design school.
Therefore, this post will share everything I know; because what you don’t know can get you into expensive trouble.
So, let’s first begin with what a Roman Shade is.
A Roman Shade is actually several different styles of window coverings made of fabric to cover the glass. It is not a blind. Blinds have slats. Or, at least openings, and are not made of fabric.
Below are the five main types of Roman Shades.
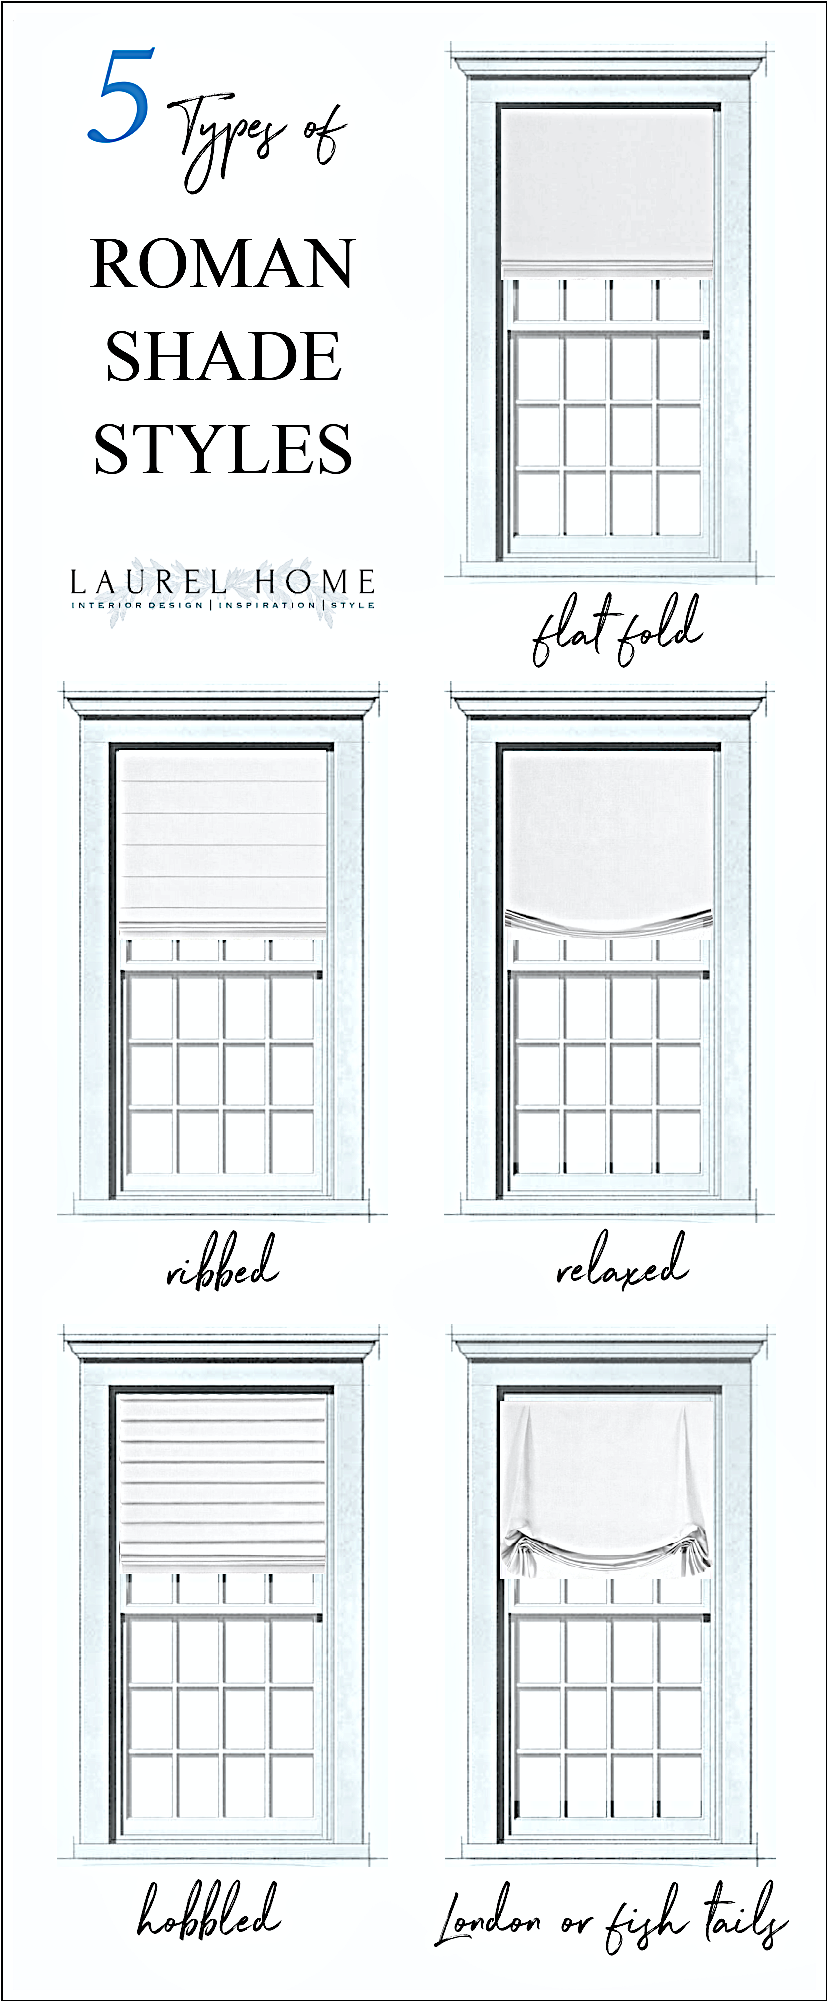
please pin to Pinterest for reference
Sometimes you will find different terms applied to the different styles of Roman shades.
This, of course, can be quite confusing. For example, sometimes, a flat fold is called a soft fold. I find that when working with a workroom, being as visual as possible works the best.
1. The flat fold Roman shade
is sometimes called a plain Roman Shade. This is the most common type, and the one used almost exclusively when there is a ribbon trim applied. The thing to remember with flat or soft fold Romans is that you have to train them to remember their folds.
However, if it’s a sheer fabric, that will likely not be possible. So, if you want a super crisp fold and don’t want to have to put the shade up at a snail’s pace, making everything lie perfectly as you go up, it might be better to do a ribbed Roman shade.
2. A ribbed Roman shade
can either be stitched or with a thin metal dowel inserted for a crisp fold when the shade goes up and down.
3. The soft fold Roman shade
is like the flat fold; only the rings used to thread the cords that make the shade go up and down are only sewn at the ends of the shade.
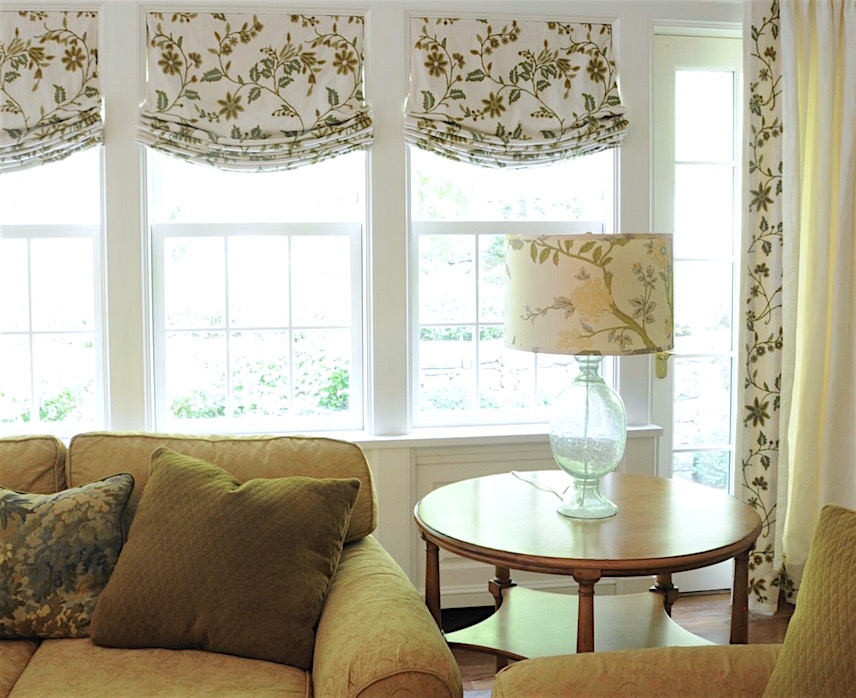
4. The London or Fishtails Roman shade
is like the soft fold; only the rings are set in from about 3″- 8″ to create a drooping tail on the end. These shades might or might not have a pleat where the rings are sewn on. This is an attractive choice when the window is wider than the width of the fabric. A seam can be put where the rings are. And then, a decorative tape can be used on the front to cover up the seams.
5. The hobbled or pleated Roman Shade
was more popular a few decades ago. However, it uses a lot of fabric and is, therefore, a lot more expensive to make. Plus, it looks a bit too fussy for most people.
What about balloon shades, Laurel?
Well, they’re not my thing. I’ve never done one.
The Advantages of Roman Shades Over Drapes
- They are usually a lot less money.
- There’s less fabric,
- Less labor
- No expensive hardware.
- Installation costs less too.
- Sometimes curtains are not an option. For example, if there’s a banquette or an especially deep radiator. Or, the window is on top of a doorway. It happens. Builders do the wackiest things, sometimes.
Of course, one can do Roman shades with curtains.
From a job, we did in 2015. This is a soft-fold Roman shade with the rings on the end.
Inside Mount vs. Outside Mount
Inside is duh…inside the window frame and IMO usually preferable, especially if there’s a pretty window casing.
An outside mount is when the shade is outside the window frame. There are a few different reasons why doing an outside mount is preferable.
- There is inadequate space to install an inside mount shade. (more about that in a sec)
- It’s in a bedroom and the inhabitant(s) need/want the room to be very dark. There are gaps in an inside mount shade.
- There are multiple shades, and some are inside, and some are not.
- Another shade’s inside the window frame. That could be a roller shade, wood blinds, I’ve even seen two Roman shades together!
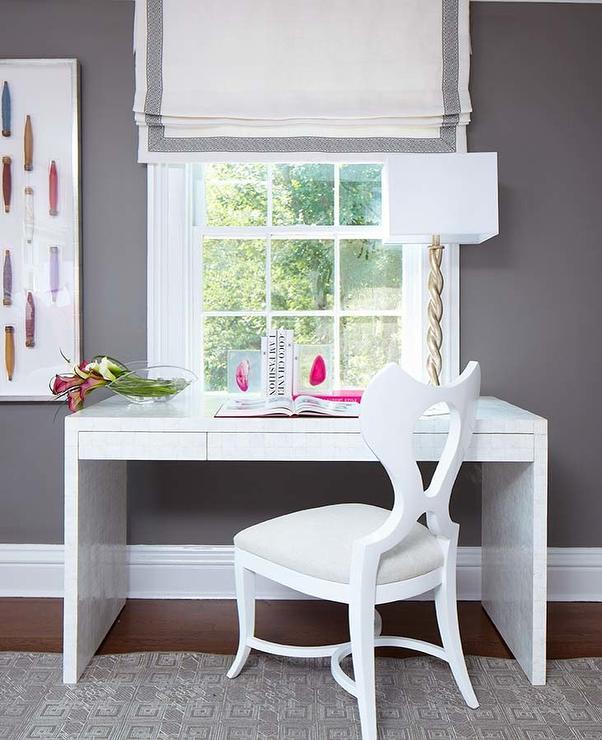
Here are some other outside mount Roman Shades.
 Carey Karlan – photo: Paul Johnson
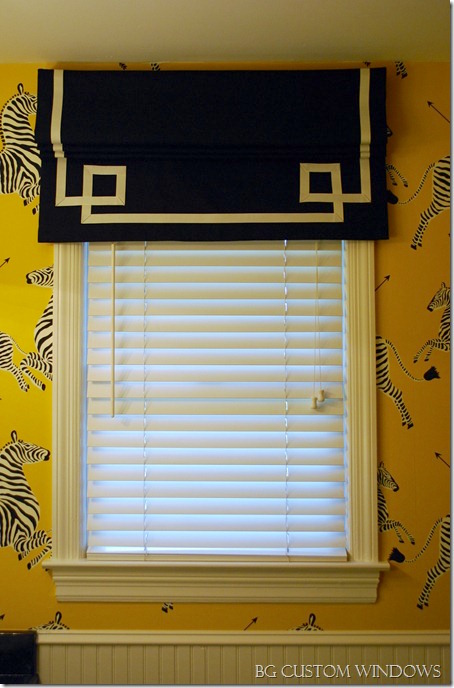
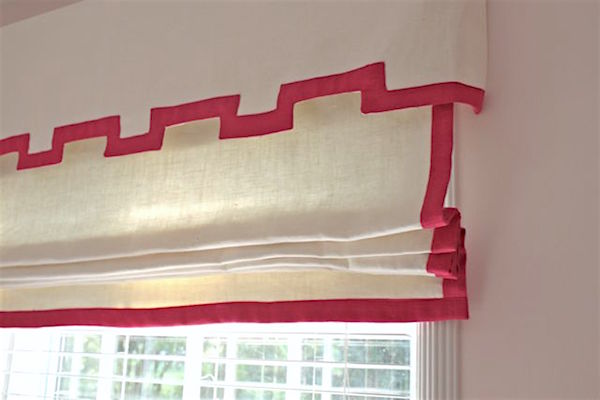 I love the cornice over the outside-mount Roman Shade with red trimming.
I love the valance over the shade with trim detail.
One thing to point out. When doing an outside mount Roman shade, you’ll see the very small board. Frankly, it doesn’t bother me, and my workroom would cover it with fabric.
However, years later, a different workroom made a flap to hide the board.
I’m not that crazy about that solution because sometimes the flap would stick out, and we’d have to use some double stick tape or putty to get it to lie flat.
So, there are two solutions.
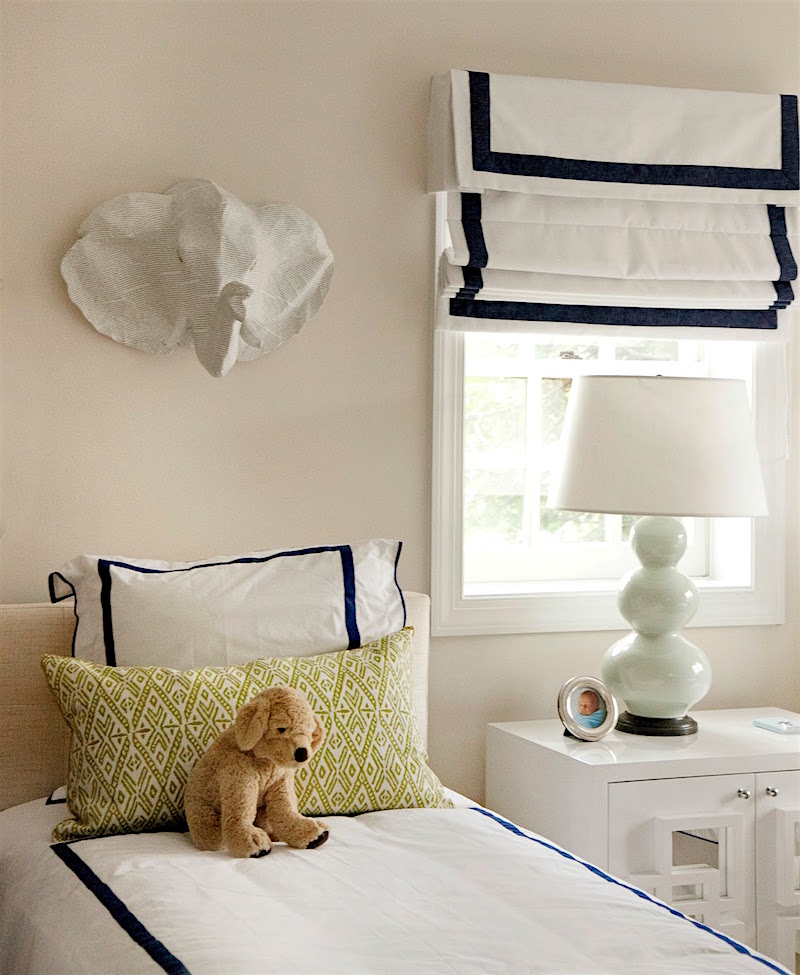
One, is to do a valance around the top of the shade, as is done in the two examples above.
Or, the flap could be sewn to the shade as this one is above.
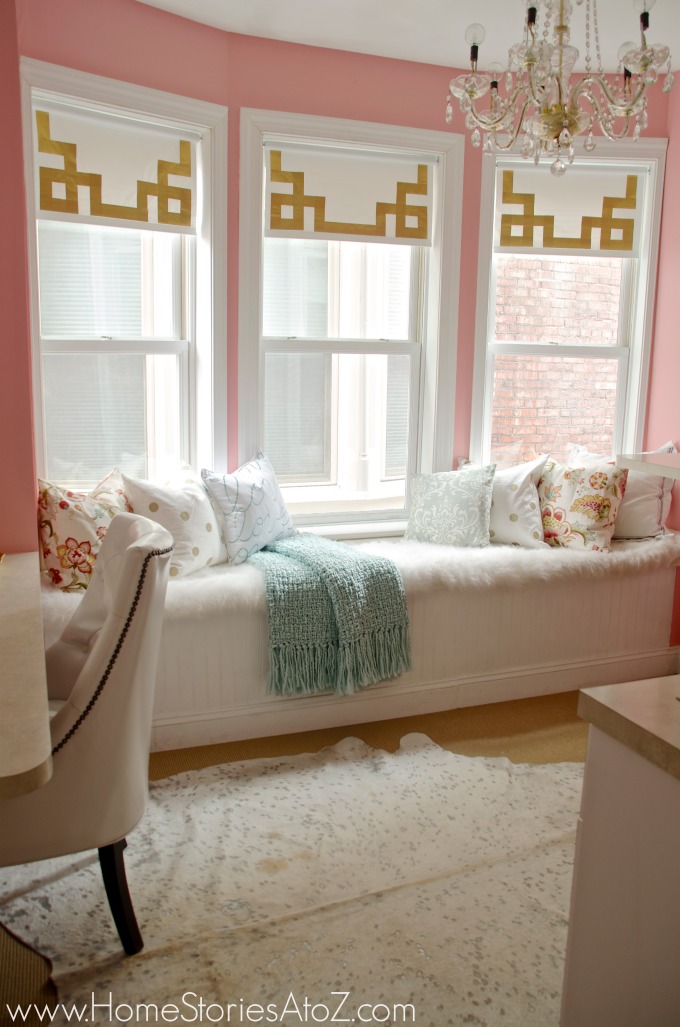
As well demonstrated in the charming room above, the outside shade should hang out about an inch on each side of the window frame. And, I think a half-inch minimum.
While we’re on Greek Key for trim, here are a few more just because I love it so!
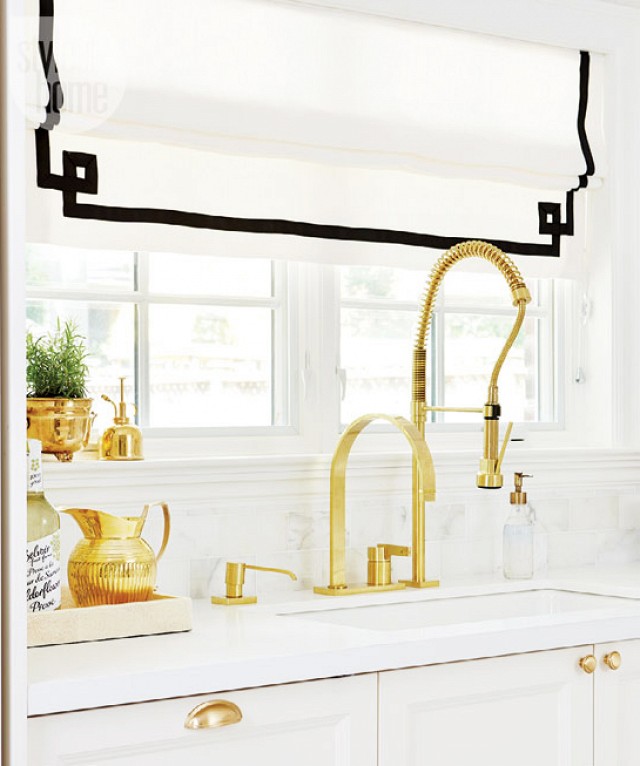 Style at Home – Stacey Brandford – photo
This is actually a roller shade. And get this. She used Gold DUCT TAPE for the trim. Here’s the tutorial.
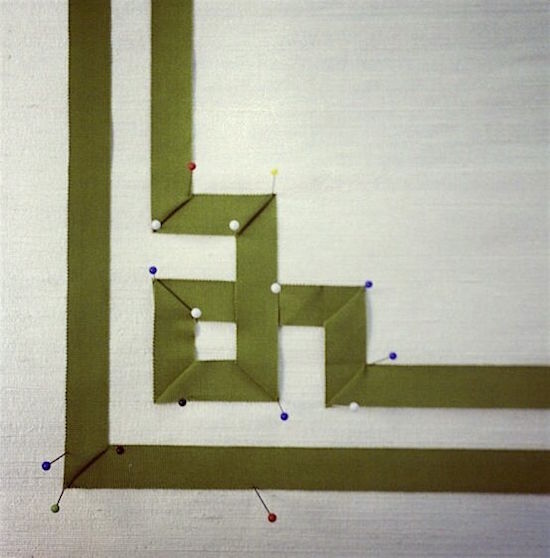
I cannot find who did this, so if anyone knows, please tell me. It gives a clear diagram of how to apply a Greek Key border. Love this!
Kayes Curtain and Blind Warehouse
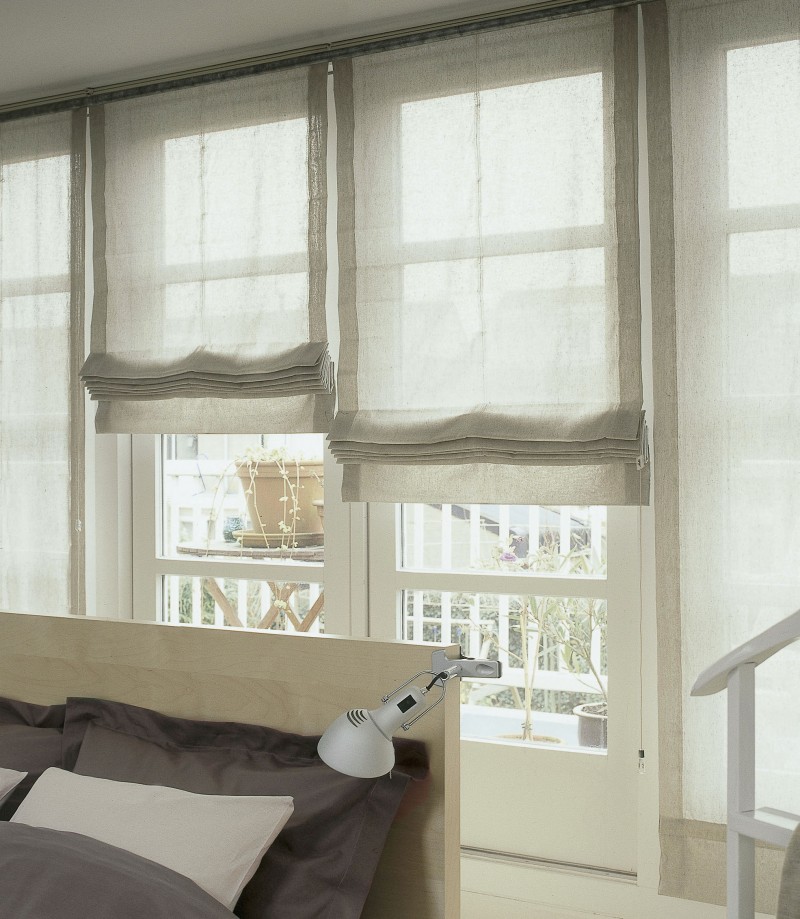
This is a wonderful bank of Roman Shades in a sheer linen. Please note that you won’t have complete privacy. I also love the extra flap detail at the bottom of the shade.
Let’s get into the nitty-gritty.
How a Ribbed Roman Shade is Made
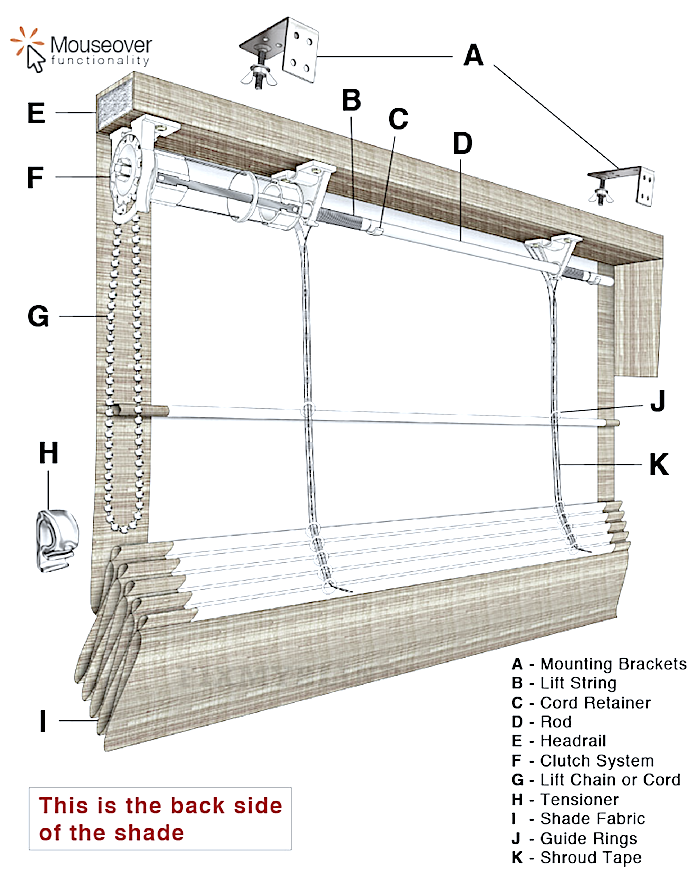
Yes, this is the backside, in case you didn’t realize that. :]
I’ve never done the kind of Roman shade with the dowels or ribs, but it’s a nice look if you don’t mind the horizontal lines. In addition, this is guaranteed to give you that crisp look if that is important to you.
Flat fold Roman shades have rings and nylon cords that go through them to pull the shade up and down. This one above has a clutch mechanism under the board. For years, I didn’t use the clutch because one broke very early on.
Later on, that changed.
I have to say that it is so much easier with the clutch because you don’t have to wrestle with the cord or tie it up around a cleat to keep the shade up.
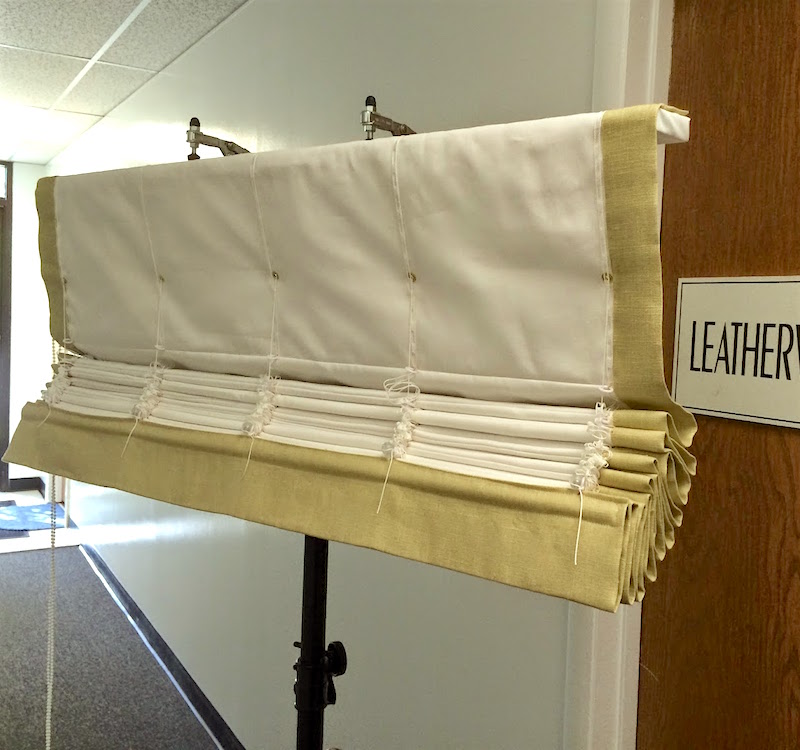
Above is a flat fold Roman Shade with rings and without the clutch.
However, this one is interesting because it is a reverse mount.
This flat fold has five rows of rings which is required on a shade this wide. And yes, they are sewn on individually–by hand. There is a ring tape, but that can only be used with a blackout lining unless you don’t mind seeing the tape.
Please also note that one often sees the rings and/or where they are sewn, plus the cords— especially with sheer Romans.
One other point is when doing a blackout Roman Shade.
Normal blackout fabric is, well, black. This can create a problem because a little speck of black might show up on your shade when the rings are sewn on. Not good. Plus, blackout linking can make for a stiff shade.
This one by Fabricut is quite soft.
Something else to be careful about
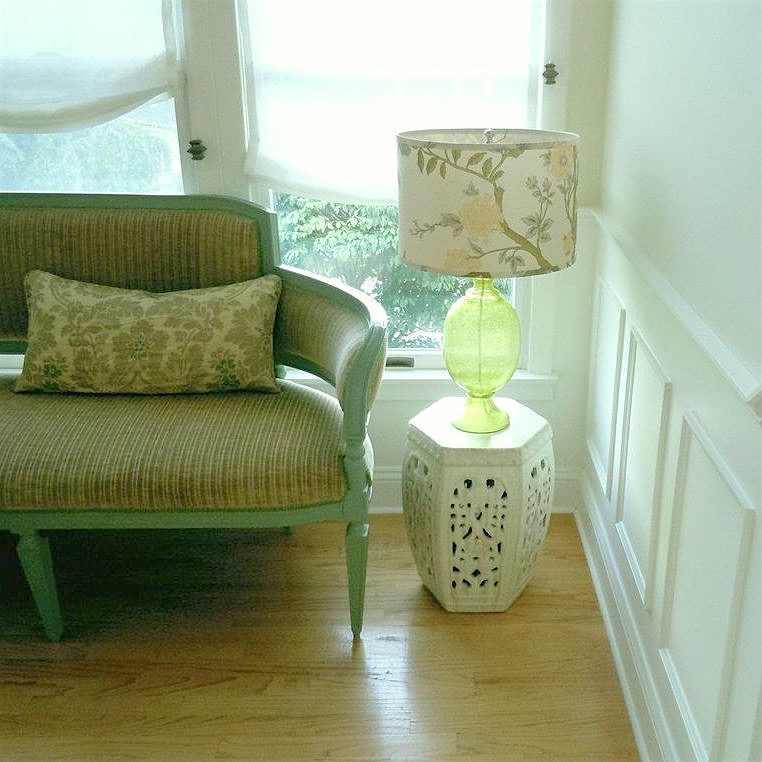
Usually, I prefer not to use blackout lining, but sometimes it’s necessary. One of those times is when you’re using a crewel fabric. They tend to have a mess of threads on the back, and when the light shines through, you’ll see them. Therefore, it is necessary to use a blackout lining. Here’s a from 2010 where we had that situation.
Laurel Bern Interiors window treatments. Yes, that’s my lamp I brought over for the photoshoot.
The shade is mounted on a 1″ x 2″ board running with the wide side parallel with the window frame. The boards are actually a tad smaller than that.
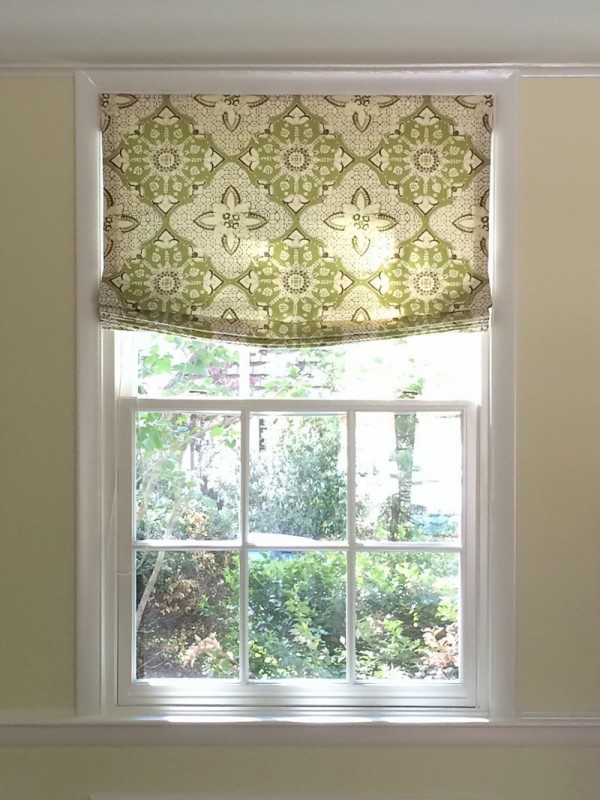
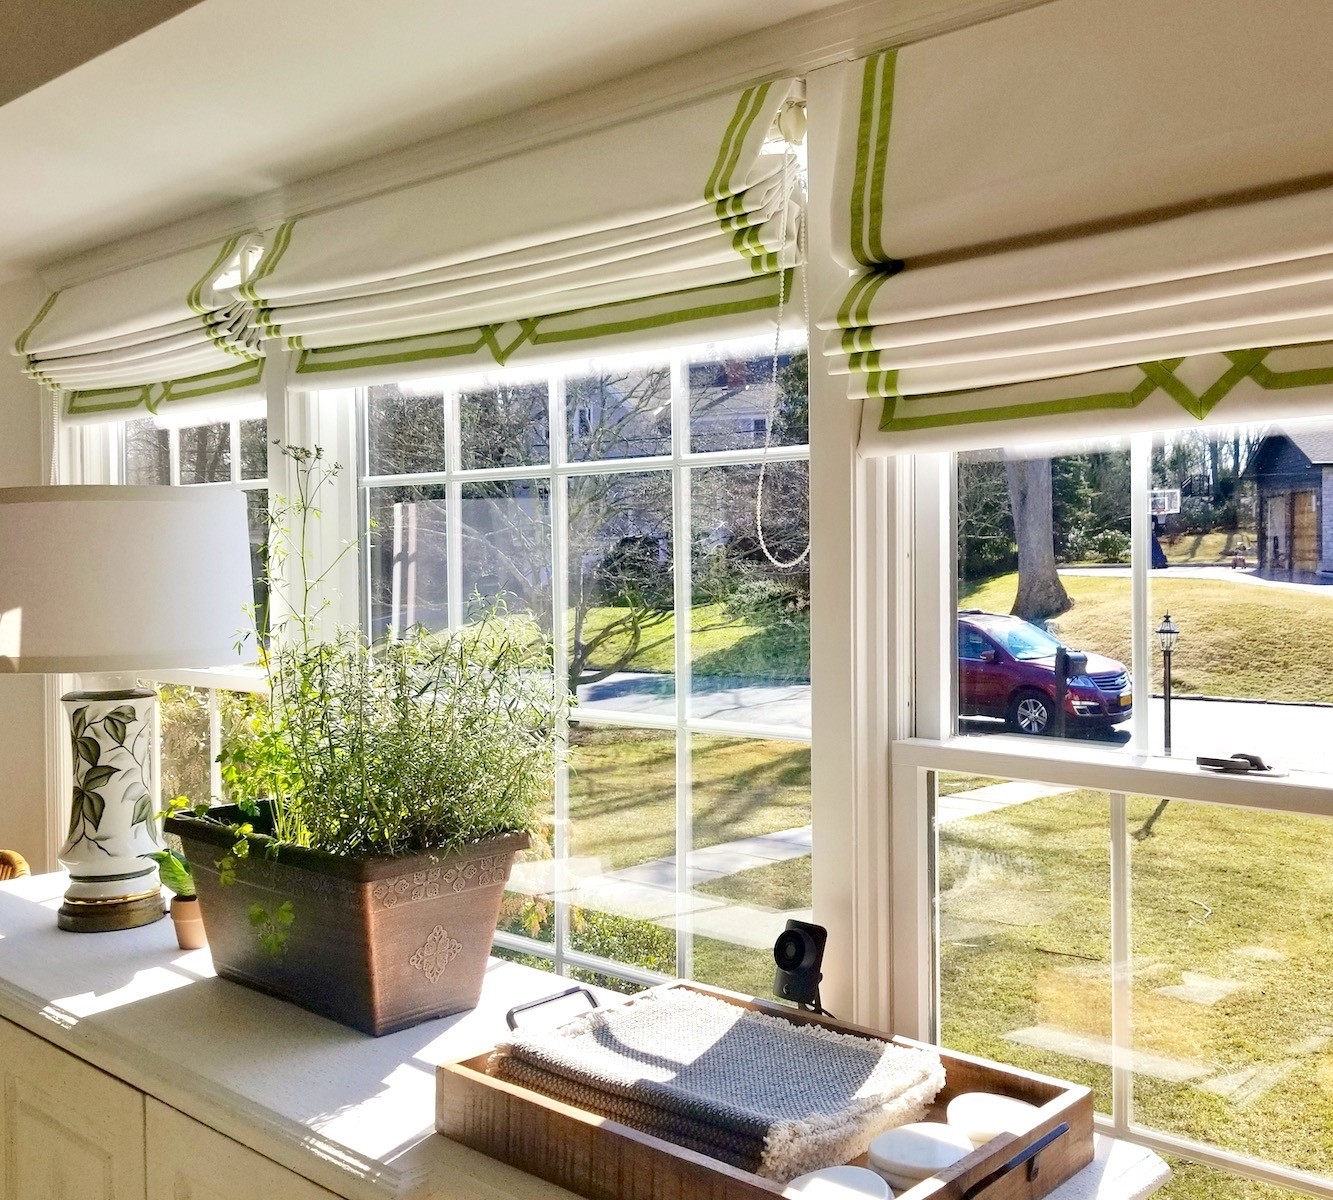
This next part is important, regarding inside mount Roman shades.
If you are doing an inside mount and space is tight, you can have your workroom run the board the other way. That is what we did for the green shade above. You can have as little as 1/2″ to work with.
Some will say that’s not enough, but we do it ALL the time! I did it in my old house. (below) It is alright if the shade protrudes up to 1/4″; it’s not noticeable.
When measuring for Roman Shades, it is essential to discuss with your workroom if they take off the measurement and, if so, how much. I would give them the exact measurements and have them take off 1/4″. (side to side) They might insist on a half-inch. I like them to fit pretty snugly, and maybe once, the installer had to shove them in. lol.
Long Windows or banks of windows.
When there is a mullion in between the windows, we can do separate shades.
If there is no mullion, then there is the option to do one long shade
or break it up between windows, leaving about a 1/4-1/2″ between shades.
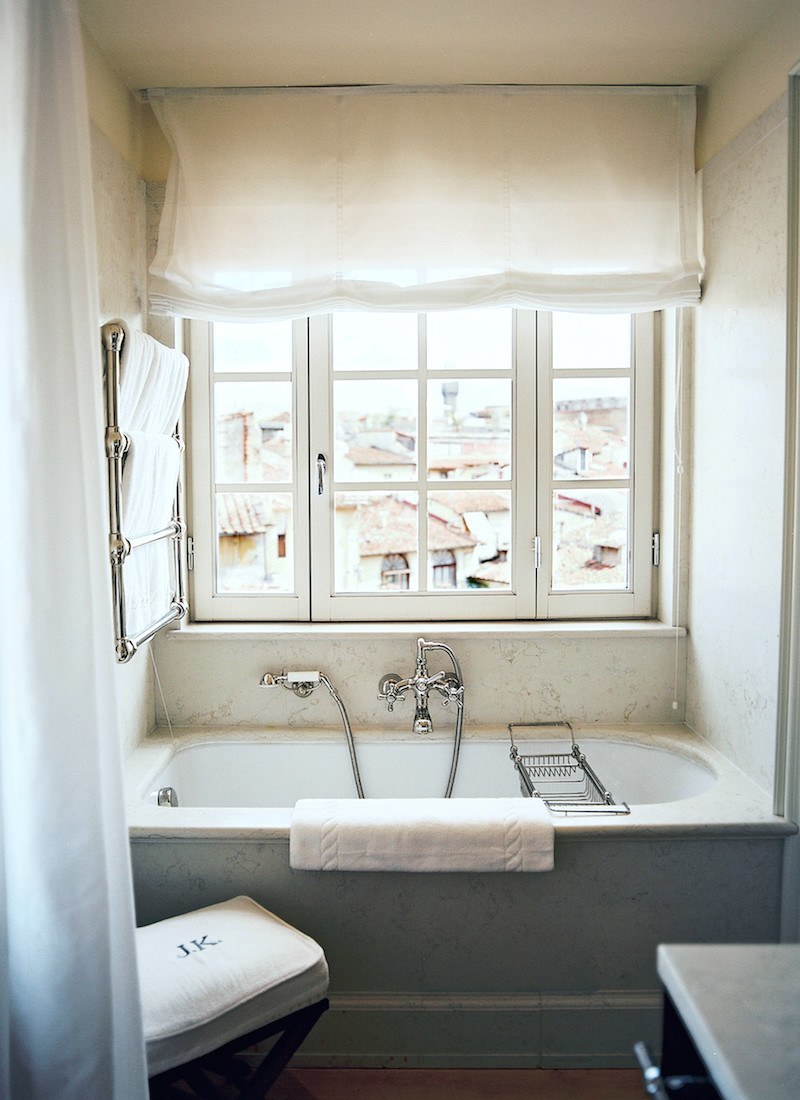
I love this long shade at the JK Place in Florence
Yes, I know there’s a kink in the shade. And, yes, it bothers me, too. haha. Alas, it’s an imperfect world.
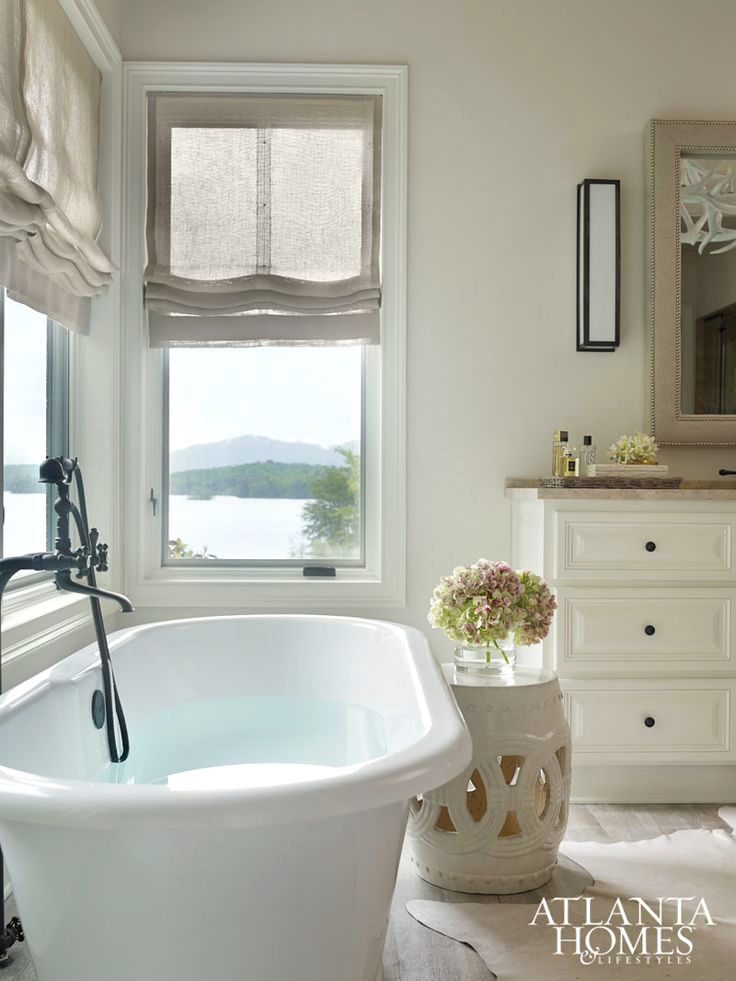
Beth Web via Atlanta Homes & Lifestyles
Gorgeous bathroom with lovely sheer linen shades.
This brings me to another common problem with Roman Shades.
The part of the window that needs to be covered in a bathroom is usually the bottom, not the top.
Here are my solutions:
One is to do the shade as below, which we needed to do anyway.
In any case, what I do for all of my Roman Shades is make a permanent pleat at the bottom, and then when down, it’s not just a piece of straight fabric hanging. But then, I suggest raising it a few inches from the sill.
 Me
Me
Another option is the top-down shades.
I found a tutorial on how to make them.
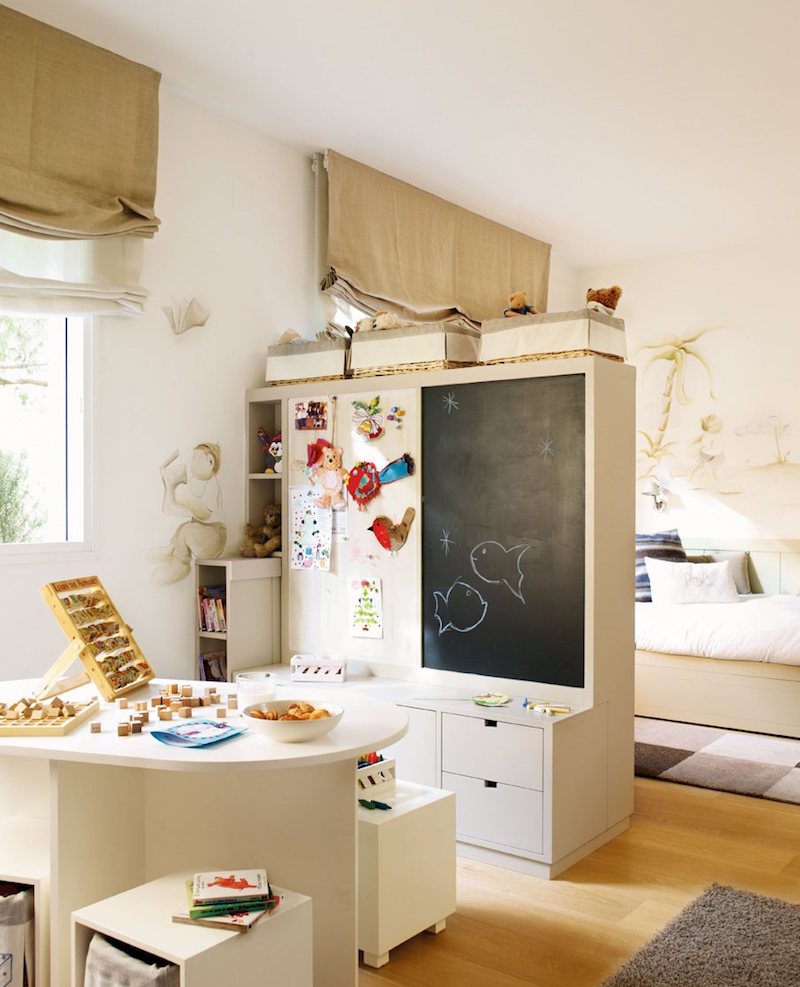
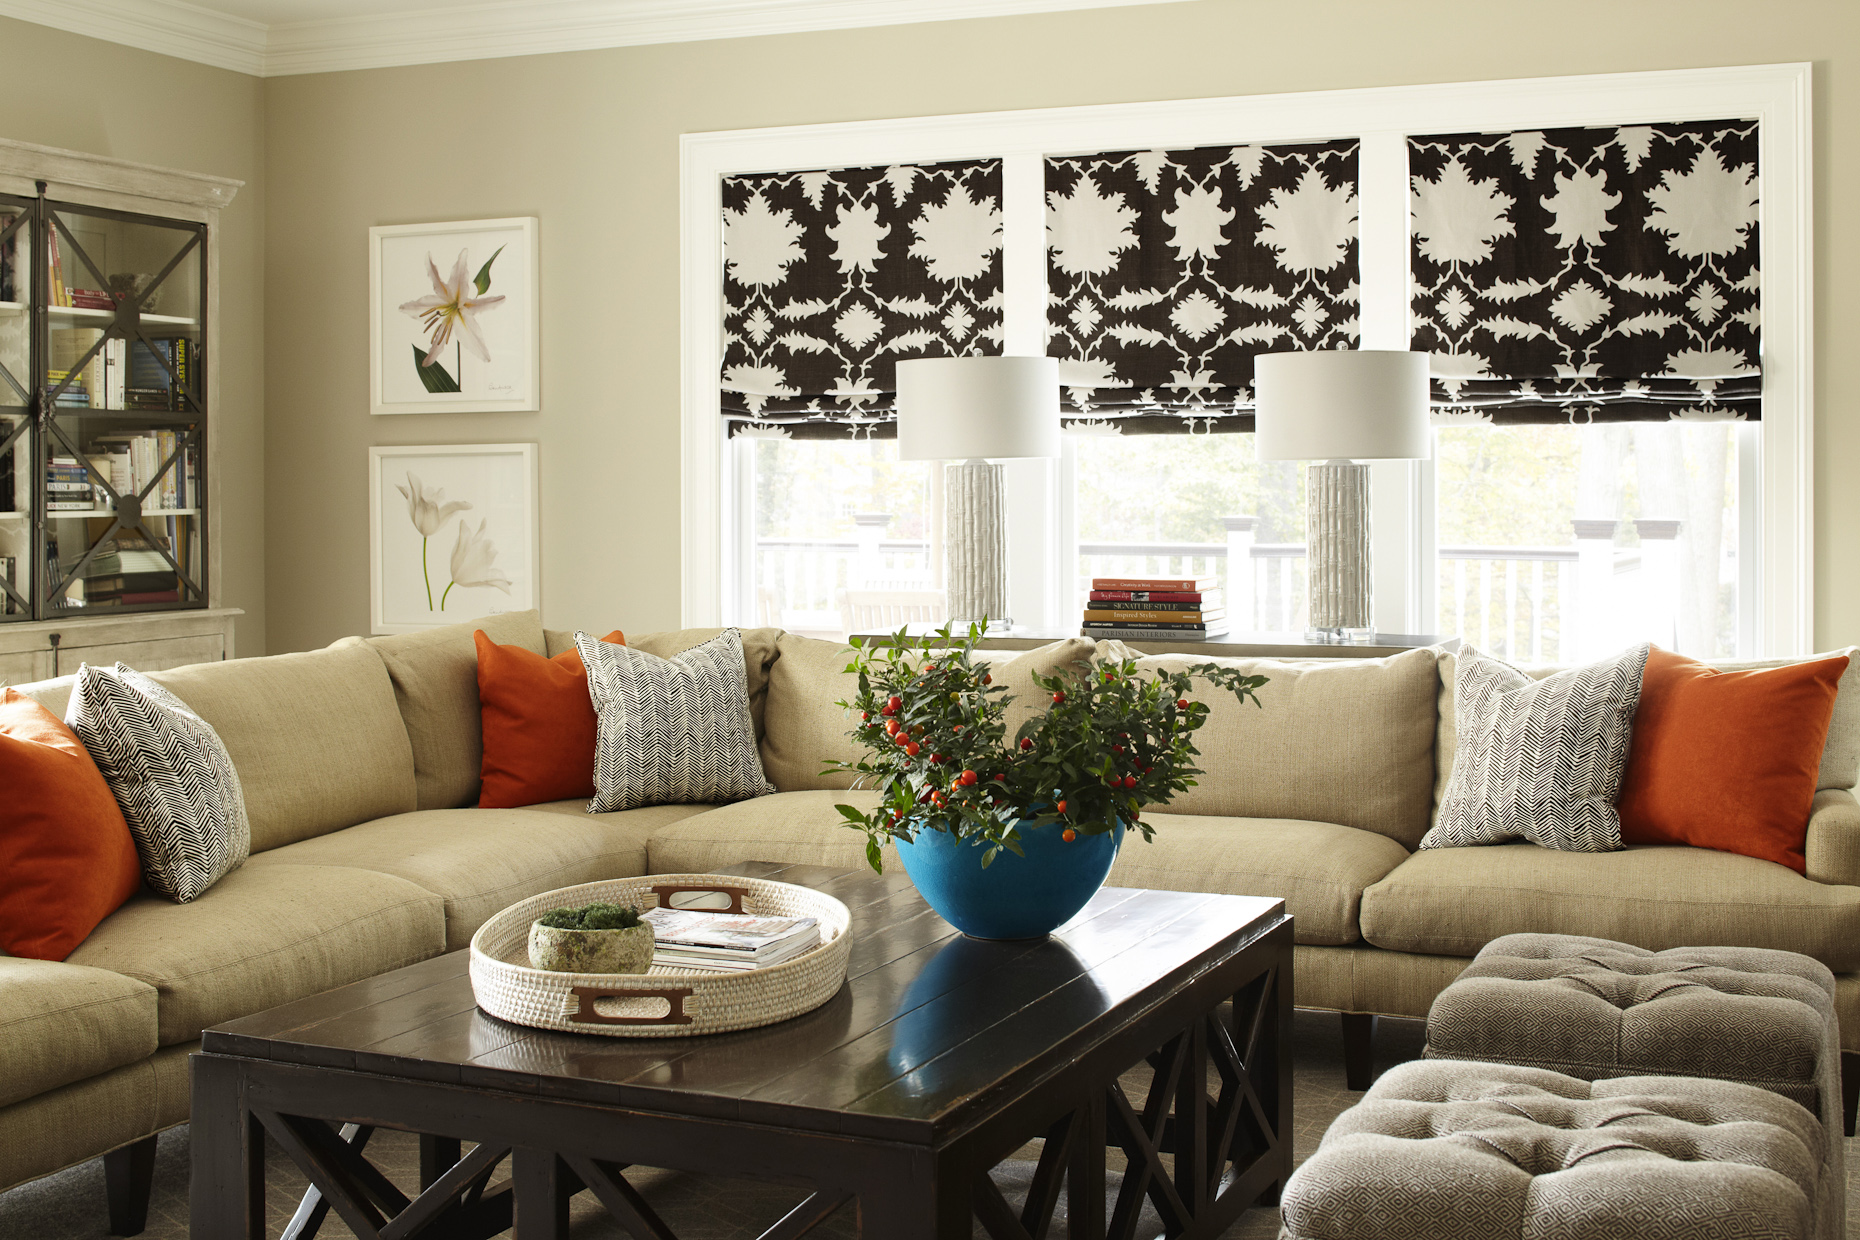
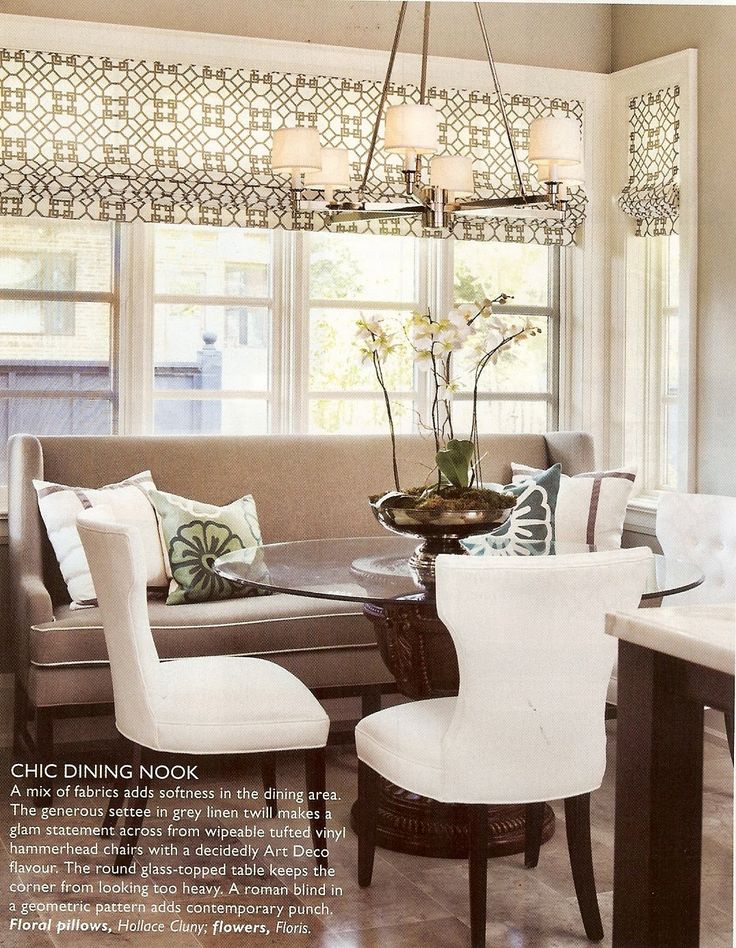
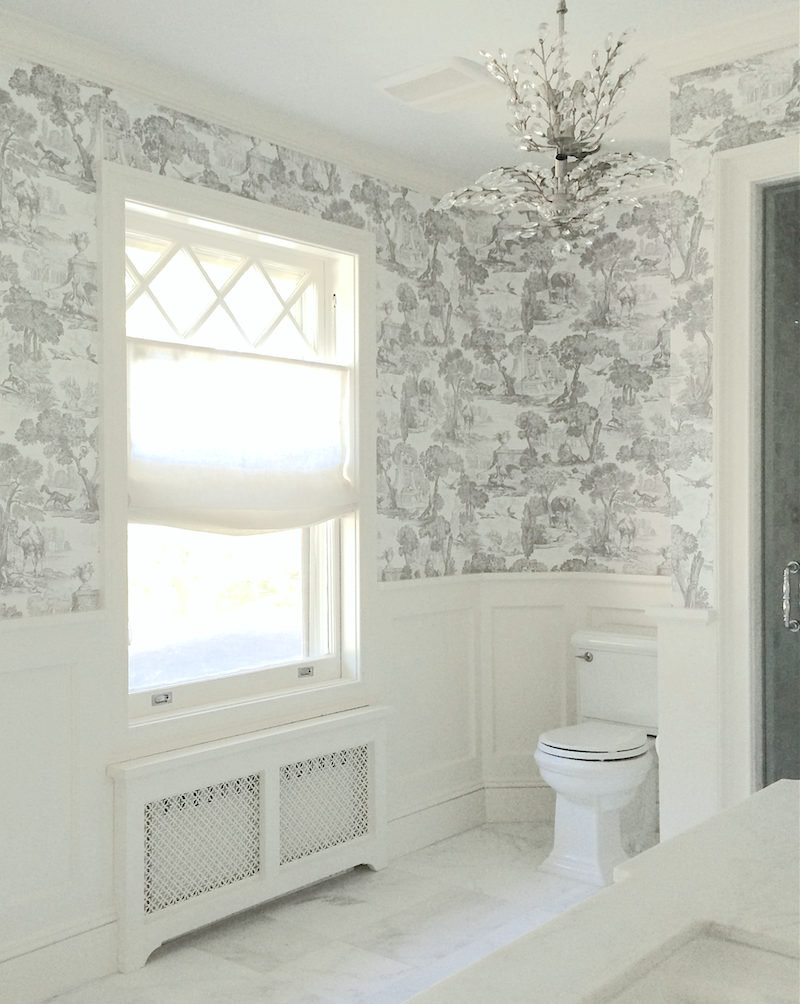
Otherwise, it is possible as in the Bronxville Bathroom to mount the shades part of the way down as in the lovely room below.
This is also a situation where they broke up the long expense with three shades. Really well-done.
Laurel, what about doing a faux Roman shade?
Well, my inclination is to say faux-get about it. (Sorry, couldn’t resist)
But, please be careful. A few key points.
- The money savings might not be that much.
- You won’t be able to use the shade. It is only a valance
- If there aren’t enough folds, it WILL look fake.
I’ve never done a faux Roman for all of the reasons above. However, if you do, please have at least 6 folds at a minimum.
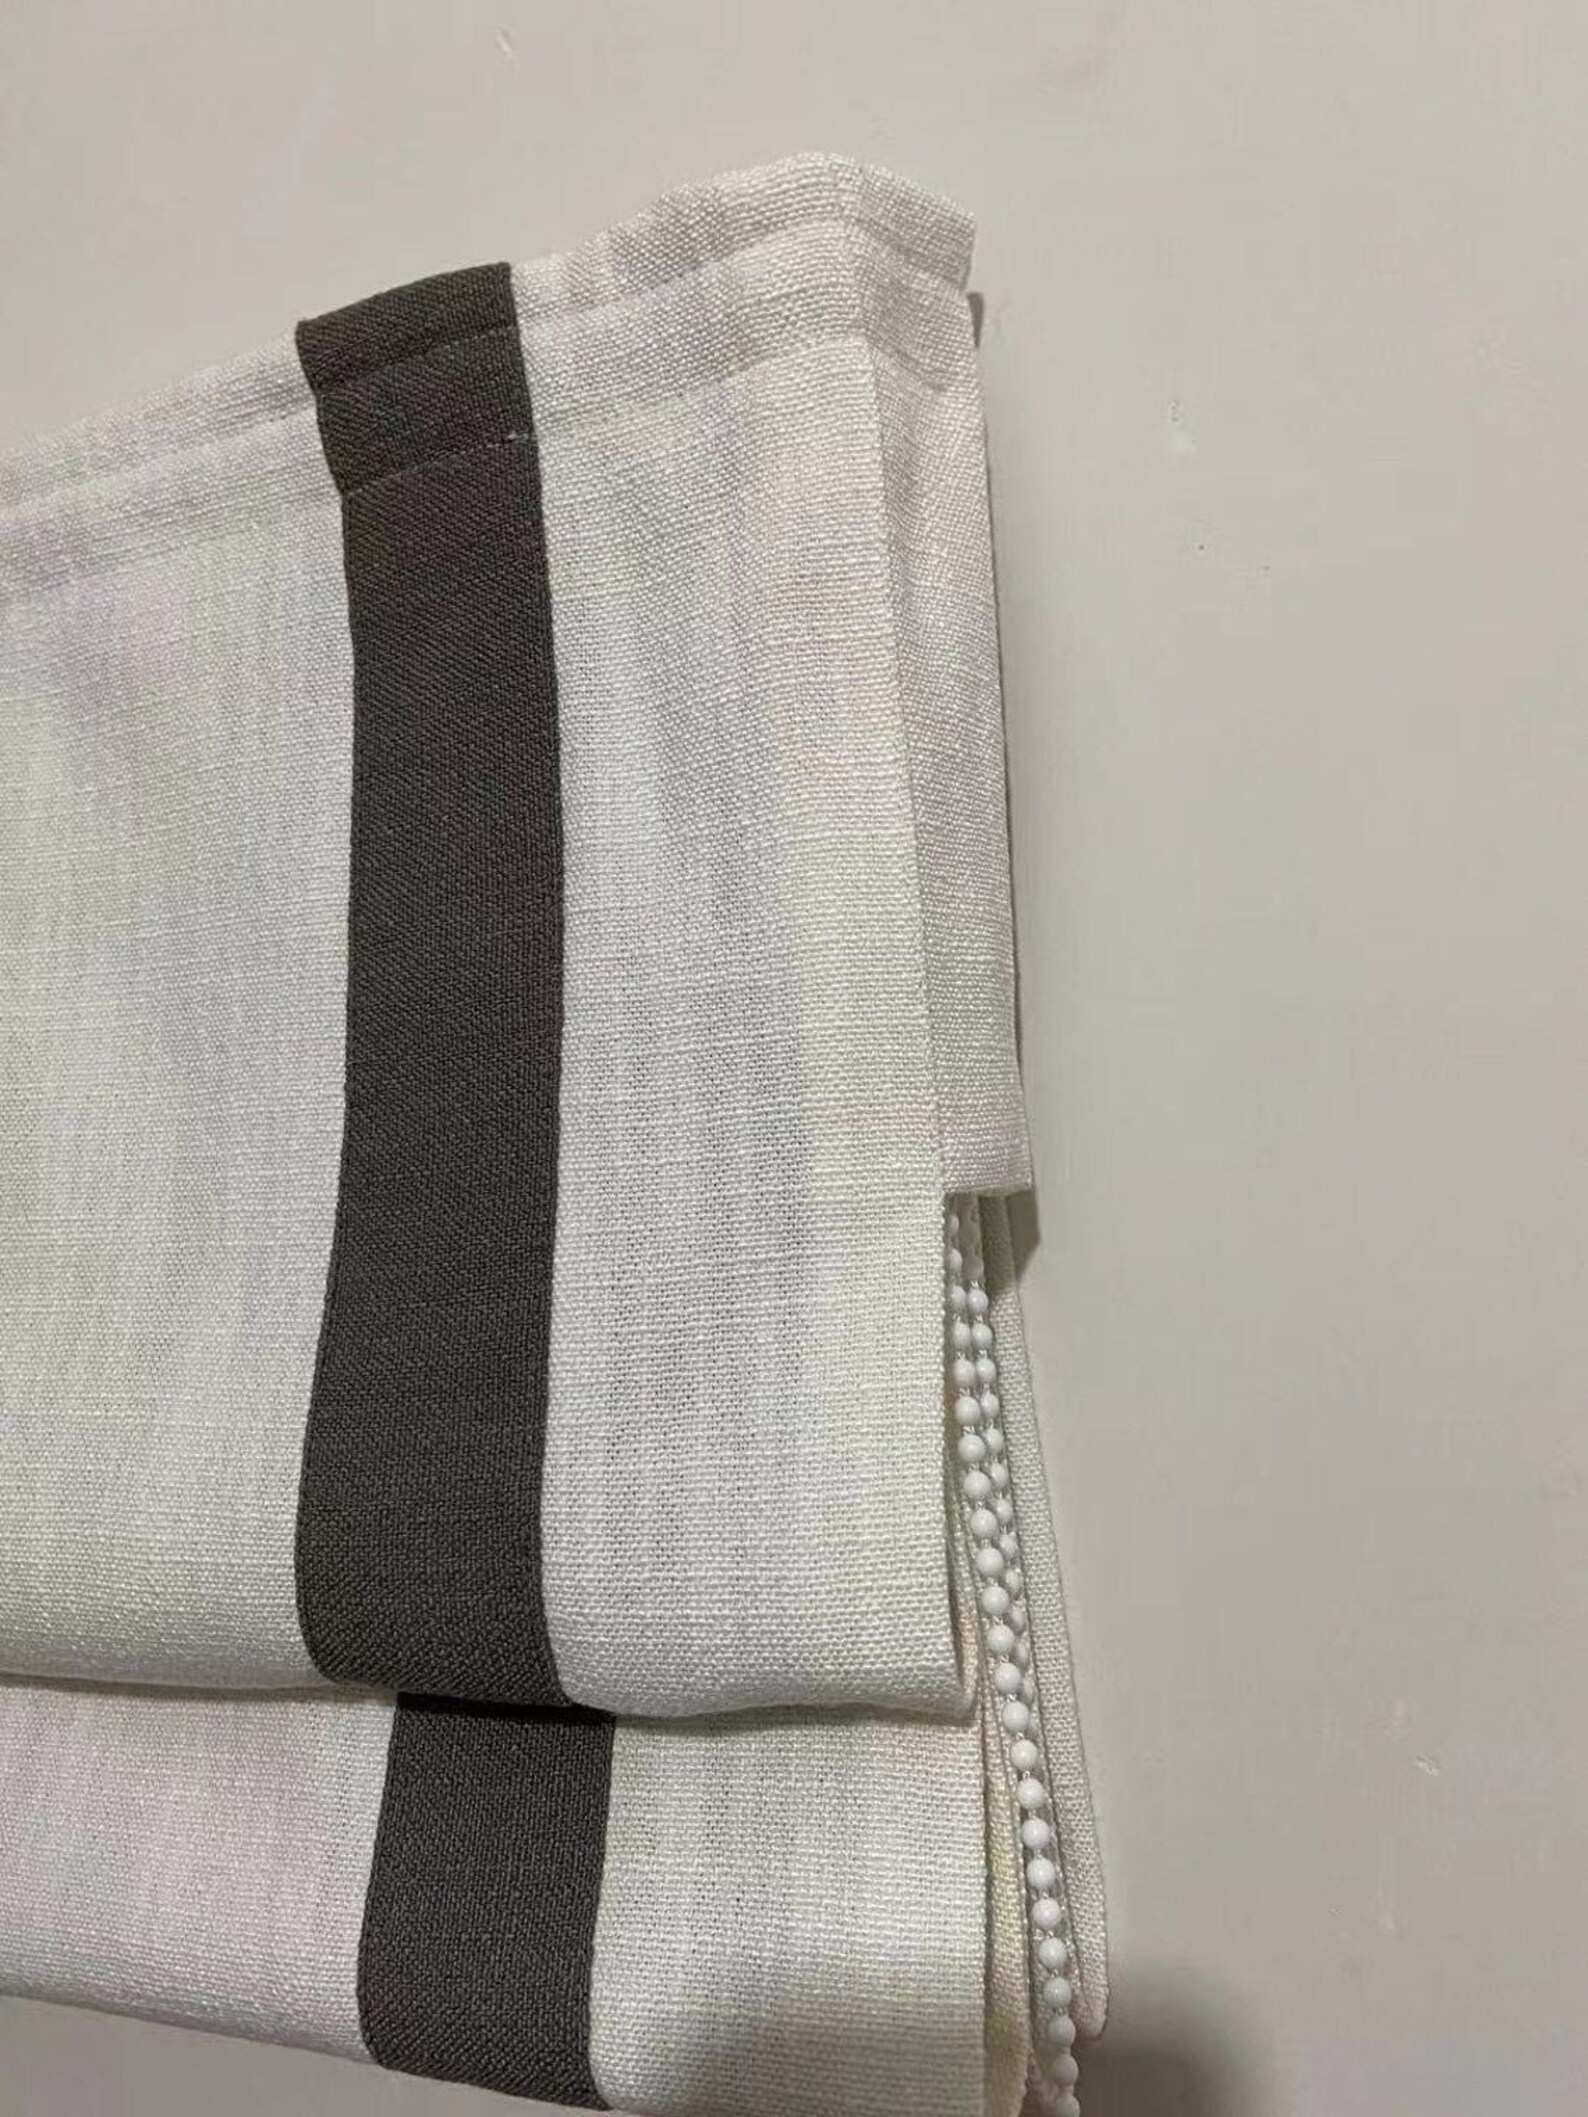
When doing a Roman shade with trimming on the bottom of the shade.
It is essential that there’s a flap at the bottom so that the trim will be seen.
Here they did make a flap; however, it’s not big enough. I believe the workroom sent instructions so that it could be fixed. They’re still really lovely, no matter.
What about ready-made Roman shades?
Yes, you can find ready-made Roman shades. What this means is that there are a set number of sizes available. If you like the shade and the size works for you, then fine. However, please be careful. You might be able to get a completely custom-made shade for about the same price. Sometimes the ready-made shades are more money!
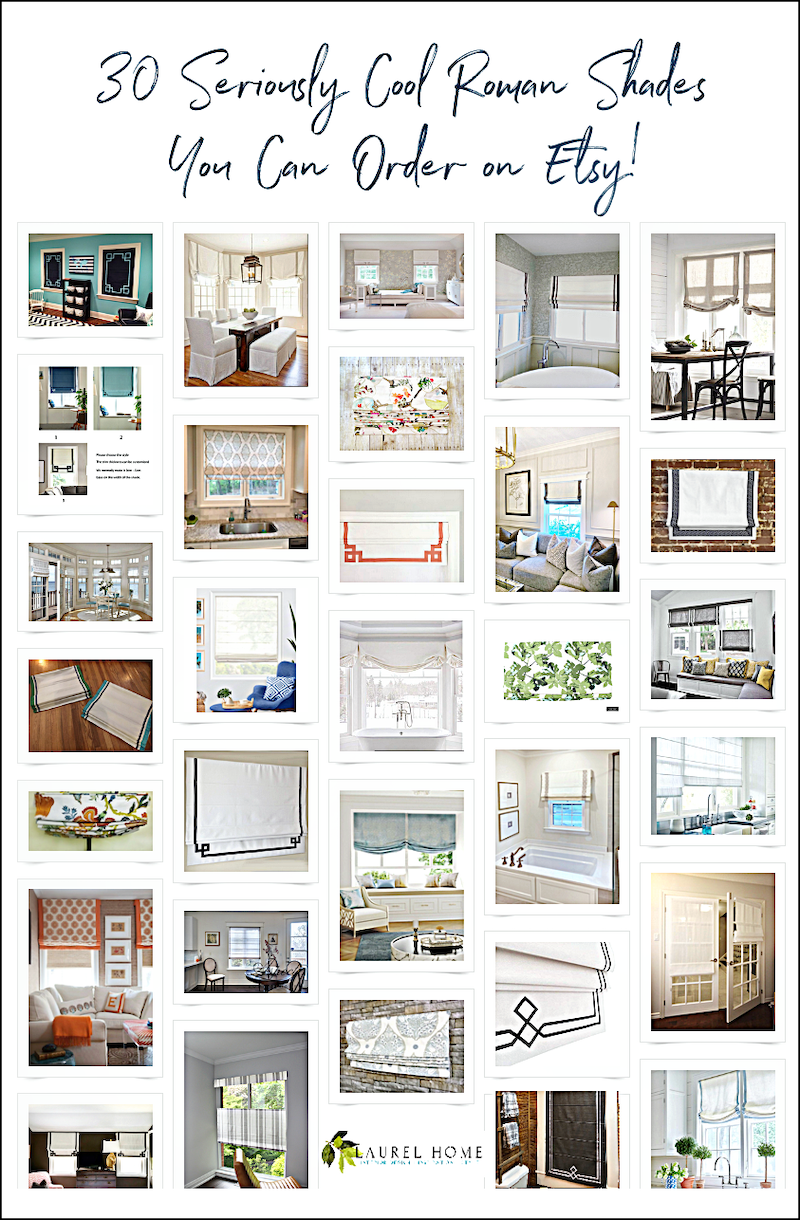
To close, I have a special treat for you.
Etsy now has dozens of workrooms that make gorgeous Roman shades, curtains (and pillows), and mostly for very reasonable prices. This widget (below) includes a sampling of some of my favorites.
Many of these workrooms do custom work with 100s of styles and fabrics.
Please click on any image for more information.

And, below is a graphic to pin to Pinterest.
xo,

PS: Please check out the newly updated HOT SALES!
Related Posts
 Transom Windows – Everything You Need To Know!
- No Windows? No Problem. Help for a Windowless Room
- Stainless Steel Sucks – What You Should Use Instead
- New Farrow & Ball Colors 2020 Inspired By Nature
- Laurel, Why Does My Decorating Look So Awful?
- Plaster Ceiling Design + Architectural Mouldings
- How to Figure Out Room Colors with a Colorful Sofa