
Recently, there have been a lot of requests for a post about window treatments.
Alright.
Here you go. Here’s a wonderful book by my colleague Jackie Von Tobel.

Everything you could possibly hope, want, need to know.
Good-night.
Yes, yes… very funny. We want to hear about YOUR window treatments, Laurel. Common… we know that you have some tricks up your jabot, so fess up!
I see…
You want me to condense 20+ years of experience into one blog post.
I see…
Okay, go grab a cup of something and a sandwich.
This is the deal with window treatments. The topic is so immense. There are so many pitfalls and issues–crazy situations.
Before I begin, one thing I want to say is that there isn’t one bit of information here that I learned in three years of interior design school. Nothing. Interesting, isn’t it?
Therefore, this post is only about draperies, drapes, curtains– whatever you want to call them.
Let us begin. Let’s begin with our
HARDWARE
I’m beginning with hardware because it’s the most difficult part and it’s important to understand it in terms of how much fabric we’ll be needing.
Like a lot of designers, when I happen on something really terrific, I don’t deviate much from it. And this is the case with my drapery hardware.
This is what I use.
99.9% of the time.
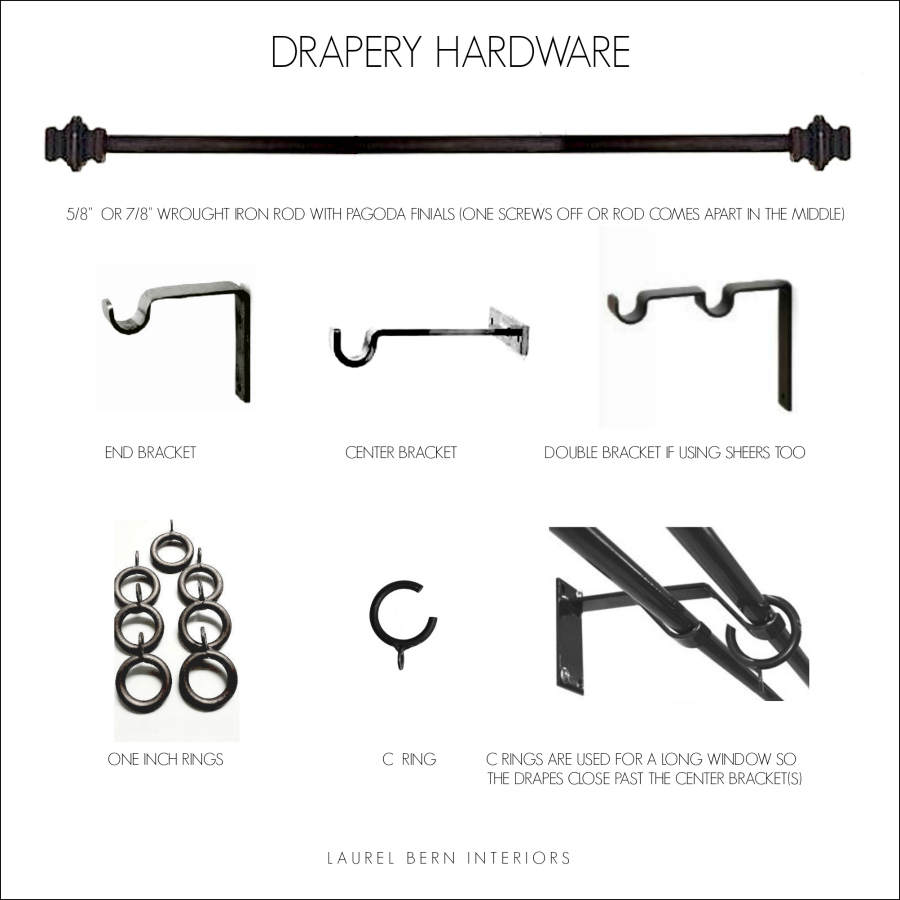
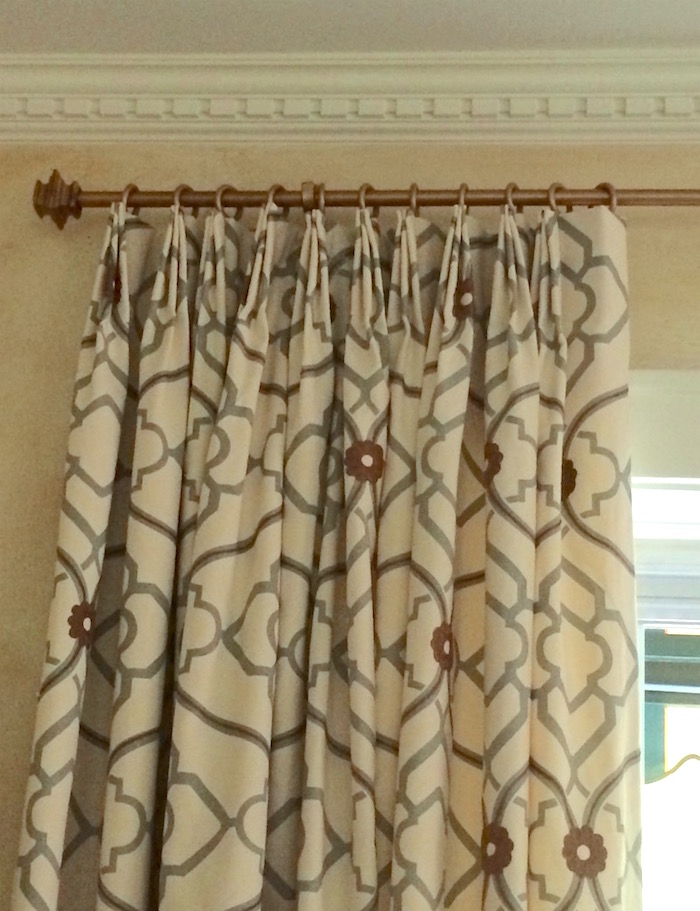
Usually we do antique black but if we want it more formal or the room dictates, we’ll do an antique gold finish.
We always use rings to hold up our drapes. And the rings are attached to the drape with a drapery hook like this.
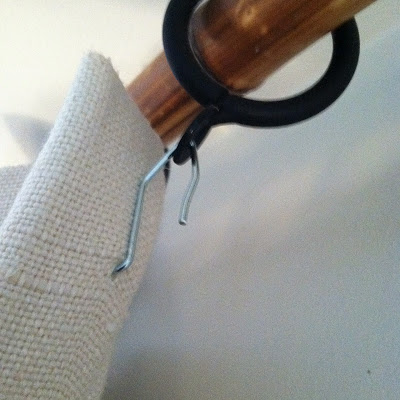
There’s usually a little wiggle room but it is important that the fabric covers the little hook or it looks messy.
I use a finial very similar to this one.
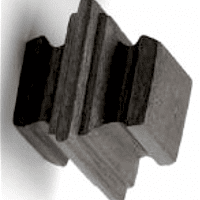
The only variation is whether the rod is 5/8″ in diameter or 3/4″ in diameter.
The former is solid and the latter, hollow. I do the thinner one these days unless the window is more than 9 or 10 feet or the ceiling is very high, or the drape is very heavy.
I have a wonderful source for custom-made rods.
They are a custom blacksmith I have worked with for over 17 years! They do wonderful work, they ship all over the country and are reasonably priced.
While I give out sources for just about everything else, I rarely give out the information for my custom workrooms. But it is available if you purchase my rolodex guide. It’s one of the three dozen sources I can’t live without. If you want to know this information, please purchase the Rolodex. You’ll make back the $ on your first order.
The first 3 years in business, I used this dude in the city who was at least triple the price– and rude. So, I found these folks and have been thrilled with their work ever since.
One thing you must never do for a wider window is an adjustable rod.
Trust me here. The drapes will never hang straight because one end of the rod is thinner than the other. It’s not worth it.
The drape is held up with 1″ rings. (that is the diameter in the opening of the ring)
My source for the rings is different from the rods and that is also in the Rolodex.
If space allows, I like to extend the rod, a minimum of 4-6″ past the window for a regular window.
If it’s a very large window that you want to minimize, you will need 2″ to allow space for the bracket.
The bracket under normal circumstances has a projection away from the wall of 3.5″.
However, if you have a bulky baseboard it is absolutely fine to go out as much as 6″. If you need a double rod for sheers, you will need to do this, anyway.
In the graphic above, you will notice that I included a C Ring. It’s just what it says. The cut out is so that the rings can go over the bracket or brackets on extra long windows. That is, if the drapes need to close. Pretty clever, huh?
You will need a professional installer to put up the rods. Trust me here.
Installing draperies is very similar to the kind of training required to fly a jumbo jet.
I have never had a rod fall off the wall.
Or if it did, it killed them and so I never found out about it.
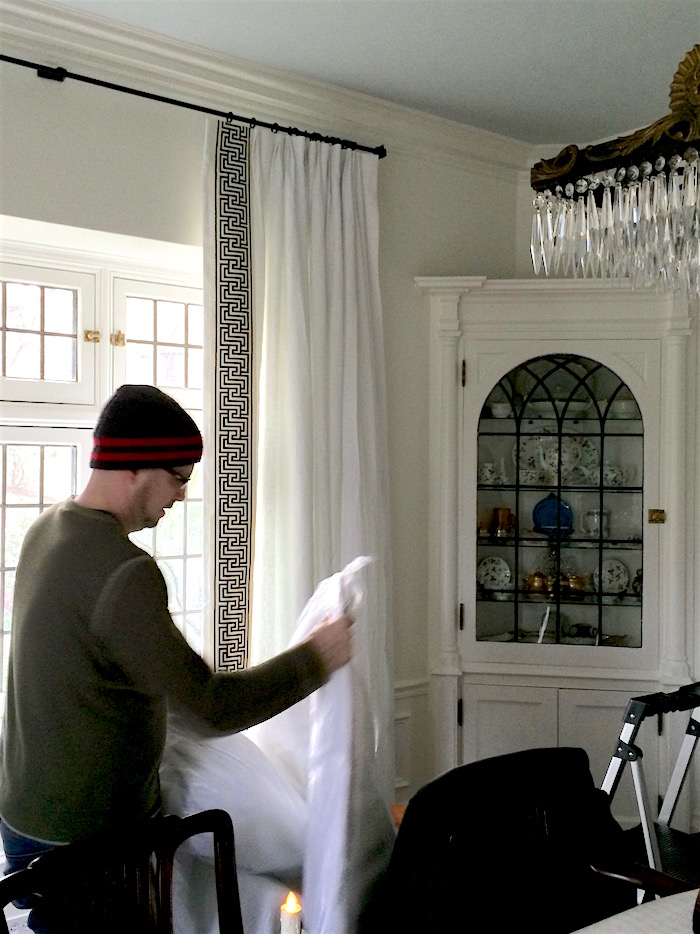
Here’s Mario, a fabulous installer, hard at work a couple of weeks ago. I did have him move that ring down to the end.
We have one hard and fast rule when it comes to putting up the rods.
If it looks straight, it’s straight. So put down the level thingy. It’s a waste of time.
***HOT TIP*** These drapes are two and half panels on each side because they need to close. The rods can be difficult to slide the rings along because they are painted in a matte finish. We used to use silicone but it’s a little messy and slippery if you accidentally get it on the floor. The other day, we rubbed a little soap along the top of the rod and it worked beautifully!
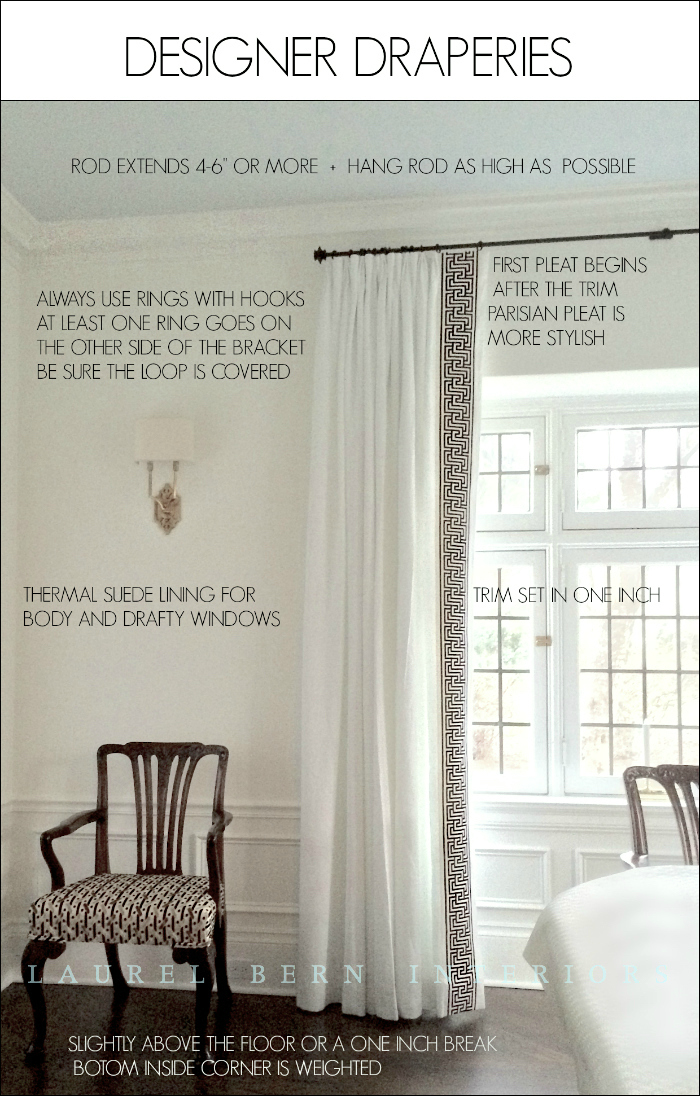
Below is another graphic that you may pin to pinterest for reference
FABRIC
Cotton – excellent fabric for drapes
Linen – also excellent, however it can yo-yo. Linking should help prevent that. Or a blend of linen and cotton can be very nice
Silk – gorgeous but never in a south-facing window and silk must always be lined and interlined. More about that in a sec
Wool – drapes gorgeously can rot in the sun
Synthetics – fine as long as they don’t look like synthetics
HOW MUCH FABRIC WILL I NEED?
Yes, you can let your professional workroom tell you how much. But sometimes they don’t get back to you or don’t understand or something. They will ask you what the repeat is… The fabric is bloody expensive and you need to order as little as possible.
It’s really good to know how to calculate this yourself.
There are two directions you need to be concerned about top to bottom and side to side.
Let’s start with something easy.
Plain fabric going on a 40″ window (including the window casings) – ceiling height is eight feet or 96″.
ALWAYS MEASURE THE CEILING HEIGHT – DO NOT ASSUME
Let’s say there is a crown moulding that is taking up about 4″ of the wall. Now we have 92″ to work with. If we want the rod to go right under the moulding, we need to account for the rod sitting inside the bracket and then to the bottom of the ring.
From the top of the bracket to where the drape begins is usually about two inches with my rods, but it might be different with yours, if they’re thicker and/or your rings are larger.
That leaves 90″ to work with from the top of the drape to the floor.
Most of my clients prefer to have the drapes not quite touching the floor. I like a tiny break or kissing the floor, some call it. Not puddling. Kissing. :]
This is good for a variety of reasons. One the difference between the floor and the ceiling is probably not even throughout the room and I’ve had situations where it’s off by a couple of inches!
Measure everything. Again, do not assume it’s all the same even if it looks the same.
Remeasure. Go back six times and measure again and again. (and again) This is one time when a little OCD is a good thing.
Obsessive Compulsive Drapery [Measuring]
It’s no fun when you goof and have to pay to have something remade.
But the 90″ is fine for the drapes a hair’s breath above the floor. To kiss the floor, we need another inch.
Then, we need to add another ten inches for the header and bottom hem.
Therefore, one panel width for an 8 foot ceiling requires about 100″ of plain fabric or just under 3 yards.
If you have a nine foot ceiling, just add 12″. If the moulding is larger than 4″, then the length, of course might be less.
Fabric is sold by the 1/2 yard increment, so we need to round-up to the nearest half yard to know how much we need for one panel width.
100″ divide by 36″ (one yard) = 2.77777777778″
Okay, are you still with me?
Guys, it took me several years to fully understand all of this, so don’t worry if it’s not all quite sinking in.
Now, for the width.
Normal drapery/designer fabric is 54″.
BUT DOUBLE-CHECK!!!
For some painful stories which you might find entertaining, (where I goofed big time), you can click here.
We need to allow for the side hems, so then we lose another 4 inches. Now we’re down to 50″ Then, the drapery will need to make a 90″ turn back to the wall to cover the gap.
This is called a RETURN.

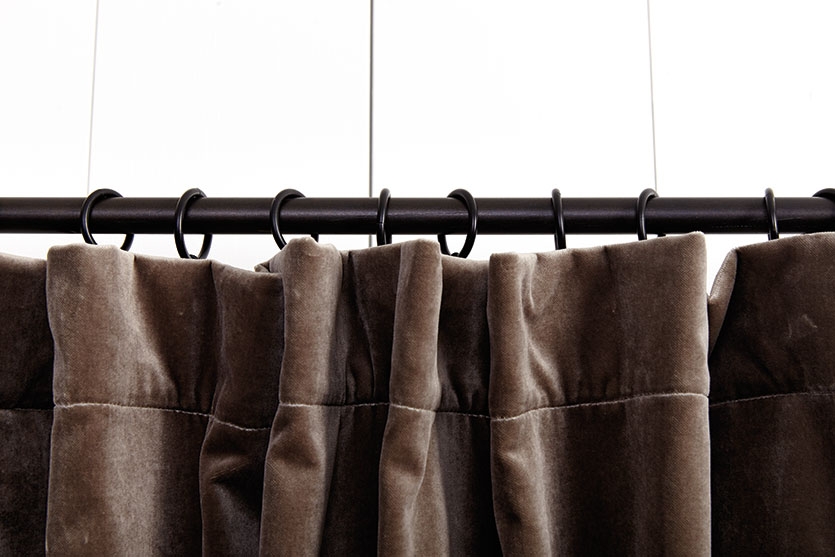
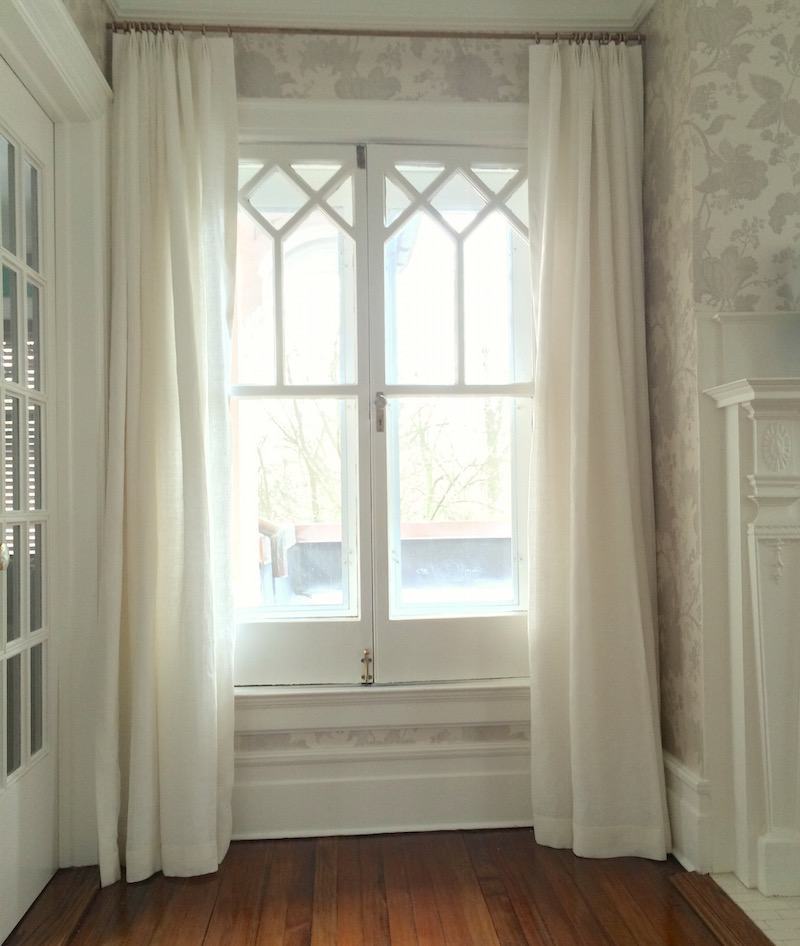
Here’s a drape that doesn’t have a return, or a finial. I had a question about the possibility of the last ring falling off and the manufacturer said that would not be possible because the last ring is sown at 2.5″ from the next to last ring making it impossible for the last ring to fall off. That’s pretty cool. It’s a casual look and that is fine, but my preference is for there to be a return of the drape back to the wall. Again, it’s a matter of taste and preference.
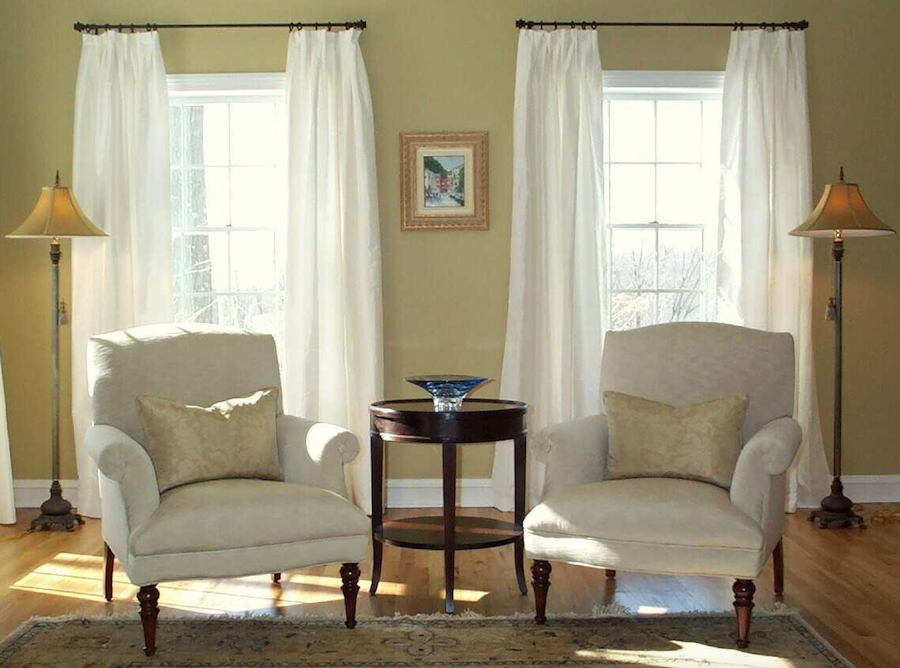
This a drape that doesn’t have a return, but I think that it should. The rod is called a return rod.
It’s become rather popular in recent years, but I’ve never done it. And to be clear, there is absolutely nothing wrong with the rod; it’s a beautiful rod. The problem is the way the installer hung the drape. The drape should wrap around and usually we hook it to the wall, with a tiny hook to hold it in place. This is to prevent the light from coming in and it looks more finished, IMO.
Here’s a drape with a return, but—— yikes! Do not put a pleat on the return. It should be a flat piece back to the wall. It can be hooked back with a ring on the bracket or sometimes we put a little nail with a loop into the wall and hook it onto that.
For measuring sake, we’ll call the return four inches. Now we have 46″ left for one single panel. The panel above looks less than 50″. There should be one more ring–and a little more fabric. It looks to skimpy to me.
Here’s a drape with a return on a return rod.
Remember that our rod projection is 3.5″ therefore the return needs to be 3.5″ Pretty simple. I also do not start the first pleat until 3.5″ unless there’s a trim and we need a little more on the front of the drape. (That is the case with the drape with the black and white trim above.)
Will one panel on each side be enough fabric?
Let’s see.
First, is the drape going to close? Let’s say that it is. The 40″ window isn’t as difficult as a longer window to calculate.
Remember that our rod should extend out from the frame at least four inches (plus the finial). That makes our window 48 – 52″
OPTIMAL FULLNESS.
Well first of all, the minimum fullness is two times the width of the rod.
Optimal, IMO is usually TWO AND A HALF times the width of the rod. Because the drape is extending the length or almost the entire length of the rod and then it turns into the wall. Again, this is for a regular rod with space on both ends.
So for most windows with a rod length of 50-54″–tops and under, you can get away with a single panel on each side. Although, I would definitely add a quarter of a panel, especially if the ceiling is very high. But if the drapes are not going to close, it is okay to use a single panel. It’s a more casual look, is all.
What if your window is wider?
If it is wider and they don’t need to close, for five feet and under, I usually do a panel and a half.
For anything wider than that, a double panel.
If the drapes need to close, I calculate that there will need to be a full panel for every 24.”
If you have a 12 foot window, you’ll need six widths of fabric. That would be 16.67 roughly or 17 yards. I usually throw in an extra half yard, just in case they’re a little short or something wonky with the ends of the fabric. So, 17.5 yards of plain fabric.
But what if there’s a big repeat?
It happens and it’s a bloody drag. Especially if it’s expensive fabric.
Mostly we are concerning ourselves with the VERTICAL REPEAT.
Let’s take a really crazy example.
The mega gorgeous, mega bucks
Brunschwig and Fils Le Lac.

It’s 81″ inches. And the fabric is only 49″ wide. This is the most extreme case I’ve ever heard of. But the fabric is also insanely expensive, so it’s unlikely that many will use this one for drapes.
Let’s take another fabric with a very large repeat of 41″. That is also abnormally large, but it does happen.
You know that you need 100″ of plain fabric. 100 divided by 41 = 2.44, but you cannot divide the repeat, so you will need to round-up to three repeats of three x 41″ = 123″ 123″ divided by 36″ (1 yard) = 3.44 yards per panel or 3.5 yards. I generally add an extra yard, in case there’s something wonky going on at the edges or the repeat starts in a funny spot at the top of the bolt.
Sometimes there is a half drop repeat. It can get complicated and it’s best to discuss with your workroom these situations.
HEADERS
The top of the drape.
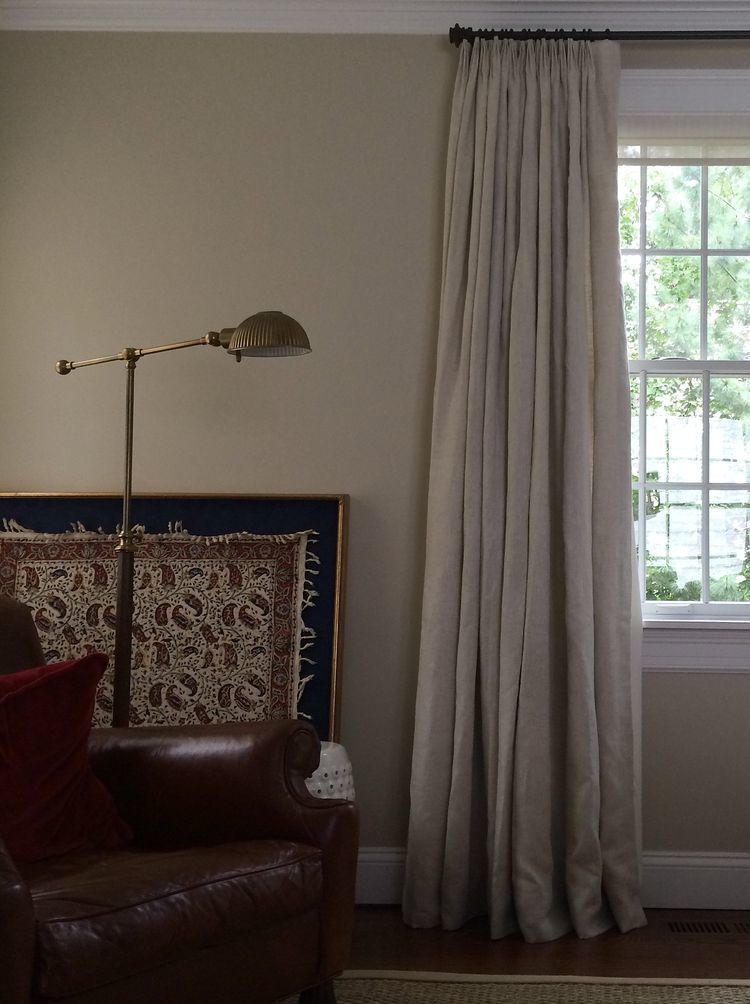
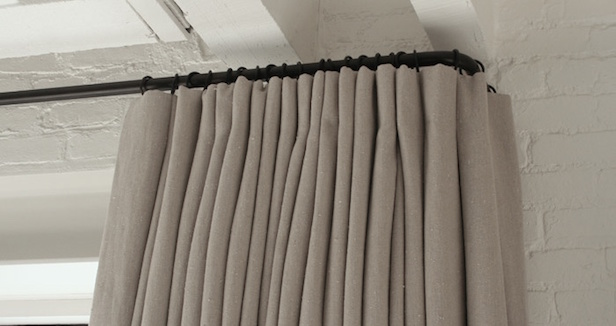
Usually, it’s pleated, but for a more casual look it’s fine to pin and let the drape fold naturally, like below.
 These days, there’s also a grommet drape. HGTV made them famous. I’ve never done these custom. But they are popular in ready-made drapes. They came with my apartment. They’re okay but not great. One day, I’ll change them.
This is a job we did 13 years ago! We did a small flat box pleat without buckram. It was a popular look in its day. My workroom used to call it “Laurie’s pleat.” For some reason, she couldn’t say Laurel.
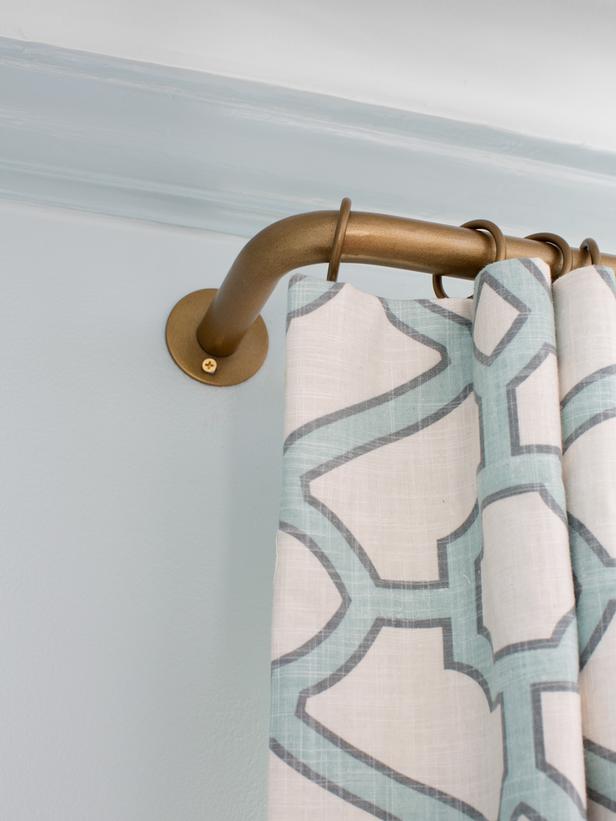
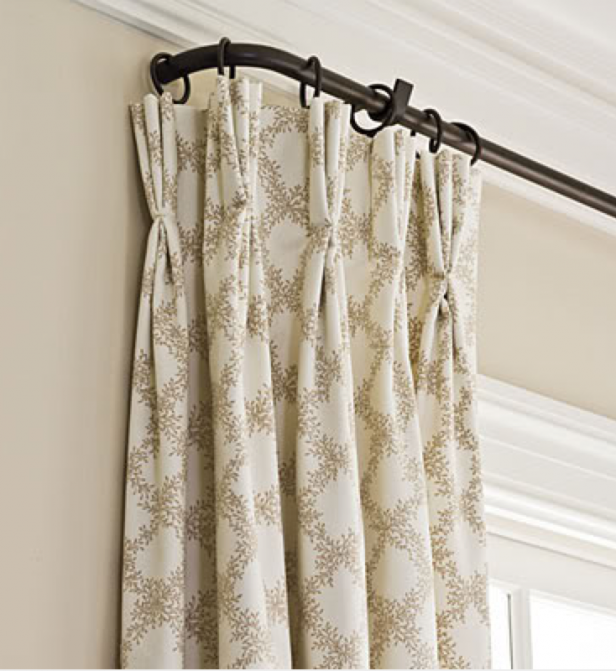
My favorite these days is a French or Parisian pleat. It has passed by the traditional pinch pleat in popularity. Here it is in a recent job. (below) This time we did the rods in an antique gold finish. Notice that the first few inches are flat before the first pleat, but there’s a ring on the end. The return, is there, but you can’t see it. This is a wide window; therefore we did a double panel. They are stationary and don’t need to close but the drapes look full enough that they could close.
Between the fabric and lining is buckram which is a flat stiff wide ribbon. I prefer it to be 3″ but standard is 5″. I just find it a little more streamline. They also make a very lovely light-weight buckram which is less stiff. It is necessary for sheer drapes but you could also use it for regular drapes, I think.
LINING
All drapes unless they are sheers need to be lined.
HERE’S ONE OF MY BEST TRICKS and it applies to all fabrics except for silk.
Most designer drapes are both lined and interlined to give them more body. The interlining is usually a thin felt. There is an even heavier interlining called bump interlining.
However, there is also a lining material called thermal suede. It’s a heavy-suede-like lining which I have found negates the necessity for an interlining. This is going to save a lot of money! In addition, it provides thermal qualities, so if you room is drafty, this is going to help with that problem.
Thermal suede is still a translucent lining material but it does block more of the light than does regular lining.
Be very careful with lining color. If it’s cream, it is going to tint your fabric with a yellow color when the light comes through! The same goes for the primary fabric. Please be very careful with cream-colored fabrics. They can go very yellow and/or dingy quickly.
SILK.
Never use silk in a south-facing room. It will rot. Silk fabrics must be lined and interlined.
BLACKOUT
I rarely do this, but one workroom I used to work with would actually use a layer of black fabric between to pieces of regular lining. The reason for this is that it was softer than regular black-out fabric that can be rather stiff.
SHEERS
I don’t do sheers a lot but when I do, they are always linen. It’s such a lovely look. No shiny polyester, please. Semi-sheer drapes also come in cotton and wool. but wool will rot in the sun.
You can also line a linen sheer. It’s one of my favorite window treatments that I discovered from Victoria Hagan about 18 years ago! Here it is in this romantic bedroom we did. In this case, the rod needed to fit in between the two walls–no room for a finial. I had them cut so that there is a tiny gap.
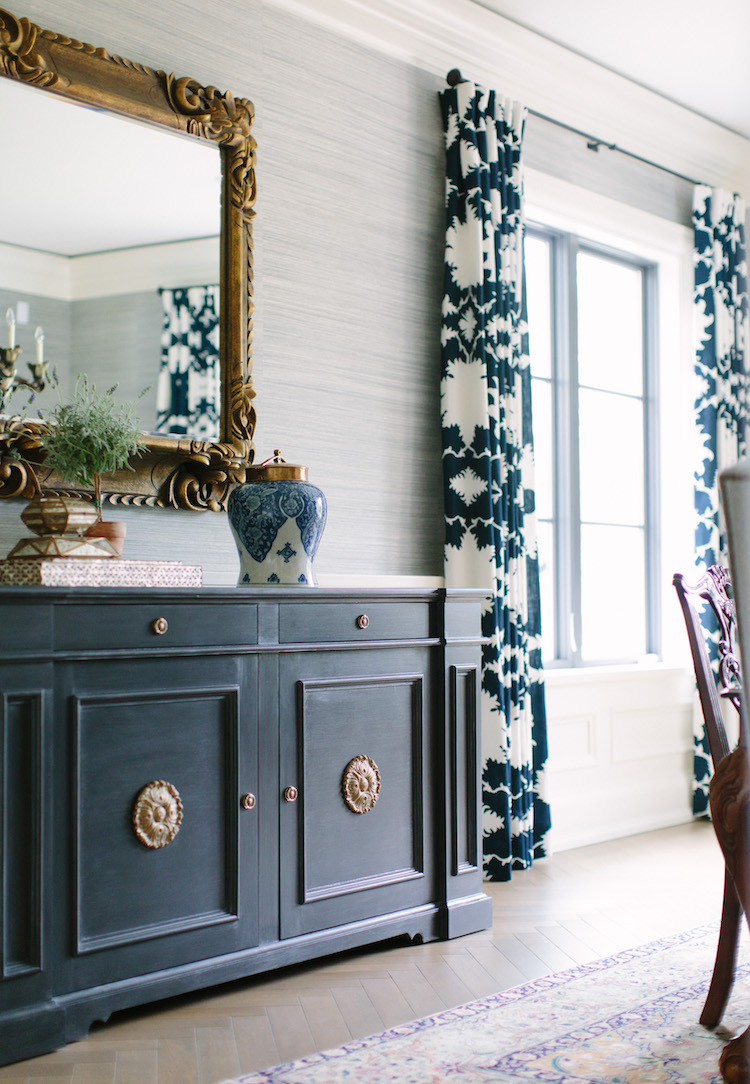
Elegant dining room with gorgeous drapes. The fabric is another Mary McDonald masterpiece for Schumacher.
Well, there it is— Laurel’s Drapery Guide. I’m sure you’ll have questions or your own experience to share. I’ll look forward to hearing that.
Happy Easter for those that celebrate it!
If you want to see more beautiful window treatments plus some no, no’s click here, here and here.
xo,

Related Posts
 Your #One Interior Decorating Problem And The Solution
- Cohesive Room Colors and Furnishings Between Rooms
- 21 Interior Design Mistakes You Need To Stop Making
- The One White Trim and Wall Color That Works Every Time
- 16 Tricks To Make Your Small Rooms Look Bigger + Mistakes To Avoid
- The Perfect Shade Of White Wall Paint For Oak Trim
- A Home For Sale Runs Amok {part II} bathrooms and more